ENGLISH
The minimum distance between the hob surface on which the pans stand and the lower part of the hood must be 65 cm, unless otherwise
specified in the installation instructions. If the hob installation instructions specify a greater distance, it must be taken into account.
The air collected must not be conveyed into a duct used to blow off smokes from appliances fed with an energy other than electricity (central
heating systems, thermosiphons, water-heaters, etc.).
Comply with the official instructions provided by the competent authorities in merit when installing the disposal duct. In addition, exhaust air
should not be discharged into a wall cavity, unless the cavity is designed for that purpose.
The room must be well aerated in case a hood and some other heat equipment fed with an energy other than electricity (gas, oil, coal heaters,
etc) operate at the same time.
In fact the intake hood, disposing of air, could create a vacuum in the room. The vacuum should not exceed 0,04mbar. This prevents the gas
exhausted by the heat source from being intaken again. It is therefore advisable to ensure the room contains air taps able to ensure a steady flow
of fresh air.
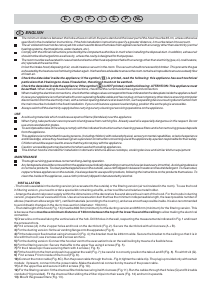
Check the data label inside the appliance; if the symbol ( ) is printed, read the following: this appliance has such technical
particulars that it belongs to class II insulation, therefore it must not be earthed.
Check the data label inside the appliance; if the symbol ( ) is NOT printed, read the following: ATTENTION: This appliance must
be earthed. When making the electrical connections, check that the current socket has a ground connection.
When making the electrical connections, check that the voltage values correspond to those indicated on the data plate inside the appliance itself.
In case your appliance is not furnished with a non separating flexible cable and has no plug, or has not got any other device ensuring omnipolar
disconnection from the electricity main, with a contact opening distance of at least 3 mm, such separating device ensuring disconnection from
the main must be included in the fixed installation. If your unit features a power lead and plug, position this so the plug is accessible.
Always switch off the electricity supply before carrying out any cleaning or servicing operations on the appliance.
USE
Avoid using materials which could cause spurts of flame (flambées) near the appliance.
When frying, take particular care to prevent oil and grease from catching fire. Already used oil is especially dangerous in this respect. Do not
use uncovered electric grates.
To avoid possible risks of fire always comply with the indicated instructions when cleaning grease filters and when removing grease deposits
from the appliance.
This appliance is not intended for use by persons (including children) with reduced physical, sensory or mental capabilities, or lack of experience
and knowledge, unless they have been given supervision or instruction concerning use of the appliance by a person responsible for their safety.
Children should be supervised to ensure that they do not play with the appliance.
Caution: accessible parts may become hot when used with cooking appliances.
This kitchen hood is intended for installation in domestic kitchens above cooktops, cooking devices and similar kitchen equipment.
MAINTENANCE
Thorough servicing guarantees correct and long-lasting operation.
Any fat deposits should be removed from the appliance periodically depending on amount of use (at least every 2 months). Avoid using abrasive
or corrosive products. To clean painted appliances on the outside, use a cloth dipped in lukewarm water and neutral detergent. To clean steel,
copper or brass appliances on the outside, it is always best to use specific products, following the instructions on the products themselves. To
clean the inside of the appliance, use a cloth (or brush) dipped in denatured ethyl alcohol.
INSTALLATION
- The hood is available in the ducting version (air evacuated to the outside) or the filtering version (air recirculated in the room). To use the hood
in filtering version, you need to order a special kit containing a baffle, a charcoal filter and relative metal holder.
- Arrange the electrical power supply within the dimensions of the decorative flue and above the air vent of the hood. For the hoods in ducting
version, prepare the air evacuation hole. Use an air evacuation duct that has the minimum indispensable length, the least possible number of
elbows (maximum elbow angle: 90°), certified materials (according to the country), and an as smooth as possible inside. It is also recommended
to avoid drastic changes in the duct cross-section (diameter: 150 mm).
- The total height of the hood (Fig. 1X) must be 800 mm (minimum) for the ducting version and 855 mm (minimum) for the filtering version. This
is because there must be a minimum distance of 120 mm between the top of the lower flue and the ceiling to allow making the electrical
connection.
1) Draw a line on the wall along the vertical axis of the hob. Drill 6 holes in the wall, respecting the measurements indicated in Fig. 1 and insert
the screw anchors.
2) Fit 2 screws (A) in the 2 upper holes and hook on the duct block (Fig. 2). Secure the duct block with all 4 screws (A + B).
3) For the ducting version: fix the air ventimg flange onto the apparatus (Fig. 3).
4) Fit the telescopic flue bracket using 2 screws D (Fig. 4); the bracket must be 249 mm wide. Secure the bracket to the ceiling so that it is in
line with the hood ; use 2 screws and 2 screw anchors.
5) For the ducting version: Connect the hood air vent to the evacuation hole on the wall/ceiling by means of a flexible hose.
6) For the filtering version: Secure the baffle to the upper flue using 2 screws (Fig. 5).
7) Fit the 2 telescopic flues securing them with 4 screws ( Fig. 6).
8) Fit the hood from the front and push it up against the wall (Fig. 7); be careful to correctly position the tabs A and B (Fig. 8). Fix with 8 viti (G).
9) Fit 2 screws F from inside of the hood (Fig. 8).
10) Connect the motor cable (Fig. 8C). Run the power cable through the hole - Fig.9; tighten the cable clip. The plug is provided only with certain
models; if present, connect it to the power cable. Make the electrical connection by means of the power cable.
11) Lift the upper flue and secure it with 2 screws (Fig.10).
12) For the filtering version: fit the charcoal filter holder securing it with 4 screws (Fig.11). Run the cables through the 2 holes (G) and fit 2 cable
conduits (H) (provided). Fit the charcoal filter sliding the 2 filter clips into their seats (Fig. 12) and turn it upwards.
13) Mount the grease filters (Fig. 13).
E
D
F
I
E
P
NL
E


Joignez-vous à la conversation sur ce produit
Ici, vous pouvez partager ce que vous pensez du Broan HDV908X Hotte aspirante. Si vous avez une question, lisez d’abord attentivement le mode d’emploi. La demande d’un mode d’emploi peut être effectuée en utilisant notre formulaire de contact.
répondre | Cela a été utile (0)