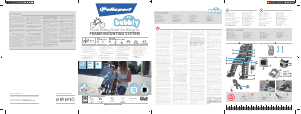
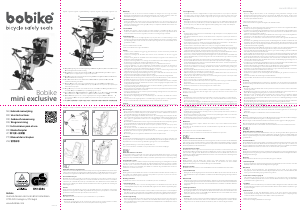
Carefully read the instructions before using this child seat. Keep them in a safe place for future reference.
Before using the product, consult the Highway Code for the country of use.
WARNING: failure to comply with the manufacturer’s instructions may compromise the safety of the
child and of the cyclist and may result in serious injury or death.
NOTICE
WARNING: Do not add any extra loads to the child seat. For additional loads, use a front parcel rack.
WARNING: All modi cations to the child seat and supports are prohibited. The manufacturer, distributor
or retailer will not be held responsible for any damages caused by such modi cations.
WARNING: When a child is on the seat, the bike may handle differently from normal conditions,
especially in terms of balance, steering and brakes.
WARNING: Never leave the bike parked with the child unattended in the child seat.
WARNING: Never leave the child in the seat when the bike is only supported by the kick-stand.
WARNING: Do not use the child seat if any parts of the seat and/or bike are broken or missing. Contact
the manufacturer or dealer to order spare parts for the seat.
In case of accident, replace the seat completely even when there is no visible damage.
GENERAL INFORMATION GENERAL INFORMATION
Rear child seat for children weighing a maximum of 22 kg – 48.5 lb; periodically check that the child
does not exceed the weight limit.
Only use if child is capable of sitting straight, unassisted, for a long period time (age 1 to 7 years
approx.). Consult a pediatrician before carrying a child less than 12 months old.
Use on bikes with 26”-28” diameter wheels that can carry additional loads equal to at least 27 kg – 59.5 lb.
Refer to the bike manual or consult you retailer.
Make sure that the bicycle is in good conditions, and especially ensure that brakes, lights and tires are
all in perfect working order.
Make sure that the size of the bike is suitable for the cyclist and that it allows all and any necessary
adjustments to ensure maximum safety for the cyclist.
Consult the bicycle’s manual, or the bicycle dealer, for any further information.
Support bracket for circular section frames (from 25 to 46 mm, 1.0” to 1.8”) and a wide range of oval
section frames. Read Table 1 carefully.
Child seat equipped with assembly system using a support fork with a welded bracket.
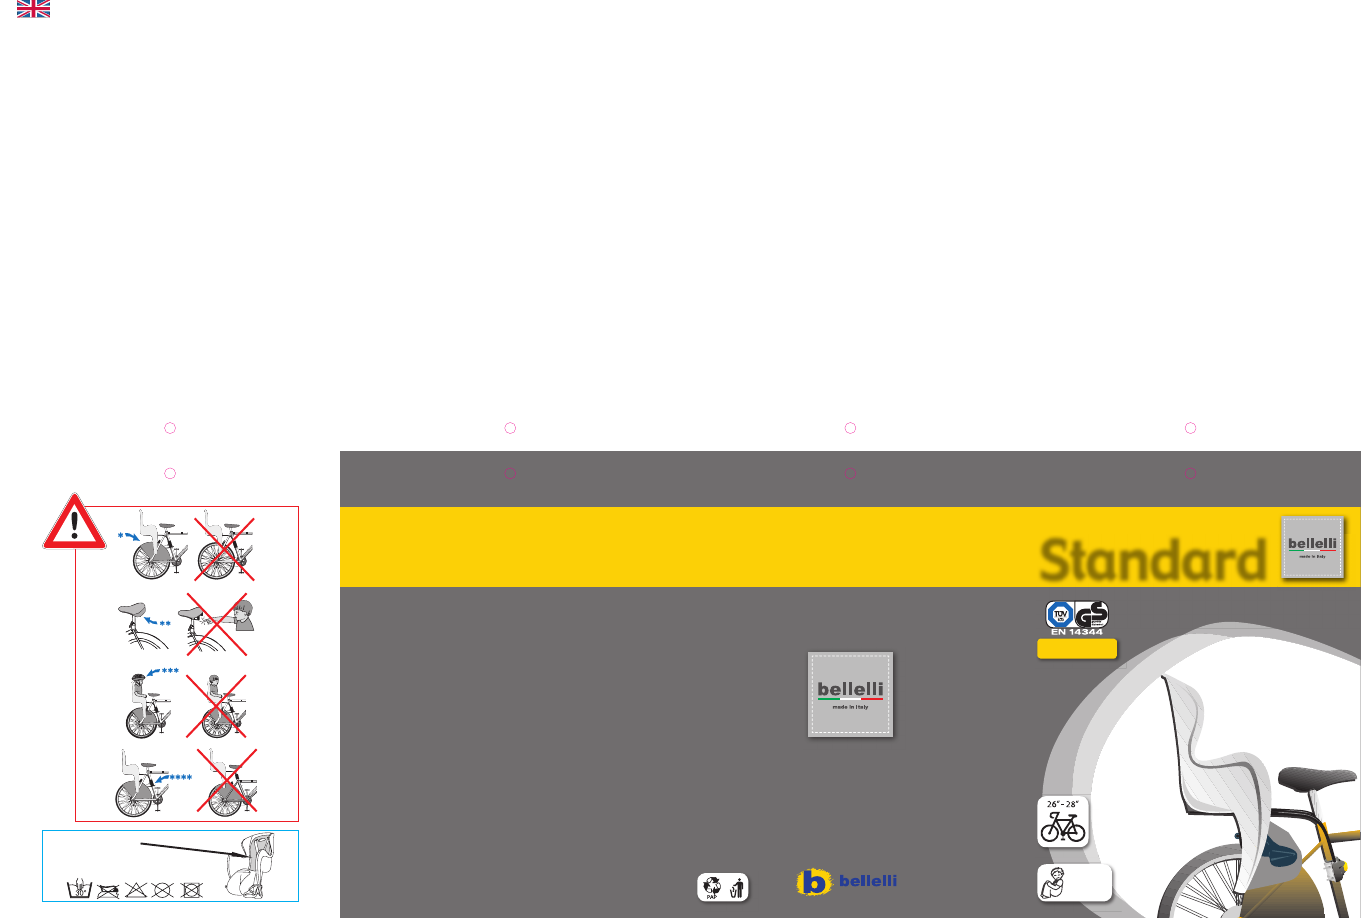
Check that the distance between the symbol indicating the barycenter on the external sides of the child
seat and the axis of the wheel is less than 10 cm – 4” to avoid tipping.
Do not install the child seat so that it leans forwards. Lean it slightly backwards in order to hold the
child more effectively.
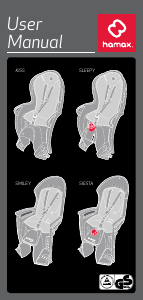
Install the child seat facing front.
Do not use the child seat on motorcycles, scooters, mopeds, racing bikes or bikes with suspensions.
Do not use the child seat on electric bikes. It is possible to use the child seat on electric pedal assisted
cycles.
Check that none of the child or cyclist limbs or clothing might be caught in the moving parts of the bike
(wheels, brake mechanism and saddle springs) or of the child seat.
Check that the child cannot poke his/her ngers or feet into the spokes of the bike wheel. We recommend
the use of a wheel guard.
Ensure that the child cannot reach sharp or cutting edges (e.g. frayed brake cables)
Always fasten the child with the harness and the straps on their ankles.
Check that the child is always dressed warmly enough, more than the cyclist and that he/she is
protected in the event of rain.
It is mandatory for the child to use an approved helmet suitable for his/her head size.
Never carry two children at the same time.
The cyclist must be at least 16 years old.
Always fasten any harness or straps, even when there is no child on the seat.
Ensure that the straps do not interfere with the wheels or other moving parts of the bike, both with and
without the child on board.
Never leave the child seat in the sun: when seating the child, the heated plastic cold burn the child’s
skin or cause other injuries.
Remove the child seat from the bike each time the latter is transported on the outside of a vehicle (e.g. on
a car roof, on a towed trailer or behind a motorhome).This is necessary because the wind force could affect
or damage the child seat to the extent that it might compromise the seat’s reliability when being re-used.
Periodically check the bike: tires, brakes, lights, etc.
Periodically check the seat’s anchoring system.
Periodically wash the child seat with soap and water. Do not use aggressive substances.
INSTALLING THE CHILD SEAT
Do not install the product on the bike with the child in the seat.
Ensure you have all the components before proceeding with assembly ( g. A).
Installing the support bracket
In case your bike has a parcel rack at the back, take it off if it interferes with the installation of the seat.
Install the support bracket on the bicycle frame as illustrated in g. B. Make sure that the arrows printed
on the front side of the block are pointing upwards.
WARNING: install the brace on the bicycle frame and not on the pipe under the bicycle saddle.
WARNING: check that the brake and gear cables do not interfere with the bracket (1).
Choose the best screws (6) for your frame (see Table 1). [If the screws that come with the seat are too
short, longer ones (M6x80, for instance) can be found in a hardware store].
Slip the screws (6) into their holes.
Tighten the nuts slightly and evenly (7) ( g. C).
The support bracket must be free to slide along the tube: it will be tightened once the seat is in the
correct position (see xing the child seat to the bike).
Fixing the support fork to the child seat
Turn the seat over.
Place the U shaped curve of the support fork (9) under the ap ( g. D). Insert it into its slot so that it
ts properly.
Align the hole of the welded bracket (9) with the hole on the child seats.
Pass the bolt (11) in the plate (10), as well as in the holes in the child seat and in the welded bracket
( g. E).
Fully tighten the nut (12) ( g. F).
Fixing the child seat to the bike
Hold down the yellow button on the bracket (2). Insert the support fork (9) into the upper part of the
bracket (1) ( g. G).
WARNING: once inserted, ensure that the yellow button pops out (2). If it doesn’t, the fork (9) is
not inserted correctly: repeat the operation.
Check that the child seat does not interfere with pedals, brakes, gears and other moving parts of the bike.
Leave enough room for the child’s legs.
Line the child seat up with the bike’s axis.
Fully tighten the screws (6) on the bracket after having found the best position for the seat.
WARNING: periodically check that the screws are well fastened. They may loosen with use.
WARNING: check that the child seat does not cover the bicycle lights (tail lights). A retro re ector
meeting the requirements of the CPSC (US Consumer Product Safety Commission) must always be
visible, with or without the child seat on the bike.
Taking the child seat off the bike
Hold down the yellow button (2) on the bracket and pull up the support fork (9) up and off ( g. G).
Installing and/or replacing the footrests
Take the left footrest (13) (marked SX on the back).
Push it into the vertical slot on the left side.
Push up as far as possible ( g. H).
Take the blocking lever (15) of the left footrest (marked SX on the back).
Push the blocking lever into the hole behind the footrest. Insert from the outside and push in ( g. I).
Close the blocking lever by pushing downwards until you hear a click ( g. L).
Repeat the same operation for the right footrest (marked DX).
ADJUSTING THE CHILD SEAT
Before using the seat, ensure that the harness and footrest positions are suitable for your child’s size.
The harness must be positioned just above the child’s shoulders.
The child should be able to completely rest the feet on the footrests.
!!!Do not adjust the harness or the footrests while the child is in the seat.
Adjusting the harness
To move the harness from one position to another:
Take the plastic buckle from behind the backrest.
Slip the harness (17) and buckle (19) out of the slot in the backrest.
Insert the harness and buckle into the slot of the backrest at the desired height ( g. M).
Repeat the same operation for the other harness strap.
Adjusting the footrests
Turn the blocking lever behind the bracket in the upward position ( g. N).
Move the footrest up or down to the desired position.
Block the lever by pushing downwards until you hear a click.
FINAL CHECK
WARNING: do not run the nal check with the child in the seat.
Push the bicycle for several meters by hand to ensure that no moving parts touch the child seat, that none
of the harness or straps interferes with the wheel, and that the bicycle brakes and pedals work properly.
Repeat the check every time you take out the bike for a ride.
PLACING THE CHILD IN THE SEAT
Press the button on the large central buckle (16) until you hear a click indicating that the hook has been
released ( g. O).
Pull upwards to extract the buckle.
Seat the child.
Pull the harness down over the child’s head ( g. P).
Fasten the large central buckle to the opening closest to the child ( g. Q). Push the buckle all the way
into the slot until you hear a click.
Adjust the holders (18) on the harness so that the harness will adhere to the child’s body ( g. R).
Place the child’s feet in the footrests.
Lock the ankle strap (14) and fasten it to the pin on the back of the footrest ( g. S).
WARNING: always fasten and tighten all safety straps used to hold the child (both harness and ankle
straps).
WARNING: when cycling, periodically check that the child is properly fastened at all times.
WARNING: fasten the ankle straps even when a child is not being carried, so that they do not hang
loose from the seat.
REMOVING THE CHILD FROM THE SEAT
Release the straps on the child’s ankles.
Press the button on the large central buckle until you hear a click indicating that the hook has been
released.
Pull upwards to extract the buckle.
Pull the harness over the child’s head.
GUARANTEE
The conditions of the guarantee can be found on our web site: www.bellelli.com and www.
mammacangura-na.com.
03ISSTDBELNA00
max 22 kg
max 48.5 lb


Joignez-vous à la conversation sur ce produit
Ici, vous pouvez partager ce que vous pensez du Bellelli Standard Siège de vélo. Si vous avez une question, lisez d’abord attentivement le mode d’emploi. La demande d’un mode d’emploi peut être effectuée en utilisant notre formulaire de contact.