
GB
DEAR MODEL SHIP BUILDER
We are pleased that you have chosen one of our model kits, and we trust that you will
spend many enjoyable hours with the model. Building a model ship does require a lot of
care, patience, precision and - above all - a lot of time. So please do take your time. And
proceed carefully from one step to the next.
The development of all BILLING BOATS model kits is based on meticulous research - by
studying models and original drawings, when possible, by visiting museums, studying his-
torical developments, collecting technical data, and so on. This is all necessary if we are to
design and manufacture model ships which are as precise and realistic as possible.
Before beginning the model, do take the time to read through the various information sup-
plied covering the more general aspects of model ship building.
Also, check the contents of the kit very carefully.
And one more thing: There are important decisions to be made before progressing very
far with the model. You must decide whether you wish to be able to sail the model ship,
or whether you will use it as a decorative object only. If you have chosen a model which
can be used for sailing, it will in some cases be necessary to buy extra equipment - eg.
stern tube, propeller, rudder, battery, engine, etc. Before mounting the deck, you must also
decide whether you wish to use remote-control, and if so, which type of equipment yo will
choose. Various parts of such equipment must be attached to the baseplate of the hull, and
part of the cabins must be also be removable. You can ask for advice in the shop where
you bought your model kit, should you be in doubt.
Most of the kits are laser-cut and ready for assembly. Few other kits will need to be cut out.
Do this with a sharp knife in the grooves marked. Sand the edges smooth before applying
glue. Use white joiner’s cement for gluing wood to wood; contact cement for gluing wood to
plastic and cyanoacrylate or 2-component cement for gluing plastic to plastic.
Wooden Hull
Position the frames at right angles to the keel. The use of a building slip simplies this task
(Fig. 1).
Next mount the deck and bulkhead. When dry, sand the frames to taper (Fig. 2). This en-
sures both a larger gluing surface and a better positioning of the planking strips.
Planking the hull can be done in a number of ways. Here we have chosen to start by apply-
ing the rst strip so that it follows the upper edge of the deck. Apply glue to each frame and
the upper edge of the strip, and hold the strip in place with pins until dry. Proceed planking
the hull downwards, shifting from side to side in order to avoid any disalignment as the
strips are applied. Each strip should be cut or sanded conically (Fig. 3) to t the shape of
the hull when gently placed on the frame. Do not force the strip into position.
If the hull is to be stained, remove any excess cement with a damp cloth.
When you have planked downwards to the keel, begin again from the deck and upwards.
Sand the entire hull roughly, and re-glue where necessary. It can also be a good idea to
apply a primer (white cement slightly diluted with water) while sanding the hull, as this will
close off any small holes or cracks. This is not to be done if the hull is to be stained, as glue
is stain- resistant.
When dry, sand the hull again very carefully. Fender and railing strips, etc. can then be
mounted.
Masts and Rigging
If the masts are to be painted or stained, it is a good idea to do this before assembly. After
assembling the masts, mount the various ttings. Follow the same procedure with the
yards. If the model has sails, sew these, then afx blocks and rigging thread. Attach the
sails to the yards.
Next, mount the masts in the hull and afx shrouds and stays. Attach the sails and yards to
the mast.
The following illustrations show how to cut out and sew the sails and how to attach the
shrouds, blocks and dead-eyes. An attractive appearance can be achieved by rubbing the
rigging threads with wax.
Sanding and Painting
The following sanding and painting procedure may appear to be difcult and time-consum-
ing. Remember, however, that the appearance of the hull is of great importance for the
appearance of the nal model. Time spent carefully sanding and painting will be rewarded
with a hull which is completely smooth, with no dents or cracks.
Prime the hull with ground colour. Sand, and ll out with putty. Sand again, and continue
this process until all irregularities or cracks no longer can be seen.
Paint the model with oil paint, and ll out with putty again. Sand once again, then paint the
model.
When the paint is completely dry mark off the waterline aroung the entire hull, as can be
seen on the main drawing. Set tape along the line, which will allow you to paint the bottom
part of the hull with no risk of mixing the two colours (Fig. 1). Do not remove the tape until
the paint is completely dry.
Models of older ships with a wooden hull are usually stained instead of painted. Sand care-
fully; do not use putty.
Deck
You can work with the deck in a variety of ways, depending on how detailed you wish your
model to be. You can varnish th edeck and use as it is. Alternatively, you can varnish the
deck and use a sharp pencil to deepen the lines, thereby indicating deck planks. You can
also glue thin strips between the thick lines on the deck and press thin rigging thread be-
tween the strips, thereby simulating caulking (Fig. 1). The varnish or paint the deck.
For the best results, assemble and paint cabin skylights, companionways, etc. before posi-
tioning these on the model.
It is a good idea to wash all plastic ttings with detergent before painting. This removes any
grease from the surface.
Bending strips to shape can be made easier by moistening the strip and bending it over a
candle ame.
NL
BESTE MODELBOUWER,
Het doet ons plezier dat U deze bouwdoos van ons heeft aangeschaft en we hopen dat U
veel prettige uren zult doorbrengen met het maken van dit model.
Het bouwen van een scheepsmodel vereist veel zorg, geduld, precisie en vooral veel tijd.
Neem er daarom ook de tijd voor; het resultaat zal des te beter zijn.
De ontwikkeling van alle Billing Boats bouwdozen is gebaseerd op zorgvuldig onderzoek,
het bestuderen van (zo mogelijk) de echte schepen, eventuele bestaande modellen in
musea, de originele bouwtekeningen, technische gegevens, foto’s enz.
Dit alles is noodzakelijk om een bouwdoos te ontwikkelen en te produceren die de werkeli-
jkheid zo dicht mogelijk benaderd.
Voordat U met bouwen begint, is het verstandig om de tekeningen, bouwbeschrijving en
inhoudsopgave grondig te bestuderen, zodat U het model als het ware al in Uw hoofd
gebouwd heeft. Dit voorkomt later problemen enlof ellende. Controleer ook altijd eerst de
inhoud van de bouwdoos aan de hand van de inhoudsopgave. Bij sommige bouwdozen
moet U vooraf de keuze maken of U er mee wilt varen of dat het zuiver een statisch model
moet worden.
Indien het model moet varen, zal er extra materiaal nodig zijn zoals motoren, accu’s en
radioapparatuur. Ook zal het model soms aangepast moeten worden in verband met de
bereikbaarheid van deze onderdelen. Hiervoor kunt U advies vragen bij Uw speciaalzaak.
Veel onderdelen in deze doos zijn vóórgesneden m.b.v. een laser en kunnen na het glad
maken van de aanhechtpunten zo gebruikt worden. Andere onderdelen moeten zelf uit-
gezaagd of -gesneden worden langs de opgedrukte lijnen en kunnen na het gladschuren
van de randen aangebracht worden. Gebruik een witte houtlijm voor het lijmen van hout op
hout, een contactlijm (UHU) of dikke secondenlijm voor het lijmen van plastic op metaal en
plastic en metaal op hout. Voor het lijmen van plastic op plastic gebruikt men afhankelijk
van de soort plastic PS-lijm of polystyreenlijm.
Houten romp
Zorg er altijd voor dat de spanten haaks op kiel staan! Het gebruik van een bouwhelling
(Billing Boats nr. 301) vereenvoudigt deze taak (Fig. 1).
Daarna dekken en schotten aanbrengen. Als de lijm goed droog is, moeten de spanten in
het verloop van de romp gevijld en geschuurd worden (Fig.2). Hierdoor verkrijgt men een
groter lijmvlak voor de huidlatten en voorkomt men het ontstaan van lelijke bulten in de
romp, die er later niet meer uit te schuren zijn.
Er zijn verschillende manieren om een romp te bekleden. Wij hebben ervoor gekozen om
eerst vanaf het dek naar beneden te werken en daarna vanaf het dek naar boven.
Begin met het aanbrengen van een huidlat op de spanten met de bovenrand van de lat
gelijk met de bovenkant van het dek. Zet deze lat op de spanten vast met glaskopspelden,
nog niet lijmen. Zet daarna de volgende lat met een speld vast op de middelste spant en
druk hem naar voor en naar achter tegen de spanten. Als deze lat de bovenliggende lat
ergens overlapt, dit dan met een potlood aftekenen op de onderliggende lat. Hierna beide
latten verwijderen en het afgetekende gedeelte op de eerste lat verwijderen (dit heet ver-
jongen). Nú pas de eerste lat vastlijmen en met spelden vastzetten tot de lijm goed droog
is. De latten worden tegen de spanten en tegen elkaar gelijmd. Deze procedure verder
volgen tot de romp dicht is. Het dichtmaken van de romp moet om en om gebeuren, d.w.z.
eerst een lat links, dan een lat rechts, dan weer een links enz., dit om het kromtrekken van
de romp te voorkomen. Latten die sterk gebogen moeten worden bij voorof achtersteven,
kunnen het best in de stoom van een uitketel gehouden worden tot ze soepel gebogen
kunnen worden. Daarna op de romp aanbrengen, met spelden vastzetten, in vorm laten
drogen en vastlijmen. Als de onderkant van de romp dicht is, de romp vanaf het dek naar
de toppen van de spanten dichtmaken. Door het volgen van deze methode is het gebruik-
en van spijkertjes overbodig, wat als voordeel heeft dat ze later niet kunnen gaan roesten.
Gebruikt U tóch spijkertjes, dan moeten ze bij een varend model goed doorgeslagen
worden, waarna de gaatjes met plammuur gedicht moeten worden.
Als de romp helemaal dicht is kan hij glad geschuurd worden, waarna eventuele
berghouten (stootranden) en potdeksels (afdeklatten op bovenste huidlat) aangebracht
kunnen worden.
Indien de romp gebeitst moet worden, dient overtollige lijm direct met een vochtige doek
verwijderd te worden, daar opgedroogde lijm geen beits opneemt.
Masten, ra’s en tuigage
Het is een goed idee om de masten en ra’s te lakken of te beitsen vóórdat de beslagdelen
zolals oogbouten, blokken e.d. erop aangebracht worden. Bij een model met zeilen, eerst
de zeilbanen met de naaimachine stikken en daarna met blokken e.d. aan de ra’s bevesti-
gen. Hierna kunnen de masten geplaatst en met behulp van de stagen en wanten gex-
eerd worden. Op de volgende tekeningen wordt aangegeven hoe de zeilen te naaien en
wanten, blokken e.d. aan te brengen.
Schuren en schilderen
De volgende procedure voor schuren en schilderen mag moeilijk en tijdrovend lijken. U
moet er echter aan denken dat het van groot belang is voor het aanzicht van het gehele
model. Alle extra tijd die wordt besteed aan het schuren en schilderen, draagt bij aan het
uiteindelijke resultaat.
Begin eerst met een laag grondverf. Dan schuren, kieren dichten met plamuur, weer
gronden en schuren. Dit herhalen tot de romp helemaal glad is. Hierna kan de romp afge-
lakt worden.
Als de lak helemaal droog is kan de waterlijn getekend worden (zie tekening). Plak de
romp boven de waterlijn af met afplakband en lak de romp onder de waterlijn (Fig.1). Het
afplakband eraf halen als de verf helemaal droog is. Bij rompen van schepen die gebeitst
of gevernist worden géén plamuur gebruiken, maar alleen schuren. Eventuele kieren kun-
nen het best met splinters hout opgevuld worden
Dek
Het dek kan, afhankelijk van Uw eigen voorkeur, op verschillende manieren afgewerkt
worden. De eenvoudigste methode is om met een hard, scherp potlood de deknaden na te
trekken en het dek met lak, vernis of beits te verven.
Mooier is het om het dek met dunne latjes te bekleden en tussen de latjes dun garen aan
te brengen om breeuwnaden te simuleren. (Fig.1).
Dekhuizen, bovenlichten e.d. kunnen het beste van te voren in hun geheel samengesteld
en gelakt worden; daarna pas op het dek aanbrengen. Het is een goed idee om alle plastic
onderdelen vóór het lakken even in afwasmiddel schoon te maken; dit verwijderd de vettige
laag die er tijdens het productie-proces op kan komen.




Joignez-vous à la conversation sur ce produit
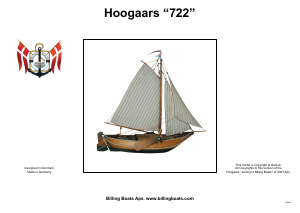
Ici, vous pouvez partager ce que vous pensez du Billing Boats set BB722 Boatkits Hogaars. Si vous avez une question, lisez d’abord attentivement le mode d’emploi. La demande d’un mode d’emploi peut être effectuée en utilisant notre formulaire de contact.
répondre | Cela a été utile (0) (Traduit par google)