Mode d’emploi Black and Decker CP12 Perceuse visseuse

Besoin d'un mode d’emploi pour votre Black and Decker CP12 Perceuse visseuse ? Ci-dessous, vous pouvez consulter et télécharger gratuitement le mode d’emploi PDF en français. Ce produit a actuellement 3 questions fréquemment posées, 0 commentaires et a 3 votes avec une note moyenne du produit de 100/100. Si ce n'est pas le mode d’emploi que vous souhaitez, veuillez nous contacter.

Votre produit est défectueux et le mode d’emploi n’offre aucune solution ? Rendez-vous à un Repair Café pour obtenir des services de réparation gratuits.

Mode d’emploi

Loading…

7
ENGLISH
Firmly tighten the chuck by turning sleeve (15) with one
hand while holding the tool with the other.
This tool is supplied with a double-ended screwdriver bit in the
bit holder (7).
To remove the screwdriver bit from the bit holder, lift the bit
from the recess.
To store the screwdriver bit, firmly push it into the holder.
Use
Warning! Let the tool work at its own pace. Do not overload.
Warning! Before drilling into walls, floors or ceilings, check for
the location of wiring and pipes.
Charging the battery (fig. A)
The battery needs to be charged before first use and
whenever it fails to produce sufficient power on jobs that were
easily done before. When charging the battery for the first
time, or after prolonged storage, it will only accept an 80%
charge. After several charge and discharge cycles, the battery
will attain full capacity. The battery may become warm while
charging; this is normal and does not indicate a problem.
Warning! Do not charge the battery at ambient temperatures
below 4 °C or above 40 °C. Recommended charging
temperature: approx. 24 °C.
Using the 3 hr charger
To charge the battery (8), remove it from the tool and slide
the charger receptacle (10) onto the battery.
Plug in the charger (9).
The battery will become warm while charging. After approx.
3 hours of charging, the battery will be sufficiently charged for
use in regular applications. After approx. 6 hours of charging,
the battery will be fully charged.
Remove the charger receptacle from the battery.
Using the 1hr charger
To charge the battery (8), remove it from the tool and
insert it into the charger (9). The battery will only fit into
the charger in one way. Do not force. Be sure that the
battery is fully seated in the charger.
Plug in the charger.
Check if the red charging indicator (11) lights up. If the
green end of charge indicator (12) lights up now instead,
the battery is too hot and cannot be charged. If this
happens, remove the battery from the charger, let the
battery cool down for approx. 1 hour and re-insert it.
After approx. 1 hour of charging, the red charging indicator
(11) will stop lighting and the green end of charge indicator
(12) will light up. The battery is now fully charged.
Remove the battery from the charger.
Checking the battery condition (fig. E)
This tool is fitted with a battery charge indicator, which allows
you to check the condition of the battery.
Press and hold down the button (17).
Check to see how many of the lights (18) are on:
Battery charge
1 light low
2 lights medium
3 lights high
Selecting the direction of rotation (fig. F)
For drilling and for tightening screws, use forward (clockwise)
rotation. For loosening screws or removing a jammed drill bit,
use reverse (counterclockwise) rotation.
To select forward rotation, push the forward/reverse slider
(2) to the left.
To select reverse rotation, push the forward/reverse slider
to the right.
To lock the tool, set the forward/reverse slider into the
centre position.
Selecting the operating mode or torque (fig. G)
This tool is fitted with a collar to select the operating mode and
to set the torque for tightening screws. Large screws and hard
workpiece materials require a higher torque setting than small
screws and soft workpiece materials. The collar has a wide
range of settings to suit your application.
For drilling in wood, metal and plastics, set the collar (3) to
the drilling position by aligning the symbol with the
marking (19).
For screwdriving, set the collar to the desired setting.
If you do not yet know the appropriate setting, proceed as
follows:
- Set the collar (3) to the lowest torque setting.
- Tighten the first screw.
- If the clutch ratchets before the desired result is
achieved, increase the collar setting and continue
tightening the screw. Repeat until you reach the correct
setting. Use this setting for the remaining screws.
CP122/CP142 - Drilling in masonry (fig. G & H)
For drilling in masonry, set the collar (3) to the hammer
drilling position by aligning the symbol with the marking
(19).
Slide the two-gear selector (5) towards the front of the tool
(2nd gear).
CP122/CP142 - Two-gear selector (fig. H)
For drilling in steel and for screwdriving applications, slide
the two-gear selector (5) towards the rear of the tool
(1st gear).
Télécharger mode d’emploi en Français (PDF, 1.08 MB)
(Tenez compte de l’environnement et imprimez ce manuel uniquement si c’est vraiment nécessaire)

Loading…

Évaluation

Dites-nous ce que vous pensez du Black and Decker CP12 Perceuse visseuse en laissant une note de produit. Vous voulez partager vos expériences avec ce produit ou poser une question ? Veuillez laisser un commentaire au bas de la page.
Etes-vous satisfait du Black and Decker CP12 Perceuse visseuse ?
Oui Non
100%
0%
3 évaluations

Joignez-vous à la conversation sur ce produit

Ici, vous pouvez partager ce que vous pensez du Black and Decker CP12 Perceuse visseuse. Si vous avez une question, lisez d’abord attentivement le mode d’emploi. La demande d’un mode d’emploi peut être effectuée en utilisant notre formulaire de contact.

En savoir plus sur ce mode d’emploi

Nous comprenons qu’il est agréable d’avoir un mode d’emploi papier pour vos Black and Decker CP12 Perceuse visseuse. Vous pouvez toujours télécharger le mode d’emploi depuis notre site Web et l’imprimer vous-même. Si vous souhaitez disposer d’un mode d’emploi original, nous vous recommandons de contacter Black and Decker. Ils pourront peut-être fournir un mode d’emploi original. Recherchez-vous le mode d’emploi de votre Black and Decker CP12 Perceuse visseuse dans une autre langue ? Choisissez votre langue préférée sur notre page d’accueil et recherchez le numéro de modèle pour voir si nous l’avons disponible.

Caractéristiques

Marque Black and Decker
Modèle CP12
Catégorie Perceuses visseuses
Type de fichier PDF
Taille du fichier 1.08 MB

Tous les modes d’emploi pour Black and Decker Perceuses visseuses
Plus de modes d’emploi de Perceuses visseuses

Foire aux questions sur Black and Decker CP12 Perceuse visseuse

Notre équipe d’assistance recherche des informations utiles sur les produits et des réponses aux questions fréquemment posées. Si vous trouvez une inexactitude dans notre foire aux questions, veuillez nous le faire savoir en utilisant notre formulaire de contact.

Je n'arrête pas d'endommager la tête de vis lorsque j'utilise la perceuse-visseuse. Pour quelle raison ? Vérifié

Il y a moyen de régler la plupart des perceuses-visseuses pour qu'elles vissent plus fort ou plus doucement. Si la tête de vis continue à être endommagée, il faut probablement régler différemment la perceuse-visseuse. Pour un appareil sans fil, assurez-vous toujours que la batterie est chargée pour obtenir un résultat optimal.

Cela a été utile (73) En savoir plus

Dois-je porter une protection auditive lorsque j'utilise une perceuse ? Vérifié

Oui, vous devriez. Bien que la quantité de bruit produite par une perceuse varie selon les marques et les modèles, une exposition prolongée aux bruits forts peut entraîner des lésions auditives permanentes. C'est pourquoi il est judicieux de porter une protection auditive.

Cela a été utile (23) En savoir plus

Puis-je ranger des outils électriques dans un hangar ou un garage ? Vérifié

En général, vous pouvez ranger les outils électriques dans un cabanon ou un garage, même s'il y gèle parfois. Cependant, pour préserver la durée de vie de l'outil électrique, il est préférable de le stocker dans un endroit sec et sans variations de température importantes. Dans une remise ou un garage, les différences de température peuvent provoquer la formation de condensation, ce qui peut provoquer de la rouille. De plus, les outils fonctionnant sur piles durent moins longtemps et se chargent moins bien à des températures très basses. Pour être sûr de la manière dont votre outil électrique doit être stocké, lisez toujours attentivement le manuel d'utilisation.

Cela a été utile (11) En savoir plus
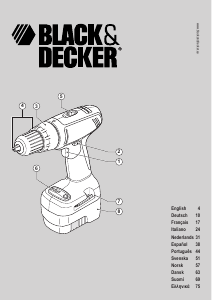
Mode d’emploi Black and Decker CP12 Perceuse visseuse

Produits connexes

Catégories associées