Mode d’emploi Caliber MCD570 Autoradio

Besoin d'un mode d’emploi pour votre Caliber MCD570 Autoradio ? Ci-dessous, vous pouvez consulter et télécharger gratuitement le mode d’emploi PDF en français. Ce produit a actuellement 4 questions fréquemment posées, 0 commentaires et 0 votes. Si ce n'est pas le mode d’emploi que vous souhaitez, veuillez nous contacter.

Votre produit est défectueux et le mode d’emploi n’offre aucune solution ? Rendez-vous à un Repair Café pour obtenir des services de réparation gratuits.

Mode d’emploi

Loading…
ENGLISH
3
ENGLISH
2
DISC PLAY
PRECAUTIONS
Use only in a 12-volt DC negative-ground electrical system.
Disconnect the vehicle's negative battery terminal while mounting and connecting the
unit.
When replacing the fuse, be sure to use one with an identical amperage rating.
•Using a fuse with a higher amperage rating may cause serious damage to the unit.
•DO NOT attempt to disassemble the unit. Laser beams from the optical pickup are
dangerous to the eyes.
Make sure that pins or other objects do not get inside the unit; they may cause
malfunctions, or create safety hazards such as electrical shock or laser beam exposure.
If you have parked the car for a long time in hot or cold weather, wait until the
temperature in the car become normal before operating the unit.
Keep the volume at a level at which you can hear outside warning sounds (horns
sirens, etc.).
CD NOTES
Playing a defective or dusty CD can cause dropouts in sound.
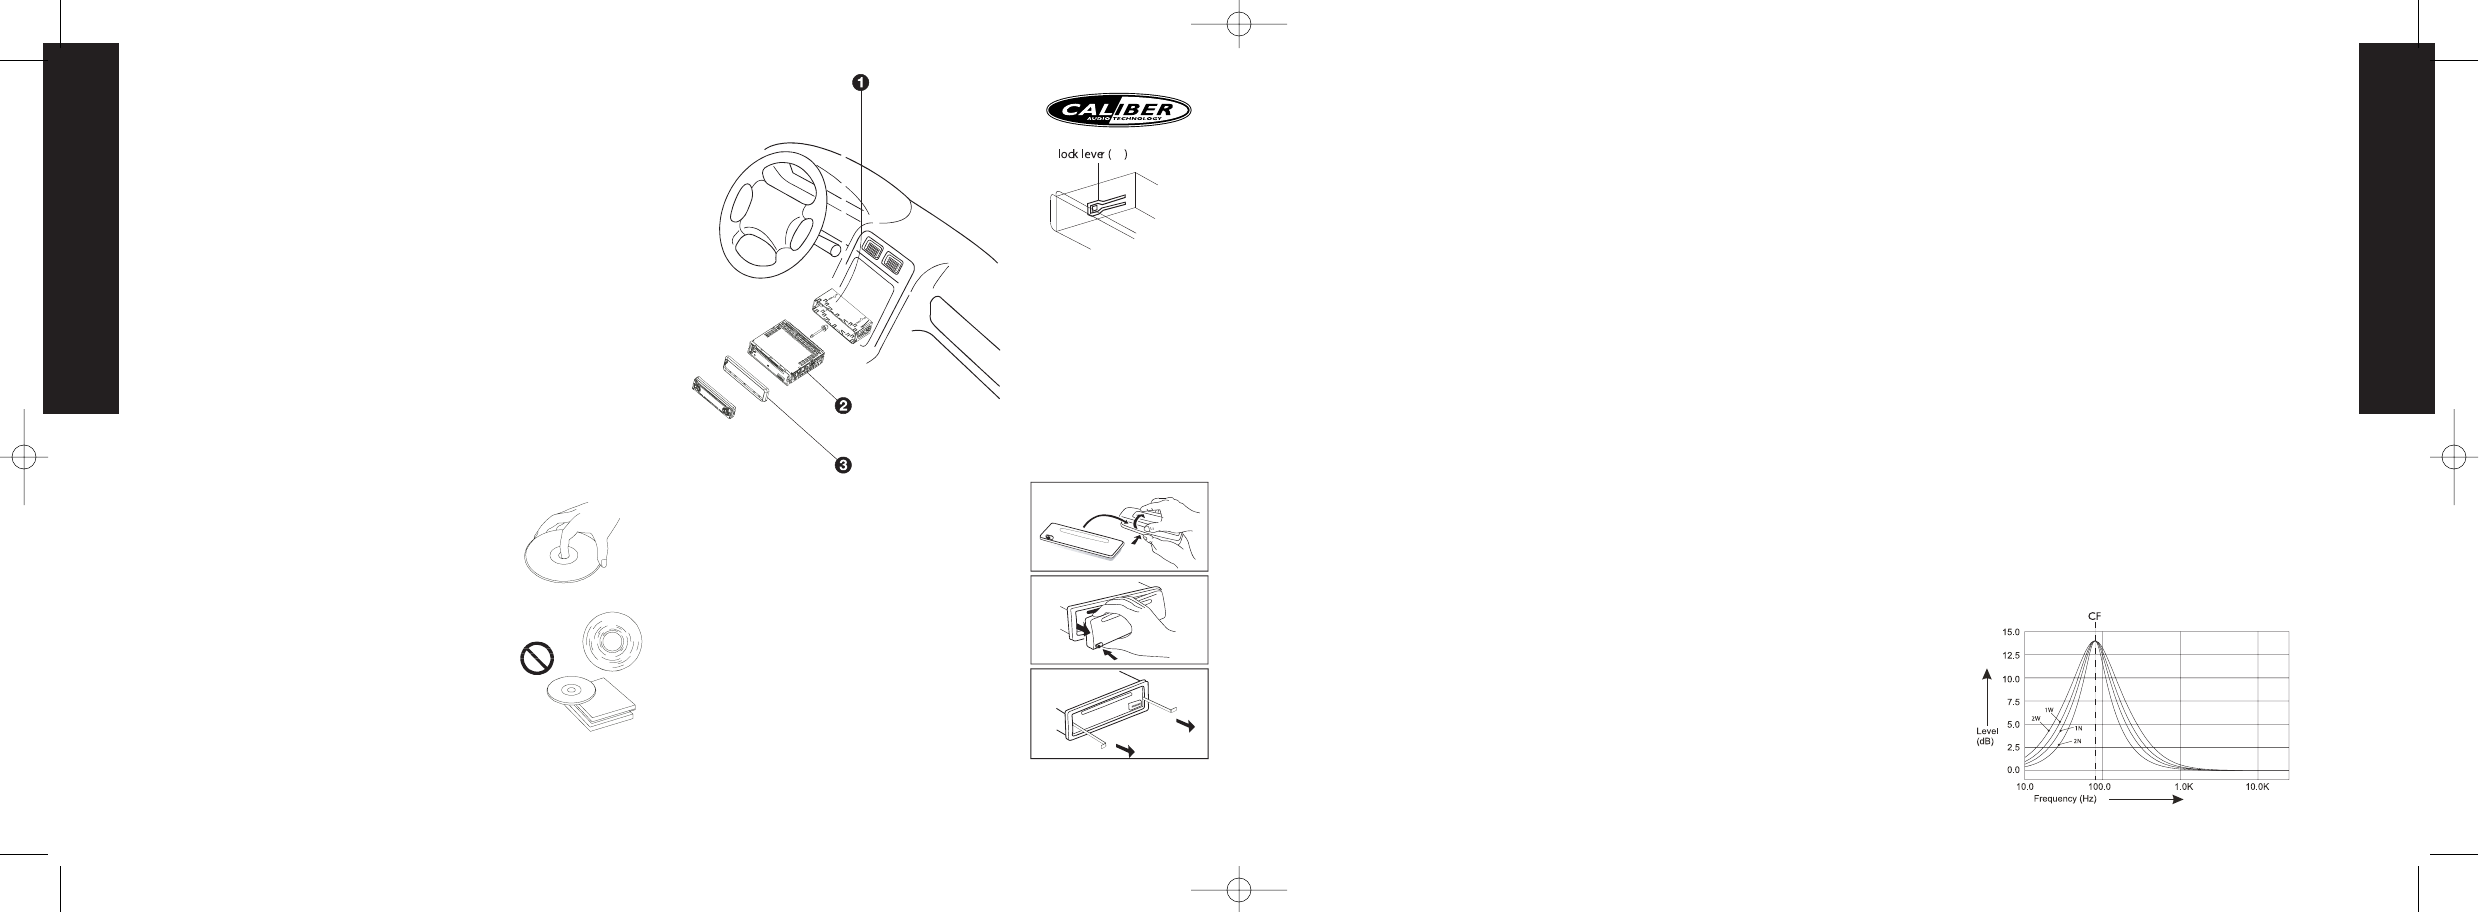
Hold CDs as illustrated.
DO NOT touch the unlabeled side.
DO NOT attach any seal, label or data protection sheet to either side of a disc.
DO NOT expose a CD to direct sunlight or excessive heat.
Wipe a dirty CD from the center outward with a cleaning cloth.
•Never use solvents such as benzine or alcohol.
This unit cannot play 3-inch ( 8cm ) CDs.
NEVER insert a 3-inch CD contained in the adapter
or an irregularly shaped CD.
The unit may not be able to eject it, resulting in a
malfunction.
BEFORE OPERATION
•DO NOT raise the volume level too much, as this
will block outside sounds, making driving dangerous.
Stop the car before performing any complicated
operation.
CAUTION
DO NOT open covers and do not repair by yourself.
Consult the dealer or an experienced technician for help.
Installation procedures
First complete the electrical connections, and then
check them for correctness.
Anti-Theft System
This unit is equipped with a detachable panel.
Removing this panel makes the radio totally inoperable.
Removing the panel
1. Switch off the power of the unit.
2. Remove the detachable panel (REL button).
3. Gently press the button of the case and open the
cover. Place the panel into the case and take it with you
when you leave the car.
Install detachable panel
1.Fix right part of face plate in the right part of panel slot
of the unit.
2.Press down the left side of the face plate until it clicks
into the panel slot of the unit.
Remove the unit
Switch of the power of the unit.
1. Remove the panel and the trim plate.
2. Insert both T-Keys into hole in front of the set until
they lock.
3. Pull out the unit.
BASIC OPERATIONS
ON/OFF
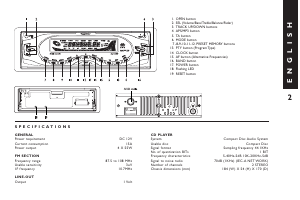
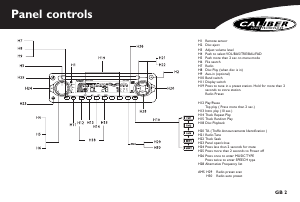
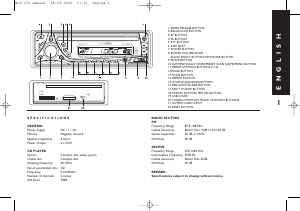
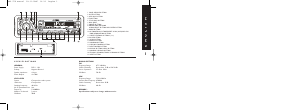
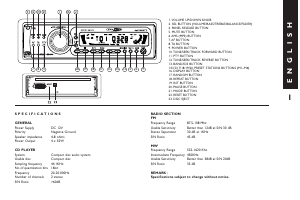
Switch on the unit by pressing POWER button(7) or any other button on the radio
(except eject) when system is on, press POWER button(7) to turn off the unit.
FACEPANEL RELEASE
Press REL button (1) to remove the facepanel.
SOUND ADJUSTMENT
Press the button (2) “MUTE” momentarily to mute the audio volume, and "Mute" will
flash in the display. Press the mute button again to restore volume to the previous setting.
SOURCE
Press button (9) “MODE“ to switch between Tuner, CD, iPod and Aux Line-In.
DISPLAY
Press the button (18) “DISPLAY/MENU” repeatedly to select the following different
Display options:
Spectrum mode 1 -> Spectrum mode 2 -> Spectrum mode 3 -> Default Display
MENU OPERATIONS
Press the button (18) “DISPLAY/MENU” longer then 3 seconds to access the menu.
Press button (8) “AUDIO” momentarily to move forward to the next option.The
menu can also be navigated by using the buttons (20) Tuning Up or Tuning Down to
move to the next or previous option. Once the desired option appears on the display,
adjust that option by rotating the volume control within 5 seconds. The following
options can be adjusted:
CONTRAST
The contrast level of the display is set at “contrast 05” by default. Rotate the volume
control to adjust the contrast level from 00 to 10.
CLOCK FORMAT
This option allows selection of a 12 hour or 24 hour clock format.“CLK FORMAT 12”
is the default setting. Rotate the volume button to change the 24 hour clock format.
TIME SET
The time on the clock will be set to 12:00 as the default. Program the current time by
rotating the volume button clockwise to adjust the minutes and counterclockwise to
adjust the hours.
PROGRAMMABLE TURN-ON VOLUME (VOL PGM)
This option allows selection of the volume level the radio will automatically assume
when first turned on.“VOL PGM 12” is the default setting, which will turn the radio
on at the volume level selected when the unit was last turned off.To program a
specific volume level for the radio to turn on at, rotate the volume control to select
“VOLUME LEVEL”.Within 5 seconds.
BEEP TONE
You can rotate the volume knob to select the following options:
BEEP ON Beeps when any button is pressed.
BEEP OFF To disable the beep option.
AUDIO OPERATIONS
Press the button (8) “AUDIO” to enter the sound set up. Press button (8) “AUDIO”
momentarily to move forward to the next option.The menu can also be navigated by
using the buttons (20) Tuning Up or Tuning Down to move to the next or previous
option. Once the desired option appears on the display, adjust that option by rotating
the volume control within 5 seconds.The following options can be adjusted:
VOLUME
To increase the volume rotate the volume knob (8) clockwise, to decrease the volume
rotate the volume knob counterclockwise.
SUBWOOFER (SUBWOOFER LEVEL)
Rotate the volume knob (8) to select the desired volume level from “00” to “12”.
NOTE:The subwoofer level control will only appear in the Audio Menu if the
“Subwoofer” function is activated and a subwoofer speaker is connected.
Press button (3) “SUB-W” to activate the subwoofer function. Press again to turn off.
SUB-W LPF (SUBWOOFER LOW PASS FILTER)
Rotate the volume knob (8) to select the desired Low Pass Filter function: Flat, 80Hz,
120Hz or 160Hz.
NOTE :The subwoofer level control will only appear in the Audio Menu if the
“Subwoofer” function is activated and a subwoofer speaker is connected.
IX-BASS (IX-BASS LEVEL)
Rotate the volume knob (8) to select the desired Bass Boost function: low, mid or high.
NOTE :The iX-Bass function will only appear in the Audio Menu if the “iX-Bass”
function is activated. Press button (5) “IX-BASS” to activate the iX-Bass function.
Press again to turn off.
BASS (BASS LEVEL)
Rotate the volume know (8) to select the desired Bass level from “-6” to “+6”.
BASS-CFQ (BASS CENTER
FREQUENCY)
Rotate the volume knob (8)
to select the desired Bass
center Frequency to 60Hz,
80Hz, 100Hz or 200Hz.
BASS-Q (BASS Q FACTOR)
Rotate the volume knob (8)
to select the desired Bass-Q
Factor to 2N, 1N, 1W or
2W.
1. Insert mounting bracket into the
dashboard, and bend the mounting
tabs out with a screwdriver. (Make
sure that lock lever is flush with
the mounting bracket. Not
projecting outward)
2. Secure the rear of the unit After
fixing mounting bolt and power
connector, fix the rear of the unit
to the car body by rubber cushion.
3. Insert trimplate
MCD 570 manual 03-11-2006 14:33 Pagina 2
Télécharger mode d’emploi en Français (PDF, 1.81 MB)
(Tenez compte de l’environnement et imprimez ce manuel uniquement si c’est vraiment nécessaire)

Loading…

Évaluation

Dites-nous ce que vous pensez du Caliber MCD570 Autoradio en laissant une note de produit. Vous voulez partager vos expériences avec ce produit ou poser une question ? Veuillez laisser un commentaire au bas de la page.
Etes-vous satisfait du Caliber MCD570 Autoradio ?
Oui Non
Soyez le premier à évaluer ce produit
0 évaluations

Joignez-vous à la conversation sur ce produit

Ici, vous pouvez partager ce que vous pensez du Caliber MCD570 Autoradio. Si vous avez une question, lisez d’abord attentivement le mode d’emploi. La demande d’un mode d’emploi peut être effectuée en utilisant notre formulaire de contact.

En savoir plus sur ce mode d’emploi

Nous comprenons qu’il est agréable d’avoir un mode d’emploi papier pour vos Caliber MCD570 Autoradio. Vous pouvez toujours télécharger le mode d’emploi depuis notre site Web et l’imprimer vous-même. Si vous souhaitez disposer d’un mode d’emploi original, nous vous recommandons de contacter Caliber. Ils pourront peut-être fournir un mode d’emploi original. Recherchez-vous le mode d’emploi de votre Caliber MCD570 Autoradio dans une autre langue ? Choisissez votre langue préférée sur notre page d’accueil et recherchez le numéro de modèle pour voir si nous l’avons disponible.

Caractéristiques

Marque Caliber
Modèle MCD570
Catégorie Autoradios
Type de fichier PDF
Taille du fichier 1.81 MB

Tous les modes d’emploi pour Caliber Autoradios
Plus de modes d’emploi de Autoradios

Foire aux questions sur Caliber MCD570 Autoradio

Notre équipe d’assistance recherche des informations utiles sur les produits et des réponses aux questions fréquemment posées. Si vous trouvez une inexactitude dans notre foire aux questions, veuillez nous le faire savoir en utilisant notre formulaire de contact.

Qu’est-ce que DAB+ ? Vérifié

DAB+ est le successeur du signal FM et signifie « Digital Audio Broadcasting. » (radiodiffusion numérique). Il s’agit d'un signal numérique autorisant plusieurs chaînes dans la même bande passante et permettant un changement plus facile entre les chaînes.

Cela a été utile (641) En savoir plus

Quelle est la différence entre FM et AM ? Vérifié

FM et AM sont deux formes de modulation utilisées pour transmettre un signal. FM signifie « Frequency Modulation » (modulation de fréquence) et « AM » signifie « Amplitude Modulation » (modulation d’amplitude. AM est la plus ancienne forme de modulation. La plus grande différence réside dans le fait que le signal FM est bien plus fort que le signal AM.

Cela a été utile (413) En savoir plus

Un CD est coincé dans mon autoradio, que dois-je faire ? Vérifié

Certains autoradios ont une fonction pour éjecter les CD coincés. Éteignez la voiture et appuyez simultanément sur les boutons « marche » et « éjection » pendant 10 secondes. Si cela ne fonctionne pas, démarrez la voiture et réessayez.

Cela a été utile (395) En savoir plus

Quelle taille d’autoradio convient à ma voiture ? Vérifié

Il existe deux tailles standard d’autoradio, 1-DIN et 2-DIN. 1-DIN est la version mince standard et 2-DIN est le double de cette hauteur. Les autoradios 2-DIN disposent souvent d’un écran pour afficher des informations de navigation ou lire des films.

Cela a été utile (332) En savoir plus
Mode d’emploi Caliber MCD570 Autoradio

Produits connexes

Catégories associées

×
Download