Mode d’emploi Cat Mate 359W Timer Control Chatière

Besoin d'un mode d’emploi pour votre Cat Mate 359W Timer Control Chatière ? Ci-dessous, vous pouvez consulter et télécharger gratuitement le mode d’emploi PDF en français. Ce produit a actuellement 1 question fréquemment posée, 2 commentaires et a 1 vote avec une note moyenne du produit de 0/100. Si ce n'est pas le mode d’emploi que vous souhaitez, veuillez nous contacter.

Votre produit est défectueux et le mode d’emploi n’offre aucune solution ? Rendez-vous à un Repair Café pour obtenir des services de réparation gratuits.

Mode d’emploi

Loading…

4 5
1. Introduction
Thank you for choosing the Cat Mate Timer Control Cat Flap.
WE RECOMMEND THAT YOU CAREFULLY READ THESE INSTRUCTIONS TO
BECOME FAMILIAR WITH THE CAT FLAP BEFORE YOU INSTALL IT.
The Cat Mate Timer Control Cat Flap allows you to choose the times you do not
wish your cat(s) to go out through the flap to avoid high risk periods, e.g. high traffic,
night time, etc. A secure rotary 5 way lock allows you complete control of your cat’s
movement through the flap.
2. Fitting Instructions
Wood / Plastic / Metal Door Panels
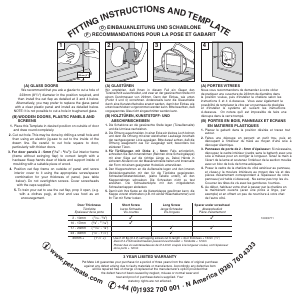
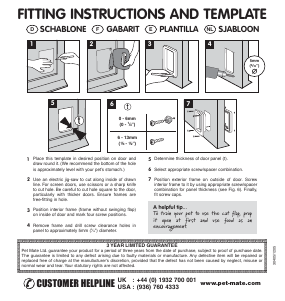
2.1 Place the exterior frame in desired position on panel and draw round the
outside of the tunnel section as shown in Fig. 3. We recommend the bottom of
the hole is approximately level with your pet's stomach.
2.2 Use an electric jigsaw to cut 2mm (
1
/
16
”) outside of drawn line. Be careful to
cut hole square to the door, particularly with thicker doors. Ensure frames are
free-fitting in hole.
2.3 Determine thickness of door panel.
2.4 For door panels 0 - 20mm (
3
/
4
”) thick:
2.4.1 Position exterior frame on outside of door and mark four hole positions
(Fig. 4).
2.4.2 Remove frame and carefully drill screw clearance holes square to panel
at 6mm (
1
/
4
”) diameter (Fig. 5).
2.4.3 For panels less than 18mm (
3
/
4
”) thick, cut excess tunnel from exterior
frame as shown in Fig. 6 with a hacksaw or plastic cutting disc.
2.4.4 Fit seal to exterior frame. Position exterior frame on outside of door.
Screw interior frame to it by using 32mm (1
1
/
4
”) screws for panels from
6 - 20mm (
1
/
4
” -
3
/
4
”) thick. For panels less than 6mm (
1
/
4
”) thick use 19mm
(
3
/
4
”) screws. Finally, fit screw caps (Fig. 7).
2.5 For door panels 20mm (
3
/
4
”) + thick:
2.5.1 Carefully drill out four holes in interior frame to allow close clearance on
screws (recommended drill 5mm (
3
/
16
”) diameter) as shown in Fig. 8.
2.5.2 Fit seal to exterior frame. Screw exterior frame on outside of door using
13mm (
1
/
2
”) screws.
2.5.3 Screw interior frame to inside of door using 19mm (
3
/
4
”) screws. Finally, fit
screw caps.
Walls / Glass Panels
You will require an adapter kit available from your cat flap supplier or direct from
Pet Mate (Product Ref. 361) to enable easy installation.
3. Fitting the batteries
3.1 Remove the battery cover by pushing up the retaining clip and pulling out
(Fig. 9).
3.2 Insert 2 x AA batteries using the orientation symbols marked on the inside of the
battery compartment. Replace the battery cover.
3.3 The cat flap will self test for approximately 10 seconds after which the clock will
show 0:00.
Good quality alkaline batteries should normally last approximately 24 months
(dependent on use). You may use all popular batteries including 1.5v lithium
batteries but the low battery indicator will only work correctly with standard
alkaline batteries.
4. Setting the clock
4.1 Press and hold the SET and ADJ buttons for 5 seconds until the hour figure on
the clock starts to flash.
NOTE: Hours are always displayed in a 24 hour clock format.
4.2 Press the ADJ button to adjust clock to the correct hour. Hold down the ADJ
button for longer than 3 seconds to scroll through.
4.3 Press the SET button and the minute figure will flash. Adjust the minutes using
the ADJ button, then press SET to save the setting. Do not press any buttons
for 30 seconds, the display will then show current time.
5. Setting the Timer Control
NOTE: Setting procedure will time out if no button is pressed for 30 seconds.
5.1 Set 5 way lock to position E , Fig. 2.
5.2 Press and hold the SET and ADJ buttons for 5 seconds until the hour figure on
the clock starts to flash.
5.3 Press the SET button three times. Segment 3 , Fig. 1 will flash.
5.4 To select a time period for the timed lock to be operative (e.g. 8am - 10am, as
Fig. 1) repeatedly press the ADJ button until the flashing segment ( 3 , Fig.1)
reaches the start of the desired period(s). (In this example indicated by flashing
of segment of 8 - 9.)
5.5 Press SET so that the OUT arrow ( 5 , Fig. 1) disappears.
5.6 Press ADJ and the next segment will then flash. (In this example you would
again press SET.) In this manner you may program multiple time periods if
required.
5.7 To DESELECT a time segment in which the timed lock is operative, press the
ADJ button repeatedly until the flashing segment is positioned at the relevant
segment. Then press SET.
When you have programmed all the time segments you require, do not press any
buttons for 30 seconds.
NOTE: When the timer lock is operative the current time segment will flash.
Télécharger mode d’emploi en Français (PDF, 0.41 MB)
(Tenez compte de l’environnement et imprimez ce manuel uniquement si c’est vraiment nécessaire)

Loading…

Évaluation

Dites-nous ce que vous pensez du Cat Mate 359W Timer Control Chatière en laissant une note de produit. Vous voulez partager vos expériences avec ce produit ou poser une question ? Veuillez laisser un commentaire au bas de la page.
Etes-vous satisfait du Cat Mate 359W Timer Control Chatière ?
Oui Non
0%
100%
1 évaluation

Joignez-vous à la conversation sur ce produit

Ici, vous pouvez partager ce que vous pensez du Cat Mate 359W Timer Control Chatière. Si vous avez une question, lisez d’abord attentivement le mode d’emploi. La demande d’un mode d’emploi peut être effectuée en utilisant notre formulaire de contact.

Rebecca Kretschmer 20-09-2019
Est-il possible de régler la chatière pour que les animaux ne puissent entrer et sortir que pendant un certain temps ? Je souhaite attacher le rabat à mon enclos à lapins pour que les lapins puissent se déplacer librement dans le jardin pendant la journée - quand j'y vais le matin, je ne peux pas les laisser sortir car il fait encore noir et les martres sont toujours là à ce moment-là. Le soir, je peux l'enfermer moi-même. Mais personne n'est autorisé à se produire le matin.

répondre | Cela a été utile (0) (Traduit par google)
Deodat Lawson 10-11-2019
Comment changer l'heure dessus ? c'est rapide d'une heure.

répondre | Cela a été utile (0) (Traduit par google)

En savoir plus sur ce mode d’emploi

Nous comprenons qu’il est agréable d’avoir un mode d’emploi papier pour vos Cat Mate 359W Timer Control Chatière. Vous pouvez toujours télécharger le mode d’emploi depuis notre site Web et l’imprimer vous-même. Si vous souhaitez disposer d’un mode d’emploi original, nous vous recommandons de contacter Cat Mate. Ils pourront peut-être fournir un mode d’emploi original. Recherchez-vous le mode d’emploi de votre Cat Mate 359W Timer Control Chatière dans une autre langue ? Choisissez votre langue préférée sur notre page d’accueil et recherchez le numéro de modèle pour voir si nous l’avons disponible.

Caractéristiques

Marque Cat Mate
Modèle 359W Timer Control
Catégorie Chatières
Type de fichier PDF
Taille du fichier 0.41 MB

Tous les modes d’emploi pour Cat Mate Chatières
Plus de modes d’emploi de Chatières

Foire aux questions sur Cat Mate 359W Timer Control Chatière

Notre équipe d’assistance recherche des informations utiles sur les produits et des réponses aux questions fréquemment posées. Si vous trouvez une inexactitude dans notre foire aux questions, veuillez nous le faire savoir en utilisant notre formulaire de contact.

Une pile de mon appareil est oxydée, puis-je quand même l’utiliser en toute sécurité ? Vérifié

Oui, l’appareil peut toujours être utilisé en toute sécurité. Tout d’abord, retirez la batterie oxydée. N’utilisez jamais les mains nues pour ce faire. Nettoyez ensuite le compartiment de batterie avec un coton-tige trempé dans du vinaigre ou du jus de citron. Laissez sécher et insérez des piles neuves.

Cela a été utile (172) En savoir plus
Mode d’emploi Cat Mate 359W Timer Control Chatière

Produits connexes

Catégories associées

×
Download