
2 3
IMPORTANT SAFETY INSTRUCTIONS
The safety of electrical appliances from FIRST Austria
complies with the recognized technical directives and
legal regulations for safety. Nevertheless, you and
the other users of the appliance should observe the
following:
• Please read these instructions carefully before using
this appliance for the rst time and keep them for
further reference.
• This product has not been designed for any other
uses than those specied in this manual.
• Before connecting the appliance to the power
source, check if the voltage indicated on the
appliance corresponds with the mains voltage
in your home. If this is not the case, contact your
dealer and do not use the appliance.
• If the appliance is grounded (protection class I),
the wall outlet and any extension to which it is
connected must also be grounded.
• Place the appliance on a clear, at and heat-
resistant surface. Distance from the wall should
be at least 5cm. The area above the appliance
should be kept free to allow an unobstructed
air-circulation. Never place the appliance or power
cord on hot surfaces. Nor should the appliance be
placed or operated in the vicinity of exposed gas
ames.
• Do not let the cord hang over the edge of a table or
counter. Do not let the cord touch hot surfaces.
• Do not let the cord touch hot surfaces.
• Do not use the product near gas sources or other
ammable materials or objects.
• To protect from electrical hazard, do not immerse
this appliance or cordset in any liquids.
• If the appliance or the power cord shows any signs
of damage, do not operate it! Take the product
to an authorized and qualied service center for
inspection or repair.
• The use of attachments not recommended or sold
by the manufacturer may cause re, electric shock
or injury.
• This device is intended for home use only, do not
use it commercially.
• Do not use this appliance outdoors.
• The appliance becomes hot during operation.
Therefore, be careful not to touch any of the hot
parts.
• Do not cover the appliance during operation, as this
may cause a re hazard.
• Do not touch any moving parts while the appliance
is operating.
• Always disconnect the appliance from power
after use, before cleaning and in the event of a
malfunction.
• Do not pull directly on the power cord, rather pull
on the plug to disconnect the appliance from the
power source.
• The appliance can be used by children aged from
8 years and above and persons with reduced
physical, sensory or mental capabilities or lack
of experience and knowledge if they have been
given supervision or instruction concerning use
of the appliance in a safe way and understand the
hazards involved. Children shall not play with the
appliance. Cleaning and user maintenance shall not
be made by children unless they are older than 8
and supervised. Keep the appliance and its cord out
of reach of children less than 8 years.
• We are excluded of liability for all damages that
may arise if the appliance is used for purposes
other than originally intended or if it is used
inappropriately.
• Repairs and other work undertaken on the unit
must only be done by authorised specialist
personnel!
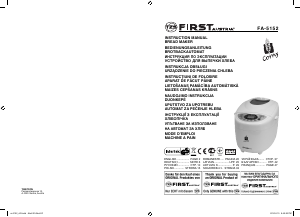
OVERVIEW (see g. 1)
1. Control Panel
2. Window
3. Nut Dispenser
4. Dispenser release button
5. Kneading blades
6. Bread pan
7. Measuring cup
8. Measuring spoon
9. Hook for removing the kneading blade
CONTROL PANEL: (see g. 2)
10. Menu: Press the “Menu” button to select the desired
program. The program number and corresponding
preparation time appear on the display.
11. Start/Stop: Press the “Start/Stop” button to start
or pause the current program. When a program is
paused, the remaining time ashes on the display.
Hold the button to cancel a running program.
12. Browning: Press the “Browning” button to select
the browning of the crust for specic programs. You
can choose Light / Medium / Dark.
(Only applicable to program 1, 2, 3, 4, 5, 6, 8, 9, 12)
13. Time +/-: Use the “Time +/-“ buttons to add a delay
time to the preparation process or to adjust the
time settings of each preparation step within the
“Custom” program.
14. Size: Press the “Size” button to select the desired
loaf size.
You can choose 900 g / 1150 g / 1350 g.
(Only applicable to program 1, 3, 5, 9, 12)
DISPLAY SYMBOLS:
Kneading indicator
Rising indicator
Baking indicator
Keep warm indicator
Nut dispenser indicator.
Appears in programs where the dispenser is
used during the last kneading process.
Applicable to program 1, 2, 3, 4, 5, 6, 9, 12, 14
BEFORE FIRST USE
• Remove all packaging parts and keep them away
from children - danger of suocation!
• Place the appliance on a dry and level surface in a
suitable place with sucient ventilation.
• Clean the appliance by following the steps of the
chapter “CLEANING & MAINTENANCE”
OPERATION
BAKING BREAD
1. Open the lid and pull the bread pan upward out of
the appliance.
2. Put the kneading blades onto the drive shafts of
the bread pan. It is recommended to put some
margarine on the driver shafts before inserting
the kneaders, so that the dough does not stick
under the kneaders and the kneaders can be easily
removed from the bread later.
3. Put the ingredients into the bread pan. All
ingredients should have room temperature. The
water or liquid ingredients should be added rst,
then sugar, salt and our, always add yeast or
baking powder at the end. Make sure that the yeast
does not come into contact with salt or liquids.
Note: The maximum quantity of our and yeast is
900 g and 9 g!
Yeast or soda
Dry ingredients
Water or liquid ingredients
4. Insert the bread pan into the appliance. Make sure
that it is positioned properly, then press it down
until it locks into place.
5. Close the appliance lid.
6. Insert the mains plug into a power outlet. An
acoustic signal sounds and the display shows the
program number and duration of basic program 1.
7. Press the “Menu” button to select an appropriate
program. See program list.
8. Press the “Size” button to select the appropriate loaf
size. The current selection is indicated by a mark
on the display. (This setting is only applicable to
program 1, 3, 5, 9, 12)
9. Press the “Browning” button to select the desired
browning degree of the crust. The current selection
is indicated by a mark on the display. (This setting is
only applicable to program 1, 2, 3, 4, 5, 6, 8, 9, 12)
10. If desired, you have the option to set the end time
of the baking process by using the “Time +/-“
buttons. This delays the start of the preparation. The
display shows the time after which the bread will
be ready. The maximum time is 13 hours. (The delay
function is not available to program 4, 8, 10, 11, 13)
11. Press the “Start/Stop” button to start the
preparation.
12. When the baking process is complete, an acoustic
signal sounds (10 beeps) and the display indicates
0:00. After baking, the appliance automatically
switches to the keep-warm mode, which lasts for
1 hour. You can interrupt it by pressing the “Start/
Stop” button.
REMOVING THE BREAD:
Always use oven gloves when removing the hot bread
pan from the appliance. Hold the bread pan upside
down over a tabletop and gently shake it until the
bread slides out of the bread pan. If the bread does
not slide o the kneading blades, carefully remove the
kneading blades with the included hook.
PROGRAM LIST:
1. Basic (Basic):
This program is suitable for baking white bread, which
consists mostly of wheat our, and you get a bread
with a compact consistency.
2. Quick (Quick):
This program kneads, rises and bakes the bread in less
time than the Basic bread. However, the bread baked
with this setting is usually smaller and has a dense
texture.
3. French (French):
This program is suitable for baking uy breads from
nely ground ours, which usually have a crispy crust.
4. Ultra-Fast (Ultra-Fast):
This program kneads, rises and bakes the bread in
shortest time. Usually the bread is smaller and rougher
than the one made with the “Quick” program.
5. Whole wheat (Whole wheat):
This program is suitable for processing strong ours
such as whole wheat our or whole rye our, resulting
in a heavy and compact bread.
6. Cake (Cake):
Use this program to bake your cake according to your
own recipe or ready-made cake mixes.
7. Dough (Dough):
Yeast dough for bread rolls, pizza or other pastries can
be kneaded with this program. The program includes
the kneading and rising phases.
8. Bake (Bake):
For additional baking of breads that are too light or not
baked through. You can also bake ready-made doughs
with this program. The bake time can be set between
10-60 minutes using the “Time +/-“ buttons. After the
baking process is nished, the bread is kept warm for
about an hour. This prevents the bread from becoming
too moist.
ENGLISH
ENGLISH

Joignez-vous à la conversation sur ce produit
Ici, vous pouvez partager ce que vous pensez du First Austria FA-5152-5 Machine à pain. Si vous avez une question, lisez d’abord attentivement le mode d’emploi. La demande d’un mode d’emploi peut être effectuée en utilisant notre formulaire de contact.