03 GB
The distance between the hob and any other unit or appliance above it
(e.g. An extractor hood) must be no less than 70 cm . (Figure 4)
Important - The diagram in figure 1 shows how the sealant should
be applied.
The hob may be installed in any worktop which is heat resistant to a
temperature of 100°C, and has a thickness of 25-45 mm. The
dimensions of the insert to be cut out of the worktop are in shown in
Figure 2.
The Hob unit is fitted by attaching the Fixing Clamps supplied, using
the holes at the base of the unit.
If the Hob is fitted next to a cabinet on either side, the distance between
the Hob and the cabinet must be at least 17 cm (60cm) or 25 cm
(75cm) (see Figure 2) ; while the distance between the hob and the rear
wall must be at least .70 mm
When there is an accessible space between the built-in hob and the
cavity below, a dividing wall made of insulating material should be
inserted (wood or a similar material) (Figure 3).
Metal objects in the drawer may reach high temperatures due to
air recirculation. It is therefore recommended to use an
intermediate wood panel.
When a 60 cm hob or a 75 cm hob is fitted over a built in oven, the latter
must be fan cooled.
1.1 BUILDING IN
1.2. SUITABLE LOCATION
The electric fan should be able to carry out a complete change of air in
the kitchen 3-5 times every hour. The installer should follow the
relevant national standards.
A gas-powered cooking appliance produces heat and humidity in the
area in which it is installed. For this reason you should ensure good
ventilation either by keeping all natural air passages open or by
installing an extractor hood with an exhaust flue. Intensive and
prolonged use of the appliance may require extra ventilation, such as
the opening of a window or an increase in speed of the electric fan, if
you have one.
If a hood can not be installed, an electric fan should be fitted to an
outside wall or window to ensure that there is adequate ventilation.
This appliance must be installed in accordance with the regulations in
force and only used in a well ventilated space. Read the instructions
before installing or using this appliance.
2. ELECTRICAL CONNECTION (FOR U.K. ONLY)
Warning - this appliance must be earthed
This appliance is designed for domestic use only. Connection to the main
supply must be made by a competant electrician, ensuring that all current
regulations concerning such installations are observed.
The appliance must only be connected to a suitably rated spur point, a
3 pin 13 amp plug/socket is not suitable. A double pole switch must be
provided and the circuit must have appropriate fuse protection.
Further details of the power requirement of the individual product will
be found in the users’ instruction and on the appliance rating plate. In
the case of built-in product you are advised, should you wish to use a
longer cable than the one supplied, that a suitably rated heat resistant
type must be used.
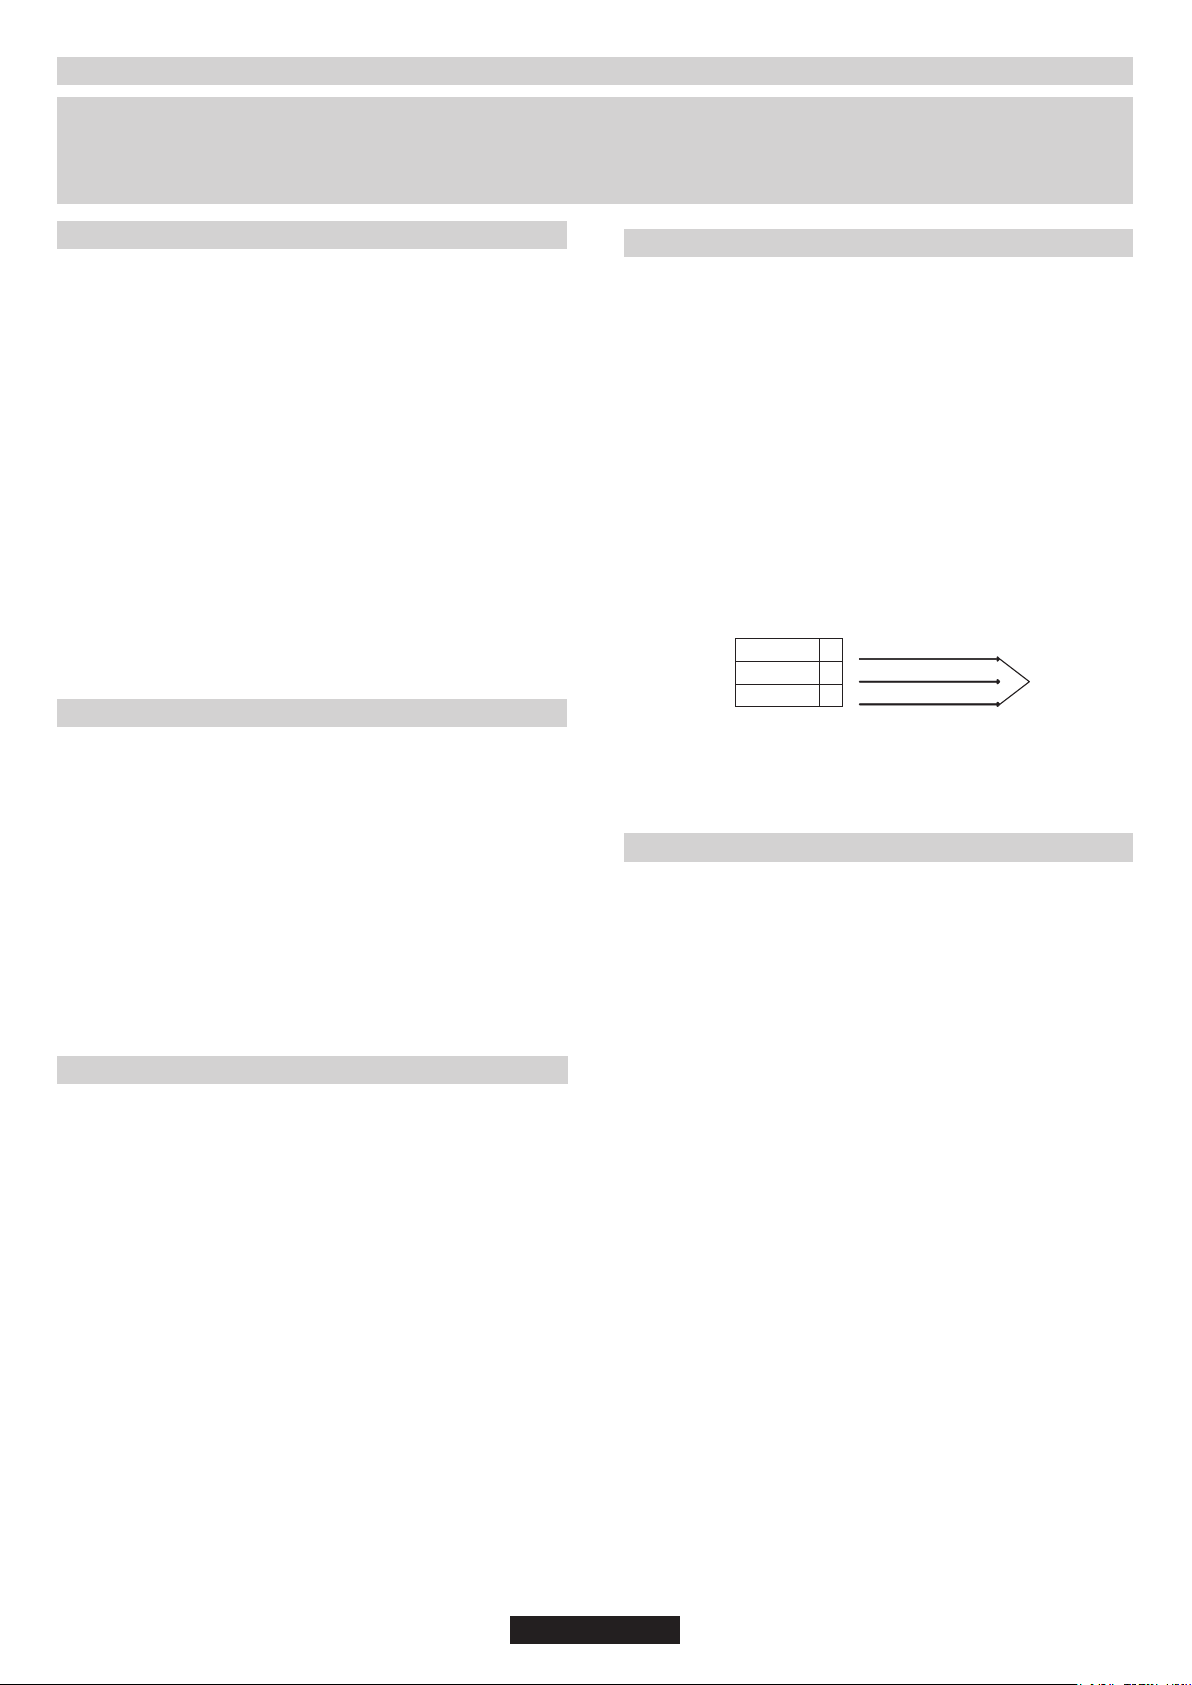
Brown Wire Live Connection
The wiring must be connected to the mains supply as follows:
Note: We do not advocate the use of earth leakage devices with
electric cooking appliances installed to spur points because of the
«nuisance tripping» which may occur. You are again reminded that the
appliance must be correctly earthed, the manufacturer declines any
responsibility for any event occurring as a result of incorrect electrical
installation.
CONNECT TO SPUR TERMINAL
Blue Wire Neutral Connection
Green & Yellow Wire Earth Connection
2.1. ELECTRICAL CONNECTION
Where the Hob is connected direct to the electricity supply, a circuit
breaker must be fitted.
The section of the cable used must be of the correct size in relation to
the absorbed power of the hob.
If the power supply cord is damaged this is to be replaced by a qualified
engineer so as to prevent any potential risk.
The earth wire ( green and yellow coloured ) must be at least 10 mm
longer than the live and neutral wires.
Check the data on the rating plate, located on the outside of the unit, to
ensure that the supply and input voltage are suitable.
Before connection, check the earthing system.
Please check rating plate for the power details and ensure that the
power supply cord is of the type 3x0.75 mm² H05 GG-F for 60-75cm
hobs or H05-V2V2-F for 75cm hobs.
By Law, this appliance must be earthed. If this regulation is not complied
with, the Manufacturer will not be responsible for any damage caused to
persons or property. If a plug is not already attached, fit a plug
appropriate to the load indicated on the rating plate. The earth wire is
coloured yellow/green. The plug should always be accessible.
LIVE
EARTH
NEUTRAL
L
N
Power Cable
Brown Wire
Green/Yellow Wire
Blue Wire
Mains Supply
If an appliance is not fitted with a supply cord and a plug, or with other
means for disconnection from the supply mains having a contact
separation in all poles that provide full disconnection under overvoltage
category III conditions, the instructions shall state that means for
disconnection must be incorporated in the fixed wiring in accordance with
the wiring rules.
1. INSTRUCTIONS FOR THE INSTALLER
INSTALLING A DOMESTIC APPLIANCE CAN BE A COMPLICATED OPERATION WHICH IF NOT CARRIED OUT CORRECTLY, CAN SERIOUSLY
AFFECT CONSUMER SAFETY. IT IS FOR THIS REASON THAT THE TASK SHOULD BE UNDERTAKEN BY A PROFESSIONALLY QUALIFIED
PERSON WHO WILL CARRY IT OUT IN ACCORDANCE WITH THE TECHNICAL REGULATIONS IN FORCE. IN THE EVENT THAT THIS ADVICE IS
IGNORED AND THE INSTALLATION IS CARRIED OUT BY AN UNQUALIFIED PERSON, THE MANUFACTURER DECLINES ALL RESPONSIBILITY
FOR ANY TECHNICAL FAILURE OF THE PRODUCT WHETHER OR NOT IT RESULTS IN DAMAGE TO GOODS OR INJURY TO INDIVIDUALS.
These instructions are for qualified personnel, installation of
equipment must be in line with the relevant national standard. (For
U.K. only: by law the gas installation\commissioning must be
carried out by a "Gas Safe" installer)
All work must be carried out with the electricity supply disconnected.
The rating plate on the hob shows the type of gas with which it is
designed to be used. Connection to the mains gas supply or gas
cylinder should be carried out after having checked that it is regulated
for the type of gas with which it will be supplied. If it is not correctly
regulated see the instructions in the following paragraphs to change
gas setting.
For liquid gas (cylinder gas) use pressure regulators which comply
with the relevant national standards.
Use only pipes,washers and sealing washers which comply with the
relevant national standards.
For some models a conic link is furnished to outfit for the installation in
the countries where this type of link is obligatory; in picture 8 it is
pointed out how to recognize the different types of links (CY =
cylindrical, CO = conic). In every case the cylindrical part of the link
has to be connected to the hob.
The flexible tube shall be fitted in such a way that it cannot come into
contact with a moveable part of the housing unit (e.g. a drawer) and does
not pass through any space where it may become crushed/ kinked or
damaged in any way.
When connecting the hob to the gas supply via use offlexible hoses
please ensure that the maximum distance covered by the hose does
not exceed 2 metres.
A: 1/2 Male Adaptor Cylindirical
To prevent any potential damage to the hob please carry out the
installation following this sequence (picture 6):
1)As illustrated, assemble parts in sequence:
Cylindirical-Cylindirical
C: 1/2 Female Gas Adaptor Conical-Cylindirical or
B: 1/2 Seal
3)Attach fitting C to mains gas supply using rigid copper pipe or
flexible steel pipe.
2)Tighten the joints with the spanner, remembering to twist the
pipes into position.
2.2. GAS CONNECTION


Joignez-vous à la conversation sur ce produit
Ici, vous pouvez partager ce que vous pensez du Hoover HVG6BR4WK3W Table de cuisson. Si vous avez une question, lisez d’abord attentivement le mode d’emploi. La demande d’un mode d’emploi peut être effectuée en utilisant notre formulaire de contact.