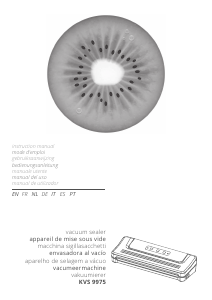
Mode d’emploi Kiwi KVS-9975 Appareils de mise sous vide
Besoin d'un mode d’emploi pour votre Kiwi KVS-9975 Appareils de mise sous vide ? Ci-dessous, vous pouvez consulter et télécharger gratuitement le mode d’emploi PDF en français. Ce produit a actuellement 0 questions fréquemment posées, 0 commentaires et 0 votes. Si ce n'est pas le mode d’emploi que vous souhaitez, veuillez nous contacter.
Votre produit est défectueux et le mode d’emploi n’offre aucune solution ? Rendez-vous à un Repair Café pour obtenir des services de réparation gratuits.
Mode d’emploi
Loading…

Loading…
Évaluation
Dites-nous ce que vous pensez du Kiwi KVS-9975 Appareils de mise sous vide en laissant une note de produit. Vous voulez partager vos expériences avec ce produit ou poser une question ? Veuillez laisser un commentaire au bas de la page.En savoir plus sur ce mode d’emploi
Nous comprenons qu’il est agréable d’avoir un mode d’emploi papier pour vos Kiwi KVS-9975 Appareils de mise sous vide. Vous pouvez toujours télécharger le mode d’emploi depuis notre site Web et l’imprimer vous-même. Si vous souhaitez disposer d’un mode d’emploi original, nous vous recommandons de contacter Kiwi. Ils pourront peut-être fournir un mode d’emploi original. Recherchez-vous le mode d’emploi de votre Kiwi KVS-9975 Appareils de mise sous vide dans une autre langue ? Choisissez votre langue préférée sur notre page d’accueil et recherchez le numéro de modèle pour voir si nous l’avons disponible.
Caractéristiques
| Marque | Kiwi |
| Modèle | KVS-9975 |
| Catégorie | Appareils de mise sous vide |
| Type de fichier | |
| Taille du fichier | 1.11 MB |
Tous les modes d’emploi pour Kiwi Appareils de mise sous vide
Plus de modes d’emploi de Appareils de mise sous vide
Joignez-vous à la conversation sur ce produit
Ici, vous pouvez partager ce que vous pensez du Kiwi KVS-9975 Appareils de mise sous vide. Si vous avez une question, lisez d’abord attentivement le mode d’emploi. La demande d’un mode d’emploi peut être effectuée en utilisant notre formulaire de contact.