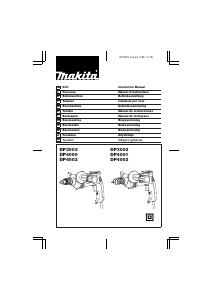
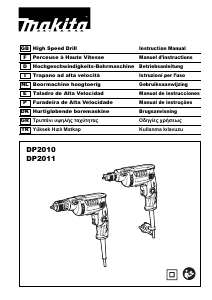
Mode d’emploi Makita DP4010 Perceuse visseuse

Besoin d'un mode d’emploi pour votre Makita DP4010 Perceuse visseuse ? Ci-dessous, vous pouvez consulter et télécharger gratuitement le mode d’emploi PDF en français. Ce produit a actuellement 3 questions fréquemment posées, 0 commentaires et 0 votes. Si ce n'est pas le mode d’emploi que vous souhaitez, veuillez nous contacter.

Votre produit est défectueux et le mode d’emploi n’offre aucune solution ? Rendez-vous à un Repair Café pour obtenir des services de réparation gratuits.

Mode d’emploi

Loading…

4
Reversing switch action (Fig. 2)
This tool has a reversing switch to change the direction of
rotation. Move the reversing switch lever to the
D posi-
tion (A side) for clockwise rotation or the
E position (B
side) for counterclockwise rotation.
CAUTION:
Always check the direction of rotation before operation.
Use the reversing switch only after the tool comes to a
complete stop. Changing the direction of rotation
before the tool stops may damage the tool.
Speed change (Fig. 3)
Two speed ranges can be preselected with the speed
change knob.
To change the speed, turn the speed change knob so
that the arrow on the tool body points toward the “I” posi-
tion on the knob for low speed or “II” position for high
speed.
If it is hard to turn the knob, first turn the chuck slightly in
either direction and then turn the knob again.
CAUTION:
Use the speed change knob only after the tool comes
to a complete stop. Changing the tool speed before the
tool stops may damage the tool.
Always set the speed change knob to the correct posi-
tion. If you operate the tool with the speed change knob
positioned halfway between the “I” and “II” position, the
tool may be damaged.
ASSEMBLY
CAUTION:
Always be sure that the tool is switched off and
unplugged before carrying out any work on the tool.
Installing side grip (auxiliary handle) (Fig. 4)
Always use the side grip to ensure operating safety.
Install the side grip so that the teeth on the grip fit in
between the protrusions on the tool barrel.
Then tighten the grip by turning clockwise at the desired
position.
NOTE:
The depth gauge cannot be used at the position where
the depth gauge strikes against the gear housing.
Installing or removing drill bit
For Model DP4010 (Fig. 5)
To install the bit, place it in the chuck as far as it will go.
Tighten the chuck by hand. Place the chuck key in each
of the three holes and tighten clockwise. Be sure to
tighten all three chuck holes evenly.
To remove the bit, turn the chuck key counterclockwise in
just one hole, then loosen the chuck by hand.
After using the chuck key, be sure to return to the original
position.
For Model DP4011 (Fig. 6)
Hold the ring and turn the sleeve counterclockwise to
open the chuck jaws. Place the bit in the chuck as far as it
will go. Hold the ring firmly and turn the sleeve clockwise
to tighten the chuck.
To remove the bit, hold the ring and turn the sleeve coun-
terclockwise.
Depth gauge (Fig. 7)
The depth gauge is convenient for drilling holes of uni-
form depth. Loosen the side grip and insert the depth
gauge into the hole in the grip base. Adjust the depth
gauge to the desired depth and tighten the side grip.
NOTE:
The depth gauge cannot be used at the position where
the depth gauge strikes against the tool body.
OPERATION
Holding the tool
Always use side grip (auxiliary handle) and firmly hold
the tool by side grip and switch handle during operations.
Drilling operation
CAUTION:
Pressing excessively on the tool will not speed up the
drilling. In fact, this excessive pressure will only serve
to damage the tip of your bit, decrease the tool perfor-
mance and shorten the service life of the tool.
There is a tremendous force exerted on the tool/bit at
the time of hole break through. Hold the tool firmly and
exert care when the bit begins to break through the
workpiece.
A stuck bit can be removed simply by setting the
reversing switch to reverse rotation in order to back out.
However, the tool may back out abruptly if you do not
hold it firmly.
• Always secure small workpieces in a vise or similar
hold-down device.
Avoid drilling in material that you suspect contains hid-
den nails or other things that may cause the bit to bind
or break.
Drilling in wood
When drilling in wood, the best results are obtained with
wood drills equipped with a guide screw. The guide
screw makes drilling easier by pulling the bit into the
workpiece.
Drilling in metal
To prevent the bit from slipping when starting a hole,
make an indentation with a center-punch and hammer at
the point to be drilled. Place the point of the bit in the
indentation and start drilling.
Use a cutting lubricant when drilling metals. The excep-
tions are iron and brass which should be drilled dry.
MAINTENANCE
CAUTION:
Always be sure that the tool is switched off and
unplugged before attempting to perform inspection or
maintenance.
Cleaning vent holes (Fig. 8)
The tool and its air vents have to be kept clean. Regularly
clean the tools air vents or whenever the vents start to
become obstructed.
To maintain product SAFETY and RELIABILITY, repairs,
carbon brush inspection and replacement, any other
maintenance or adjustment should be performed by Mak-
ita Authorized Service Centers, always using Makita
replacement parts.
Télécharger mode d’emploi en Français (PDF, 0.36 MB)
(Tenez compte de l’environnement et imprimez ce manuel uniquement si c’est vraiment nécessaire)

Loading…

Évaluation

Dites-nous ce que vous pensez du Makita DP4010 Perceuse visseuse en laissant une note de produit. Vous voulez partager vos expériences avec ce produit ou poser une question ? Veuillez laisser un commentaire au bas de la page.
Etes-vous satisfait du Makita DP4010 Perceuse visseuse ?
Oui Non
Soyez le premier à évaluer ce produit
0 évaluations

Joignez-vous à la conversation sur ce produit

Ici, vous pouvez partager ce que vous pensez du Makita DP4010 Perceuse visseuse. Si vous avez une question, lisez d’abord attentivement le mode d’emploi. La demande d’un mode d’emploi peut être effectuée en utilisant notre formulaire de contact.

En savoir plus sur ce mode d’emploi

Nous comprenons qu’il est agréable d’avoir un mode d’emploi papier pour vos Makita DP4010 Perceuse visseuse. Vous pouvez toujours télécharger le mode d’emploi depuis notre site Web et l’imprimer vous-même. Si vous souhaitez disposer d’un mode d’emploi original, nous vous recommandons de contacter Makita. Ils pourront peut-être fournir un mode d’emploi original. Recherchez-vous le mode d’emploi de votre Makita DP4010 Perceuse visseuse dans une autre langue ? Choisissez votre langue préférée sur notre page d’accueil et recherchez le numéro de modèle pour voir si nous l’avons disponible.

Caractéristiques

Marque Makita
Modèle DP4010
Catégorie Perceuses visseuses
Type de fichier PDF
Taille du fichier 0.36 MB

Tous les modes d’emploi pour Makita Perceuses visseuses
Plus de modes d’emploi de Perceuses visseuses

Foire aux questions sur Makita DP4010 Perceuse visseuse

Notre équipe d’assistance recherche des informations utiles sur les produits et des réponses aux questions fréquemment posées. Si vous trouvez une inexactitude dans notre foire aux questions, veuillez nous le faire savoir en utilisant notre formulaire de contact.

Je n'arrête pas d'endommager la tête de vis lorsque j'utilise la perceuse-visseuse. Pour quelle raison ? Vérifié

Il y a moyen de régler la plupart des perceuses-visseuses pour qu'elles vissent plus fort ou plus doucement. Si la tête de vis continue à être endommagée, il faut probablement régler différemment la perceuse-visseuse. Pour un appareil sans fil, assurez-vous toujours que la batterie est chargée pour obtenir un résultat optimal.

Cela a été utile (97) En savoir plus

Dois-je porter une protection auditive lorsque j'utilise une perceuse ? Vérifié

Oui, vous devriez. Bien que la quantité de bruit produite par une perceuse varie selon les marques et les modèles, une exposition prolongée aux bruits forts peut entraîner des lésions auditives permanentes. C'est pourquoi il est judicieux de porter une protection auditive.

Cela a été utile (37) En savoir plus

Puis-je ranger des outils électriques dans un hangar ou un garage ? Vérifié

En général, vous pouvez ranger les outils électriques dans un cabanon ou un garage, même s'il y gèle parfois. Cependant, pour préserver la durée de vie de l'outil électrique, il est préférable de le stocker dans un endroit sec et sans variations de température importantes. Dans une remise ou un garage, les différences de température peuvent provoquer la formation de condensation, ce qui peut provoquer de la rouille. De plus, les outils fonctionnant sur piles durent moins longtemps et se chargent moins bien à des températures très basses. Pour être sûr de la manière dont votre outil électrique doit être stocké, lisez toujours attentivement le manuel d'utilisation.

Cela a été utile (29) En savoir plus
Mode d’emploi Makita DP4010 Perceuse visseuse

Produits connexes

Catégories associées

×
Download