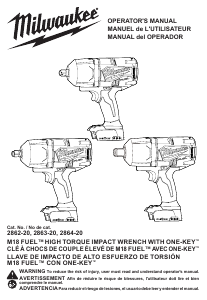
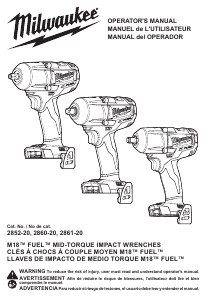
Mode d’emploi Milwaukee 2860-20 Visseuse à choc

Besoin d'un mode d’emploi pour votre Milwaukee 2860-20 Visseuse à choc ? Ci-dessous, vous pouvez consulter et télécharger gratuitement le mode d’emploi PDF en français. Ce produit a actuellement 1 de question fréquemment posée, 0 de commentaires et 0 votes. Si ce n'est pas le mode d’emploi que vous souhaitez, veuillez nous contacter.

Votre produit est défectueux et le mode d’emploi n’offre aucune solution ? Rendez-vous à un Repair Café pour obtenir des services de réparation gratuits.

Mode d’emploi

Loading…

4
OPERATION
WARNING
Always remove battery pack before
changing or removing accesso-
ries. Only use accessories specically recom-
mended for this tool. Others may be hazardous.
WARNING
To reduce the risk of injury, always
wear safety goggles or glasses
with side shields.
Using the Drive Control
The drive control button is used to adjust the torque,
rotation speed (RPM), and impact speed (IPM) for
the application (see Specications chart for RPM
and IPM).
To select the drive control mode:
1. Pull and release the trigger to turn on the tool. The
current mode indicator is lit.
2. Press the drive control button to cycle through
the 3 modes. When the desired mode indicator is
lit, begin work.
Mode
Indicator
Drive Control
Button
Mode
Indicators
Using the Control Switch
The control switch may be set to three positions:
forward, reverse and lock. Due to a lockout mecha-
nism, the control switch can only be adjusted when
the ON/OFF switch is not pressed. Always allow the
motor to come to a complete stop before using the
control switch.
1. For forward (clockwise) rotation, push the control
switch in the direction shown. Check the direction
of rotation before use.
2. For reverse (counterclockwise) rotation, push the
control switch in the direction shown. Check the
direction of rotation before use.
3. To lock the trigger, push the control switch to the
center position. The trigger will not work when the
control switch is in the locked position.
Always remove the battery pack before performing
maintenance, changing accessories, storing the
tool and any time the tool is not in use.
Push for
Forward
Push for
Reverse
PUSH TO CENTER TO LOCK
Starting, Stopping and Controlling Speed
These tools may be operated at any speed from 0
to full speed.
1. To start the tool, pull the trigger.
NOTE: An LED is turned on when the trigger is
pulled.
2. To vary the driving speed, increase or decrease
pressure on the trigger. The further the trigger is
pulled, the greater the speed.
3. To stop the tool, release the trigger.
SYMBOLOGY
Volts
Direct Current
No Load Revolutions per Minute (RPM)
Impacts per Minute Under Load (IPM)
C
US
UL Listing for Canada and U.S.
ASSEMBLY
WARNING
Recharge only with the charger
specied for the battery. For spe-
cic charging instructions, read the operators
manual supplied with your charger and battery.
Removing/Inserting the Battery
To remove the battery, push in the release buttons
and pull the battery pack away from the tool.
WARNING
Always remove battery pack before
changing or removing accessories.
To insert the battery, slide the pack into the body
of the tool. Make sure it latches securely into place.
WARNING
Only use accessories specically
recommended for this tool. Others
may be hazardous.
WARNING
Use only sockets and other acces-
sories specifically designed for
use on impact wrenches. Other sockets and
accessories might shatter or break causing in-
jury.
Attaching and Removing Accessories
1/2" Impact Wrench with Pin (Cat. No. 2860-20)
1. Use only the appropriate size Square Drive
Sockets.
2. To attach a socket, align the hole in the accessory
with the detent pin on the anvil. Hold the detent
pin in while pushing the socket onto the anvil.
The detent pin will snap into place in the hole to
secure the socket.
3. To remove the socket, insert a nail or other thin
object into the hole in the accessory and press
in the detent pin. Pull the accessory o󰀨 the anvil.
3/8" Impact Wrench with Ring (Cat. No. 2852-20)
1/2" Impact Wrench with Ring (Cat. No. 2861-20)
1. Use only the appropriate size Square Drive
Sockets.
2. To attach a socket, align the accessory with the
anvil and push it rmly over the retaining ring.
3. To remove the accessory, pull the accessory o󰀨
the anvil.
Télécharger mode d’emploi en Français (PDF, 2.27 MB)
(Tenez compte de l’environnement et imprimez ce manuel uniquement si c’est vraiment nécessaire)

Loading…

Évaluation

Dites-nous ce que vous pensez du Milwaukee 2860-20 Visseuse à choc en laissant une note de produit. Vous voulez partager vos expériences avec ce produit ou poser une question ? Veuillez laisser un commentaire au bas de la page.
Etes-vous satisfait du Milwaukee 2860-20 Visseuse à choc ?
Oui Non
Soyez le premier à évaluer ce produit
0 évaluations

Joignez-vous à la conversation sur ce produit

Ici, vous pouvez partager ce que vous pensez du Milwaukee 2860-20 Visseuse à choc. Si vous avez une question, lisez d’abord attentivement le mode d’emploi. La demande d’un mode d’emploi peut être effectuée en utilisant notre formulaire de contact.

En savoir plus sur ce mode d’emploi

Nous comprenons qu’il est agréable d’avoir un mode d’emploi papier pour vos Milwaukee 2860-20 Visseuse à choc. Vous pouvez toujours télécharger le mode d’emploi depuis notre site Web et l’imprimer vous-même. Si vous souhaitez disposer d’un mode d’emploi original, nous vous recommandons de contacter Milwaukee. Ils pourront peut-être fournir un mode d’emploi original. Recherchez-vous le mode d’emploi de votre Milwaukee 2860-20 Visseuse à choc dans une autre langue ? Choisissez votre langue préférée sur notre page d’accueil et recherchez le numéro de modèle pour voir si nous l’avons disponible.

Caractéristiques

Marque Milwaukee
Modèle 2860-20
Catégorie Visseuses à chocs
Type de fichier PDF
Taille du fichier 2.27 MB

Tous les modes d’emploi pour Milwaukee Visseuses à chocs
Plus de modes d’emploi de Visseuses à chocs

Foire aux questions sur Milwaukee 2860-20 Visseuse à choc

Notre équipe d’assistance recherche des informations utiles sur les produits et des réponses aux questions fréquemment posées. Si vous trouvez une inexactitude dans notre foire aux questions, veuillez nous le faire savoir en utilisant notre formulaire de contact.

Puis-je ranger des outils électriques dans un hangar ou un garage ? Vérifié

En général, vous pouvez ranger les outils électriques dans un cabanon ou un garage, même s'il y gèle parfois. Cependant, pour préserver la durée de vie de l'outil électrique, il est préférable de le stocker dans un endroit sec et sans variations de température importantes. Dans une remise ou un garage, les différences de température peuvent provoquer la formation de condensation, ce qui peut provoquer de la rouille. De plus, les outils fonctionnant sur piles durent moins longtemps et se chargent moins bien à des températures très basses. Pour être sûr de la manière dont votre outil électrique doit être stocké, lisez toujours attentivement le manuel d'utilisation.

Cela a été utile (6) En savoir plus
Mode d’emploi Milwaukee 2860-20 Visseuse à choc

Produits connexes

Catégories associées