
6
ENGLISH FRANÇAIS
DEUTSCH
NEDERLANDS
ESPAÑOL
ITALIANO
PORTUGUÊS
SVENSKA
Tape 1 is a tape Monitor function which does not override the current
input selection. For example, if the CD is the active input when TAPE
1 is selected, then the CD signal will continue to be selected and sent
to both the TAPE 2, and TAPE 1 OUTPUT sockets, but it is the sound
from recorder connected to Tape 1 that will be heard on the
loudspeakers. Apart from the amber LED to indicate Tape 1 is
engaged, the green LED for the active input will also stay lit.
NOTE
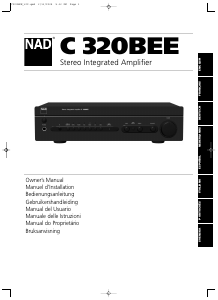
The remote control handset with the C320BEE supplied is of a
universal NAD type, designed to operate several NAD models. Some
buttons on this handset are inoperative as the functions aren’t
supported by the C320BEE. The Video 2 and Video 3 input selector
buttons on the remote control handset are inoperative in the case of
the C320BEE.
6 Soft clipping indicator - The green Soft Clipping LED shows that
the Soft Clipping mode is engaged. Refer also to “Rear Panel
Connections, Section 12 Soft Clipping” for more information.
7 Tone controls - The NAD C320BEE is fitted with BASS and TREBLE
tone controls to adjust the tonal balance of your system.
The 12 o’clock position is ‘flat’ with no boost or cut, and an indent
indicates this position. Rotate the control clockwise to increase the
amount of Bass or Treble. Rotate the control anti-clockwise to
decrease the amount of Bass or Treble. The Tone controls do not
affect recordings made using the Tape outputs but will affect the
signal going to the Pre-amp output (Pre Out).
8 Tone defeat - The TONE DEFEAT switch by-passes the tone control
section of the NAD C320BEE. If the Tone Controls are not normally
used and left in the 12 o’clock position, then it is advisable to switch
out the Tone Control section altogether by using this switch. In the
‘out’ position, the Tone Control circuits are active, pushing the TONE
DEFEAT switch ‘in’ bypasses the Tone Control section.
9 Balance - The BALANCE control adjusts the relative levels of the left
and right speakers. The 12 o’clock position provides equal level to
the left and right channels. A detent indicates this position.
Rotating the control clockwise moves the balance towards the right.
Rotating the control anti-clockwise moves the balance to the left.
The BALANCE control does not affect recordings made using the
Tape outputs but will affect the signal going to the Pre-amp output
(Pre Out).
10 Volume - The VOLUME control adjusts the overall loudness of the
signals being fed to the loudspeakers. It is motor driven and can be
adjusted from the remote control handset. The VOLUME control
does not affect recordings made using the Tape outputs but will
affect the signal going to the Pre-amp output (Pre Out).
On the remote control handset, press the MUTE button to
temporarily switch off the sound to the speakers and headphones.
Mute mode is indicated by the active input LED flashing. Press the
MUTE button again to restore sound. Mute does not affect
recordings made using the Tape outputs but will affect the signal
going to the Pre-amp output (Pre Out).
REAR PANEL CONNECTIONS
1 IR Input / output - This input is connected to the output of an IR
(infrared) repeater (Xantech or similar), or the IR output of another
component to allow control of the C320BEE from a remote location.
Ask your dealer or custom installer for further details.
2 Disc input - Input for additional line level input signals such as CD,
Mini Disc player or the output signal from a step-up amplifier for a
turntable. Use a twin RCA-to-RCA lead to connect the auxiliary unit’s
left and right ‘Audio Outputs’ to this input.
3 CD input - Input for a CD or other line-level signal source. Use a twin
RCA-to-RCA lead to connect the CD player’s left and right ‘Audio
Outputs’ to this input. The NAD C320BEE only accepts analogue
signals from your CD player.
4 Video input - Input for the audio signal from a stereo VCR (or stereo
TV/Satellite/Cable receiver) or other line-level audio source. Using
twin RCA-to-RCA leads, connect to the left and right ‘Audio
Outputs’ of the unit to these inputs. Note: These are audio inputs
only.
5 AUX input - Input for additional line level input signals such as
another CD player. Use a twin RCA-to-RCA lead to connect the
auxiliary unit’s left and right ‘Audio Outputs’ to this input.
6 Tuner input - Input for a tuner or other line-level signal source. Use
a twin RCA-to-RCA lead to connect the tuner left and right ‘Audio
Outputs’ to this input.
7 Tape 2 In/Out - Connections for analogue recording and playback
to an audio tape recorder of any type. Using twin RCA-to-RCA leads,
connect to the left and right ‘Audio Output’ of the tape machine to
the TAPE 2 IN sockets for playback and tape monitoring. Connect the
left and right ‘Audio Input’ of the tape machine to the TAPE 2 OUT
sockets for recording.
8 Tape 1 In/Out - Connections for analogue recording and playback
to an audio tape recorder of any type. Using twin RCA-to-RCA leads,
connect to the left and right ‘Audio Output’ of the tape machine to
the TAPE 1 IN sockets for playback and tape monitoring. Connect the
left and right ‘Audio Input’ of the tape machine to the TAPE 1 OUT
sockets for recording.
9 Pre out - Connections to an external power amplifier or processor,
such as a surround-sound decoder. In normal use these should be
connected to the Main-In sockets (No. 10) with the links supplied. To
connect your NAD C320BEE to external processor or amplifier
sections first remove these links. Use a twin RCA-to-RCA lead to
connect to the left and right ‘Audio Input’ of the Power amp or
processor to the Pre Out sockets.
NOTE
The Pre-Out output signal will be affected by the NAD C320BEE’s
volume and tone control settings, always turn the amplifier off
before connecting or disconnecting anything from to Pre-Out and
Main-In sockets.
C320BEE_v02.qxd 6/16/2005 5:17 PM Page 6

Joignez-vous à la conversation sur ce produit
Ici, vous pouvez partager ce que vous pensez du NAD C 320BEE Amplificateur. Si vous avez une question, lisez d’abord attentivement le mode d’emploi. La demande d’un mode d’emploi peut être effectuée en utilisant notre formulaire de contact.