Register your product and get support at
HD2637
HD2638
www.philips.com/welcome
Specifications are subject to change without notice
© 2016 Koninklijke Philips N.V.
All rights reserved.
4240 002 02201
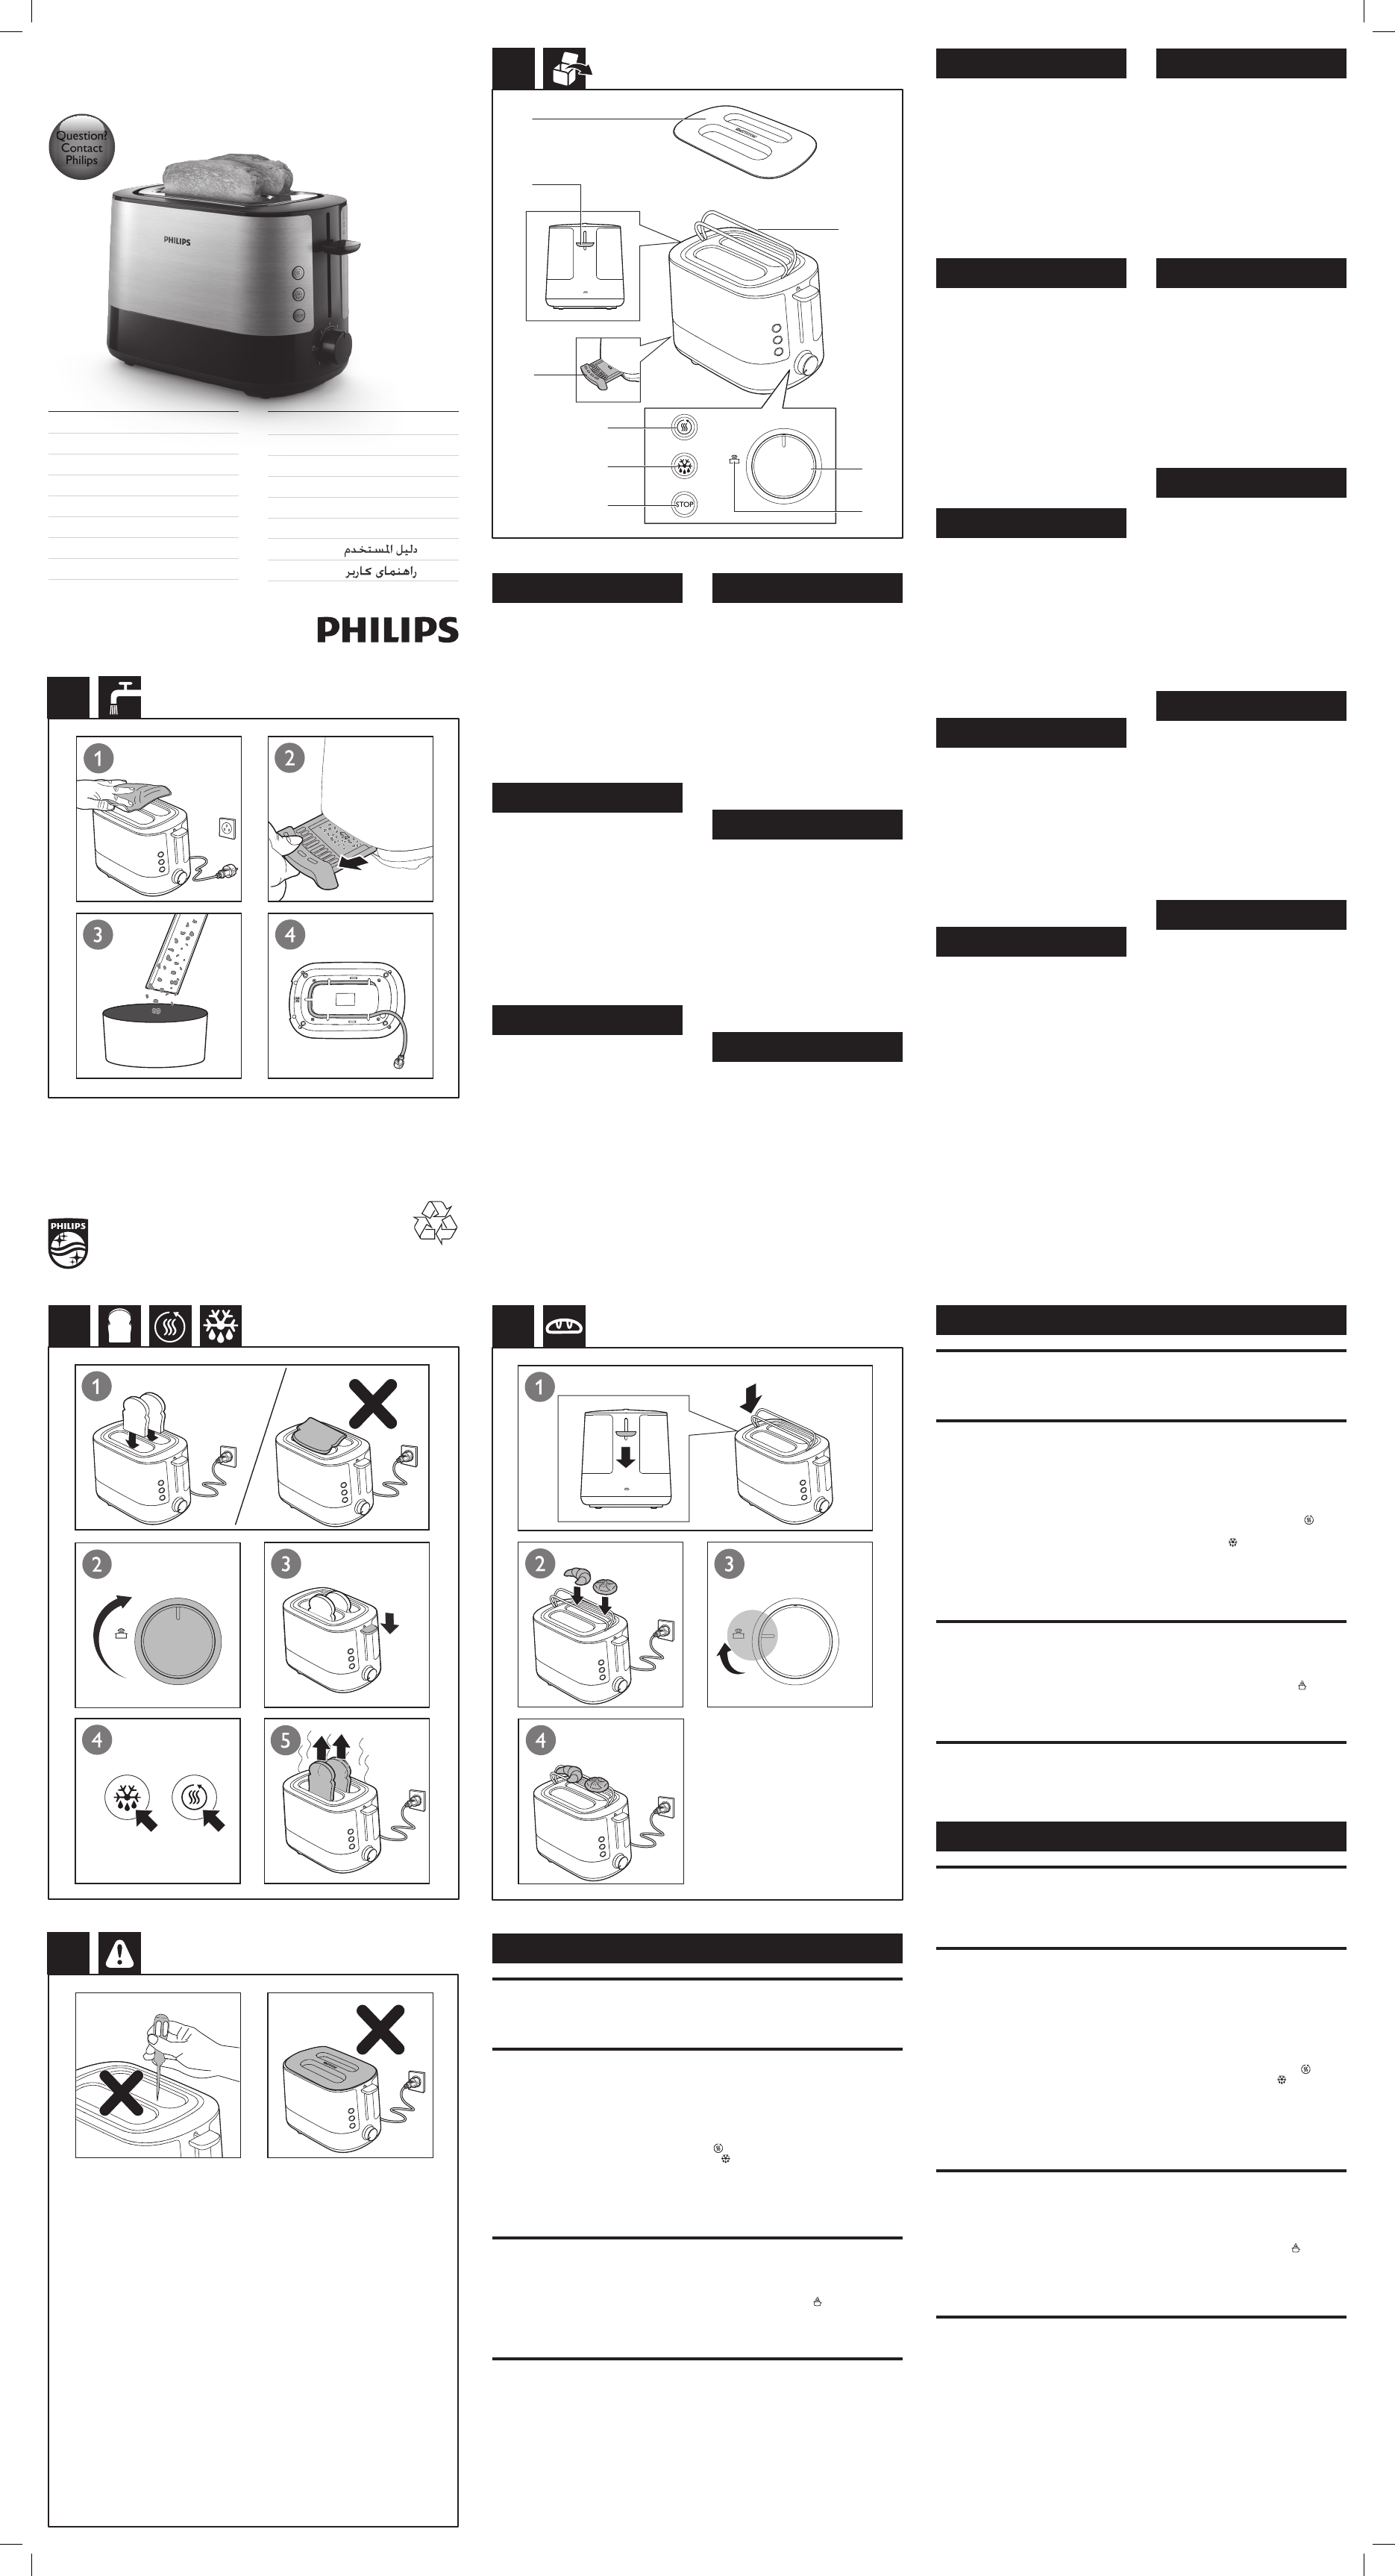
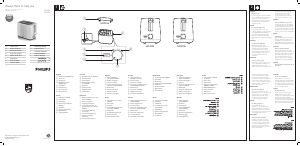
English
a Dust cover (HD2638 only)
b Warming rack lever
c Crumb tray
d Reheat button
e Defrost button
f Stop button
g Bun warming setting
h Browning control
i Warming rack
Dansk
a Støvdæksel (kun HD2638)
b Udløserknap til bollerist
c Krummebakke
d Genopvarmningsknap
e Optøningsfunktion
f Stopknap
g Indstilling for opvarmning af
boller
h Risteindstilling
i Bollerist
Deutsch
a Staubabdeckung (nur
HD2638)
b Brötchenaufsatzhebel
c Krümelschublade
d Aufwärmtaste
e Auftautaste
f Stopptaste
g Aufbackeinstellung
h Röstgradkontrolle
i Brötchenaufsatz
NL Gebruiksaanwijzing
NO Brukerhåndbok
PT Manual do utilizador
SV Användarhandbok
TR Kullanım kılavuzu
VI Hướng dẫn sử dụng
AR
FA
EN User manual
DA Brugervejledning
DE Benutzerhandbuch
ES Manual del usuario
FI Käyttöopas
FR Mode d’emploi
ID Buku Petunjuk Pengguna
IT Manuale utente
2
1
2
3
5
6
7
4
3
1
2
3
5
6
7
4
4
5
*
English
* Do not use any tool to clean the
slot.
Dansk
* Brug ikke redskaber til rengøring
af risten.
Deutsch
* Verwenden Sie kein Werkzeug
zum Reinigen der Toastkammer.
Español
*No utilice ninguna herramienta
para limpiar la ranura.
Suomi
* Älä käytä aukon puhdistamiseen
työkalua.
Français
*N'utilisez pas d'outil pour
nettoyer l'encoche.
Indonesia
* Jangan gunakan alat apa pun
untuk membersihkan slot roti.
Italiano
*Non utilizzare alcun utensile per
pulire l'alloggiamento.
English
Before rst use
Put the toaster in a properly ventilated room and select the highest browning
setting. Let the toaster complete a few toasting cycles without bread in it. This
burns o any dust and prevents unpleasant smells.
Toast, reheat, or defrost bread (g.2)
Note:
• Do not operate the appliance without the crumb tray.
To toast bread, follow the steps 1, 2, 3, 5.
• Select a low setting (1-2) for lightly toasted bread.
• Select a high setting (5-7) for darkly toasted bread.
To reheat bread, press the reheat button (
) after step 3.
To defrost bread, press the defrost button ( ) after step 3.
Note:
• You can stop the toasting process and pop up the bread at any time by
pressing the stop button (STOP) on the toaster.
• The reheat function has a preset duration. The toasting time does not
change when you turn the browning control to another setting.
Bun warming (g.3)
To warm buns, follow the steps below:
a Push down the warming rack lever to unfold the warming rack.
b Turn the browning control to the bun warming setting ( ).
Note:
• Never put the rolls to be warmed up directly on top of the toaster. Always
use the warming rack to avoid damage to the toaster.
Cleaning (g.4)
Warning:
• Never use scouring pads, abrasive cleaning agents or aggressive liquids
to clean the appliance.
Dansk
Før apparatet tages i brug
Placer brødristeren i et rum med ordentlig udluftning, og vælg den højeste
bruningsindstilling. Lad brødristeren gennemføre et par ristninger uden brød.
Derved afbrændes eventuelle støvpartikler, som kan give en ubehagelig lugt.
Rist, genopvarm eller optø brød (g. 2)
Bemærk :
• Brug ikke apparatet uden krummebakken.
Ristning af brød: Følg trin 1, 2, 3, 5.
• Vælg en lav indstilling (1-2) for at få let ristet brød.
• Vælg en høj indstilling (5-7) for at få mørkere ristet brød.
Du kan genopvarme brød ved at trykke på genopvarmningsknappen (
)
efter trin 3.
Du kan optø brød ved at trykke på optøningsknappen ( ) efter trin 3.
Bemærk:
• Du kan når som helst afbryde ristningen og få brødet til at springe op ved
at trykke på stopknappen (STOP) på brødristeren.
• Genopvarmningsfunktionen har en forudindstillet varighed. Ristetiden
ændres ikke, når du drejer risteindstillingen til en anden indstilling.
Opvarmning af boller (g. 3)
Du kan opvarme boller ved at følge nedenstående trin:
a Tryk udløseren til bolleristen ned, så bolleristen foldes ud.
b Drej risteindstillingen til indstillingen for opvarmning af boller ( ).
Bemærk:
• Læg aldrig bollerne, der skal varmes op, direkte oven på brødristeren.
Brug altid bolleristen for at undgå at beskadige brødristeren.
Rengøring (g. 4)
Advarsel:
• Brug aldrig skuresvampe eller skrappe rengøringsmidler til rengøring af
apparatet.
Deutsch
Vor dem ersten Gebrauch
Stellen Sie den Toaster in ein ausreichend belüftetes Zimmer, und wählen Sie
die höchste Röststufe aus. Lassen Sie den Toaster einige Toastvorgänge ohne
Brot durchführen. Dadurch verbrennt Staub, und es werden unangenehme
Gerüche verhindert.
Toasten, Aufwärmen und Auftauen von Brot
(Abb. 2)
Hinweis:
• Verwenden Sie das Gerät niemals ohne die Abtropfschale.
Um Brot zu toasten, folgen Sie den Schritten 1, 2, 3 und 5.
• Wählen Sie eine geringe Einstellung (1-2) für leicht getoastetes Brot aus.
• Wählen Sie eine hohe Einstellung (5-7) für dunkel getoastetes Brot aus.
Um Brot aufzuwärmen, drücken Sie nach Schritt 3 die Aufwärmtaste (
).
Um Brot aufzutauen, drücken Sie nach Schritt 3 die Auftautaste ( ).
Hinweis:
• Sie können den Toastvorgang jederzeit abbrechen, indem Sie die Taste
(STOP) am Toaster drücken. Das Brot wird sofort ausgeworfen.
• Die Aufwärmfunktion ist auf eine bestimmte Zeitdauer voreingestellt. Die
Dauer des Toastvorgangs ändert sich nicht, wenn Sie mit dem Regler für
die Bräunungseinstellung eine andere Einstellung wählen.
Aufbacken (Abb. 3)
Um Brötchen aufzubacken, folgen Sie den untenstehenden Schritten:
a Schieben Sie den Hebel nach unten, um den Brötchenaufsatz
aufzuklappen.
b Stellen Sie die Röstgradkontrolle auf die Aufbackeinstellung ( ).
Hinweis:
• Legen Sie die Brötchen zum Aufbacken niemals direkt auf den Toaster.
Verwenden Sie immer den Brötchenaufsatz, um Beschädigungen des
Toasters zu vermeiden.
Reinigung (Abb. 4)
Warnung:
• Benutzen Sie zum Reinigen des Geräts keine Scheuerschwämme und
-mittel oder aggressive Flüssigkeiten.
1
1
2
3
5
6
7
4
a
b
c
d
e
f
h
g
i
Español
a Cubierta antipolvo (solo
modelo HD2638)
b Palanca de la rejilla
calientabollos
c Bandeja recogemigas
d Botón para recalentar
e Botón para descongelar
f Botón de parada
g Posición para calentar bollos
h Control de tostado
i Rejilla calientabollos
Suomi
a Pölysuojus (vain HD2638)
b Lämmitystelineen vipu
c Murutarjotin
d Uudelleenlämmityspainike
e Pakastetun leivän paahto-
ohjelma
f Pysäytyspainike
g Sämpylöiden lämmitysasetus
h Paahtoasteen säätö
i Lämmitysteline
Français
a Couvercle anti-poussière
(HD2638 uniquement)
b Manette de la grille de
réchauffage
c Ramasse-miettes
d Bouton de réchauffage
e Bouton de décongélation
f Bouton d'arrêt
g Fonction de réchauffage de
petits pains
h Réglage du dorage
i Grille de réchauffage
Indonesia
a Pelindung debu (HD2638 saja)
b Tuas rak penghangat
c Baki serpihan
d Tombol pemanas ulang
e Tombol pencair
f Tombol Stop
g Setelan penghangat bun
h Kontrol kematangan
i Rak penghangat
Italiano
a Coperchio antipolvere (solo
HD2638)
b Leva della griglia
scaldabriosche
c Vassoio raccoglibriciole
d Pulsante di riscaldamento
e Pulsante scongelamento
f Pulsante di arresto
g Impostazione riscaldamento
panini
h Controllo doratura
i Griglia scaldabriosche
Nederlands
a Stofkap (alleen voor HD2638)
b Hendel voor opwarmrek
c Kruimellade
d Opwarmknop
e Ontdooiknop
f Stopknop
g Opwarmstand
h Bruiningsknop
i Opwarmrek
Norsk
a Støvdeksel (bare HD2638)
b Håndtak til varmerist
c Smulebrett
d Oppvarmingsknapp
e Tineknapp
f Stopp-knapp
g Innstilling for å varme opp bolle
h Bruningsbryter
i Varmerist
Português
a Protecção contra o pó (apenas
HD2638)
b Manípulo da estufa de
aquecimento
c Tabuleiro das migalhas
d Botão de reaquecimento
e Botão de descongelação
f Botão de paragem
g Regulação para aquecimento
de pão
h Controlo de torragem
i Estufa de aquecimento
Svenska
a Dammskydd (endast HD2638)
b Spak för uppvärmningsställ
c Smulbricka
d Återuppvärmningsknapp
e Upptiningsknapp
f Stoppknapp
g Uppvärmningsinställning
h Rostningsreglage
i Uppvärmningsställ
Türkçe
a Toz kapağı (yalnıza HD2638)
b Isıtma teli kolu
c Kırıntı tepsisi
d Tekrar ısıtma düğmesi
e Buz çözme düğmesi
f Durdurma düğmesi
g Poğaça ısıtma ayarı
h Kızartma ayarı
i Isıtma teli
Tiếng Việt
a Nắp chống bụi (chỉ có ở kiểu
HD2638)
b Cần vỉ hâm nóng
c Khay đựng mảnh vụn bánh mì
d Nút hâm nóng
e Nút rã đông
f Nút dng
g Cài đặt hâm nóng bánh
h Điều khiển độ chín vàng
i Vỉ hâm nóng
a ( HD2638) ٍ
b
c
d
e
f
g
h
i
a (HD2638 )
b
c
d
e
f
g
h
i
Nederlands
*Gebruik geen voorwerpen om
de sleuf schoon te maken.
Norsk
* Ikke bruk noe verktøy for å
rengjøre sporet.
Português
* Não utilize nenhum utensílio
para limpar a ranhura.
Svenska
*Använd inga verktyg när du
rengör facket.
Türkçe
* Yuvayı temizlemek için herhangi
bir araç kullanmayın.
Tiếng Việt
* Không sử dụng bất kỳ dụng cụ nào để
làm sạch khe.
. *
. *
Question?
Contact
Philips
Always there to help you


Joignez-vous à la conversation sur ce produit
Ici, vous pouvez partager ce que vous pensez du Philips HD2637 Grille pain. Si vous avez une question, lisez d’abord attentivement le mode d’emploi. La demande d’un mode d’emploi peut être effectuée en utilisant notre formulaire de contact.
répondre | Cela a été utile (3) (Traduit par google)
répondre | Cela a été utile (3) (Traduit par google)