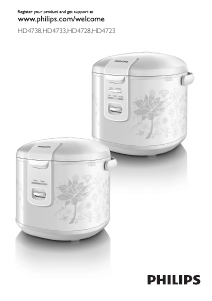
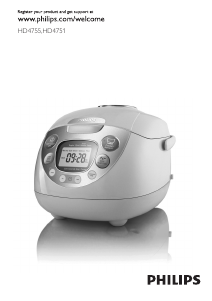
EN User manual FR Mode d’emploi
2
5
7
9 10
8
4
22
21
29
25
27
23
3 4
6
21
h
g
f
e
g
f
h
c
e
d
b
j
l
a
k
11 12
13 14 15 16
17 18 19 20
24
30
26
28
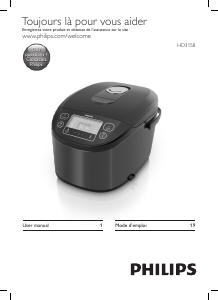
www.philips.com/welcome
User manual
www.philips.com/welcome
Warranty
http://www.philips.com/welcome
Recipe
a
b
c
d
gfe
i
3
a
b
c
d
i
©2016 Koninklijke Philips N.V.
All rights reserved.
HD4725_HD4726_UM_FR_v1.0
HD4725
English
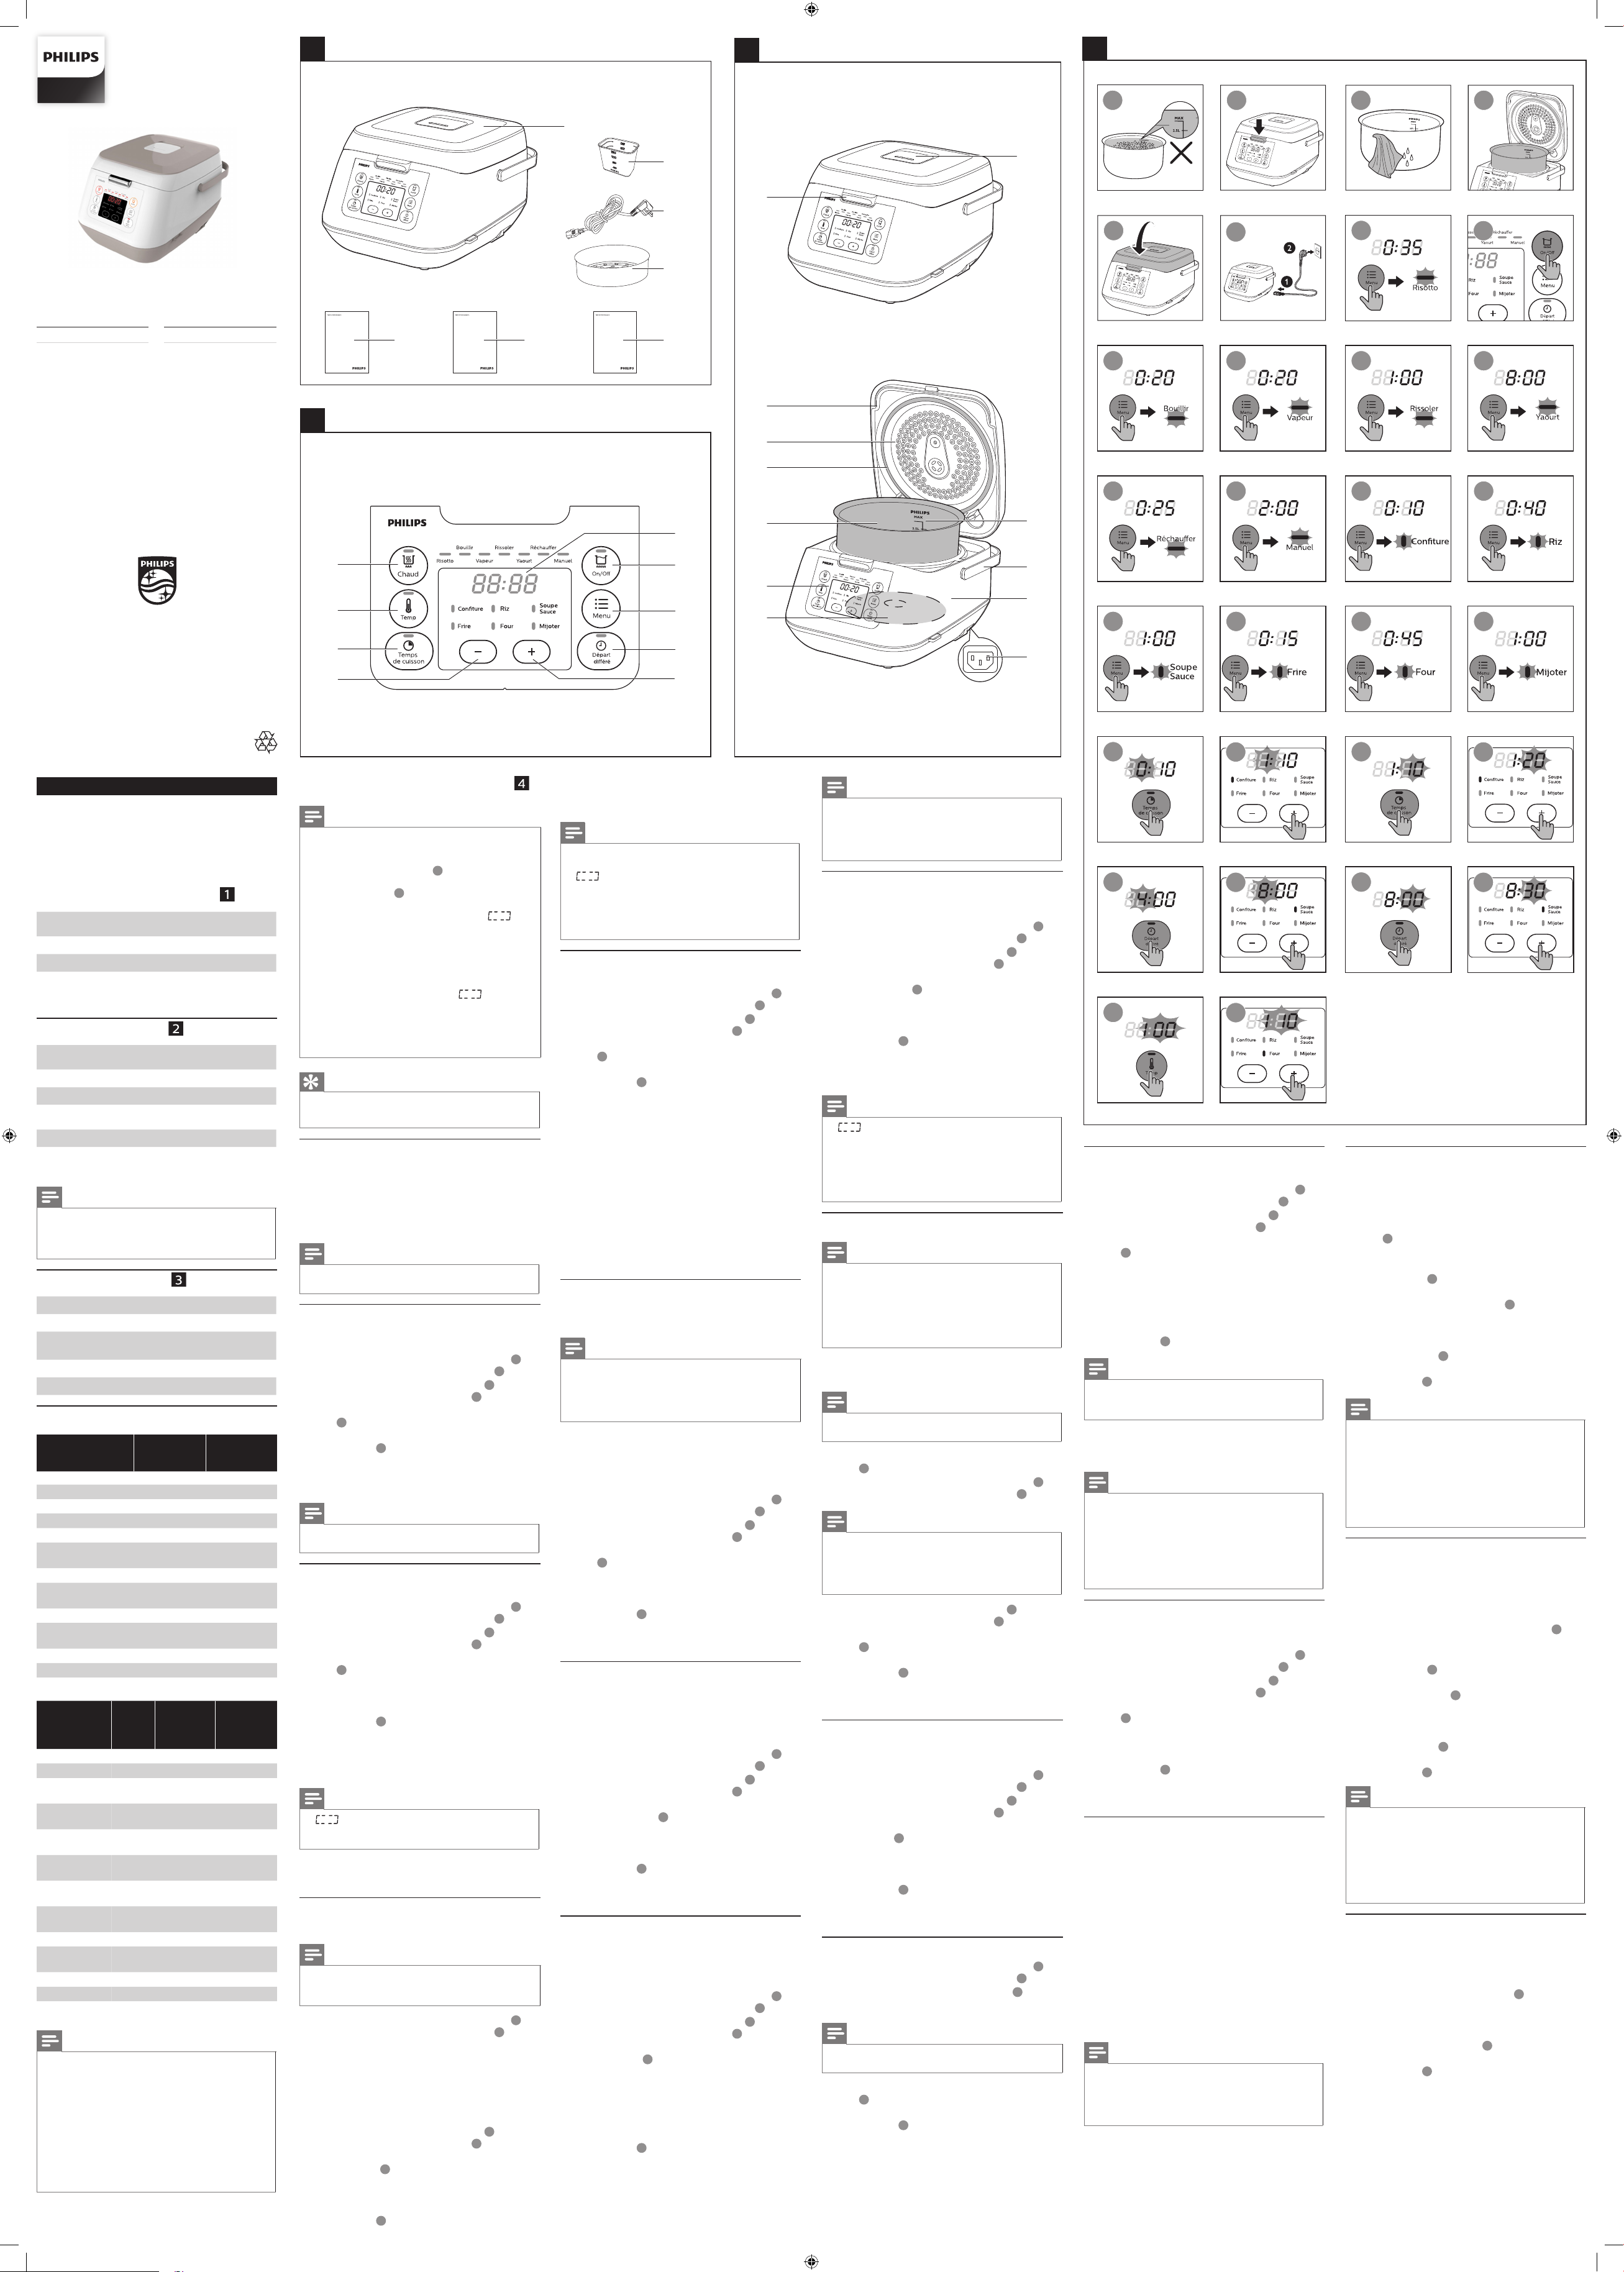
1 Your multicooker
Congratulations on your purchase, and welcome to
Philips!
To fully benet from the support that Philips oers,
register your product at www.philips.com/welcome.
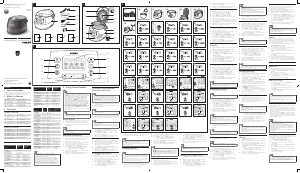
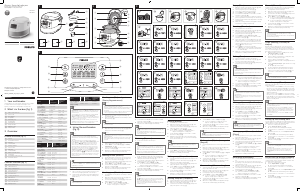
2 What’s in the box (fig.
)
a
Multicooker main
unit
e User manual
b Measuring cup f Recipe booklet
c Power cord g Warranty card
d Steam basket
3 Overview
Product overview (g.
)
a
Detachable steam
vent cap
g
Control panel
b
Lid release button
h
Heating element
c
Top lid
i
Power socket
d
Detachable inner
lid
j
Main unit
e
Sealing ring
k
Cooker handle
f
Inner pot
l
Water level
indications
Note
• Only use the original inner pot that comes with this
appliance. If the inner pot is damaged, contact the
consumer care center in your country/region to order
new inner pots.
Controls overview (g.
)
a
Keep-warm button
f
Preset button
b
Temperature button
g
Menu button
c
Cooking time
button
h
Start/O button
d
Decrease button
i
Display screen
e
Increase button
Functions overview
Functions
Default
cooking time
Cooking time
regulating
range
Pilaf (Risotto) 35 min /
Boil (Bouillir) 20 min 5 min - 2 hr
Steam (Vapeur) 20 min 5 min - 2 hr
Roast (Rissoler) 1 hr /
Yogurt (Yaourt) 8 hr 6-12 hr
Reheat
(Réchauer) 25 min 5-60 min
Manual (Manuel) 2 hr 5 min - 10 hr
Porridge
(Conture) 10 min 5 min - 2 hr
Rice (Riz) 40 min /
Soup (Soupe/
Sauce) 1 hr 20 min-4 hr
Fry (Frire) 15 min 5-60 min
Bake (Four) 45 min 20 min - 2 hr
Stew (Mijoter) 1 hr 20 min - 10 hr
Functions
Preset
time
Default
cooking
tempera-
ture
Tem-
perature
regulating
range
Pilaf (Risotto) 1 - 24 hr 130 - 140°C /
Boil (Bouillir) 1 - 24 hr 90 - 100°C /
Steam
(Vapeur)
1 - 24 hr 100°C /
Roast
(Rissoler)
1 - 24 hr 120 - 130°C /
Yogurt
(Yaourt)
1 - 24 hr 40°C /
Reheat
(Réchauer)
/ 85°C /
Manual
(Manuel)
1 - 24 hr 100°C 30 - 160°C
Porridge
(Conture)
1 - 24 hr 90 - 100°C /
Rice (Riz) 1 - 24 hr 130 - 140°C /
Soup (Soupe/
Sauce)
1 - 24 hr 90 -100°C /
Fry (Frire) / 140 - 160°C /
Bake (Four) / 130°C 40 - 160°C
Stew (Mijoter) 1 - 24 hr 90°C /
Note
• The cooking time for rice (Riz) and pilaf (Risotto)
is determined by the multicooker according to the
quantity of ingredients put in the inner pot.
• You can adjust the cooking temperature for
bake (Four) and manual (Manuel). For bake, the
temperature is available from 40°C to 160°C; for
manual, the temperature is available from 30°C to
160°C.
• After the cooking process has started, you can press
the Start/O button (On/O) to deactivate the
current cooking process, and the multicooker will
turn into standby mode.
4 Using the multicooker (fig.
)
Note
• For all functions, do not exceed the MAX indication
on the inside of the inner pot when putting food,
liquid or ingredients in it, otherwise the food may
overow during cooking (g.
).
• To open the top lid of the multicooker, press the lid
release button (g.
).
• The cooking time does not display straight from the
beginning for rice (Riz) and pilaf (Risotto).
displays on the screen during most of the cooking
time as the multicooker needs to detect the water/
liquid and ingredient volume in the initial preparation
stage. When the multicooker detects the actual
cooking time needed, the remaining cooking time
displays on the screen. For porridge (Conture),
steam (Vapeur), and boil (Bouillir), displays on
the screen before the water/liquid is brought to boil.
When the water/liquid starts boiling, the set cooking
time displays on the screen.
• Refer to the recipe booklet for more details on
cooking with each function.
Tip
• To select a certain function, press "menu" (Menu)
repeatedly. You can also press "menu" (Menu) once,
and then press increase (+) or decrease (-) to do so.
Before rst use
1 Take out all the accessories from the inner pot,
and remove the packaging material of the inner
pot.
2 Clean all parts of the multicooker thoroughly
before using it for the rst time (see chapter
‘Cleaning and Maintenance’).
Note
• Make sure all parts are completely dry before you
start using the multicooker.
Making pilaf (Risotto)
1 Put the ingredients for the pilaf into the inner
pot.
2 Wipe the outside of the inner pot dry (g.
),
and then put it in the multicooker (g.
).
3 Close the lid of the multicooker (g.
), and put
the plug in the power socket (g.
).
4 Press “menu” (Menu) to select “pilaf” (Risotto)
(g.
).
5 Press “start” (On/O) to conrm and start
cooking (g.
).
6 When the cooking is nished, the appliance
beeps and turns into warm keeping
automatically.
Note
• If the voltage is unstable at the area you live, it is
possible that food in the multicooker overows.
Boiling (Bouillir)
1 Fill the inner pot with some water.
2 Wipe the outside of the inner pot dry (g.
),
and then put it in the multicooker (g.
).
3 Close the lid of the multicooker (g.
), and put
the plug in the power socket (g.
).
4 Press “menu” (Menu) to select “boil” (Bouillir)
(g.
).
» To choose a dierent cooking time, refer to
chapter “Setting up the cooking time”.
5 Press “start” (On/O) to conrm and start
cooking (g.
).
6 When the water is brought to boil, the
multicooker beeps 5 times as a reminder for
you to open the lid and put the food in the
inner pot.
Note
• displays on the screen before the water/
liquid is brought to boil. When the water/liquid starts
boiling, the set cooking time displays on the screen.
7 When the cooking is nished, the appliance
beeps and turns into warm keeping
automatically.
Steaming (Vapeur)
1 Pour some water into the inner pot.
Note
• To steam food, pour 0.5L to 2L of water into the inner
pot. You can slightly adjust the amount of water
depending on the type of food.
2 Wipe the outside of the inner pot dry (g.
),
and then put it in the multicooker (g.
).
3 Put the steam basket in the inner pot, put the
food in a bowl, and then put the bowl on the
steam basket.
» Make sure that not all the steaming holes
on the steam basket are covered, so that
hot steam could ow up from under the
steam basket.
4 Close the lid of the multicooker (g.
), and put
the plug in the power socket (g.
).
5 Press “menu” (Menu) to select “steaming”
(Vapeur) (g.
).
» To choose a dierent cooking time, refer to
chapter “Setting up the cooking time”.
6 Press “start” (On/O) to conrm and start
cooking (g.
).
7 When the cooking is nished, the appliance
beeps and turns into warm keeping
automatically.
Note
• When steaming food, do not immerse the steam
basket in water.
• displays on the screen before the water/
liquid is brought to boil. When the water/liquid starts
boiling, the set cooking time displays on the screen.
• After the steaming is nished, use a kitchen glove
or a cloth to remove the bowl and steam basket, as
they could be very hot.
Roasting (Rissoler)
1 Put ingredients into the inner pot.
2 Wipe the outside of the inner pot dry (g.
),
and then put it in the multicooker (g.
).
3 Close the lid of the multicooker (g.
), and put
the plug in the power socket (g.
).
4 Press “menu” (Menu) to select “roast” (Rissoler)
(g.
).
5 Press “start” (On/O) to conrm and start
cooking (g.
).
6 There are 2 stages of roasting. When the rst
stage (about 35 minutes, 130°C) is over, the
multicooker beeps 5 times every 30 seconds as
a reminder for you to open the lid, and turn the
food over in the inner pot.
» The remaining cooking time (25 minutes)
displays on the screen.
7 Press “menu” (Menu) to start the second stage
(120°C).
» If menu (Menu) is not pressed within
5 minutes after the rst stage is over, the
multicooker will turn into warm keeping.
8 When the cooking is nished, the appliance
beeps and turns into standby mode
automatically.
Making yogurt (Yaourt)
1 Whisk the ingredients for the yogurt well and
put them in sealed containers.
Note
• Use sealed containers which are made of food-grade
plastics or glass that can bear temperatures higher
than 80°C.
• Refer to the recipe book for more details on how to
make yogurt.
2 Put the containers in the inner pot. Make sure
that the containers are sealed.
3 Pour some water in the inner pot. Make sure
that half of the containers are immersed in
water.
4 Wipe the outside of the inner pot dry (g.
),
and then put it in the multicooker (g.
).
5 Close the lid of the multicooker (g.
), and put
the plug in the power socket (g.
).
6 Press “menu” (Menu) to select “yogurt” (Yaourt)
(g.
).
» To choose a dierent cooking time, refer to
chapter “Setting up the cooking time”.
7 Press “start” (On/O) to conrm and start
cooking (g.
).
8 When the cooking is nished, the appliance
beeps and turns into standby mode
automatically.
Reheating (Réchauer)
1 Loosen the food and evenly distribute it in the
inner pot.
2 If needed, pour some water onto the food to
prevent it from becoming too dry. The quantity
of the water depends on the amount of food.
3 Wipe the outside of the inner pot dry (g.
),
and then put it in the multicooker (g.
).
4 Close the lid of the multicooker (g.
), and put
the plug in the power socket (g.
).
5 Press menu (Menu) to select “reheat”
(Réchauer) (g.
).
» To choose a dierent cooking time, refer to
chapter “Setting up the cooking time”.
6 Press “start” (On/O) to conrm and start
cooking (g.
).
7 When the cooking is nished, the appliance
beeps and turns into warm keeping
automatically.
Manual (Manuel)
You may use the manual mode to cook food
with more control over the cooking time and
temperature.
1 Put ingredients into the inner pot.
2 Wipe the outside of the inner pot dry (g.
),
and then put it in the multicooker (g.
).
3 Close the lid of the multicooker (g.
), and put
the plug in the power socket (g.
).
4 Press “menu” (Menu) to select “manual”
(Manuel) (g.
).
» To choose a dierent cooking temperature,
refer to chapter “Setting up the cooking
temperature”.
» To choose a dierent cooking time, refer to
chapter “Setting up the cooking time”.
5 Press “start” (On/O) to conrm and start
cooking (g.
).
6 When the cooking is nished, the appliance
beeps and turns into warm keeping
automatically.
Note
• If you select a temperature below 80°C, the
multicooker automatically turns into standby mode
after the cooking process is nished.
• If you select a temperature above 140°C, the top lid
must be open during cooking.
Cooking porridge (Conture)
1 Put ingredients for the porridge into the inner
pot and stir a little bit.
2 Wipe the outside of the inner pot dry (g.
),
and then put it in the multicooker (g.
).
3 Close the lid of the multicooker (g.
), and put
the plug in the power socket (g.
).
4 Press “menu” (Menu) to select “porridge”
(Conture) (g.
).
» To choose a dierent cooking time, refer to
chapter “Setting up the cooking time”.
5 Press “start” (On/O) to conrm and start
cooking (g.
).
6 When the cooking is nished, the appliance
beeps and turns into warm keeping
automatically.
Note
• displays on the screen before the water/
liquid is brought to boil. When the water/liquid starts
boiling, the set cooking time displays on the screen.
• For details about the ratio of ingredients and liquid,
refer to the recipe booklet.
• If the voltage is unstable at the area you live, it is
possible that food in the multicooker overows.
Cooking rice (Riz)
Note
• If the voltage is unstable at the area you live, it is
possible that food in the multicooker overows.
• After the cooking is nished, stir the rice and loosen
it immediately to release excessive moisture for uy
rice.
• Depending on the cooking conditions, the bottom
portion of the rice may become slightly browned.
1 Rinse rice, put the washed rice in the inner pot,
and ll in water.
Note
• For details about the ratio of rice and water, refer to
the recipe booklet.
2 Press the lid release button to open the lid
(g.
).
3 Wipe the outside of the inner pot dry (g.
),
and then put it in the multicooker (g.
).
Note
• Make sure that the inner pot is in proper contact with
the heating element.
• Make sure that the outside of the inner pot is clean
and dry, and that there is no foreign residue on the
heating element.
4 Close the lid of the multicooker (g.
), and put
the plug in the power socket (g.
).
5 Press “menu” (Menu) to select “rice” (Riz)
(g.
).
6 Press “start” (On/O) to conrm and start
cooking (g.
).
7 When the cooking is nished, the appliance
beeps and turns into warm keeping
automatically.
Making soup (Soupe/Sauce)
1 Put ingredients and water/liquid for the soup
into the inner pot.
2 Wipe the outside of the inner pot dry (g.
),
and then put it in the multicooker (g.
).
3 Close the lid of the multicooker (g.
), and put
the plug in the power socket (g.
).
4 Press “menu” (Menu) to select “soup” (Soupe/
Sauce) (g.
).
» To choose a dierent cooking time, refer to
chapter “Setting up the cooking time”.
5 Press “start” (On/O) to conrm and start
cooking (g.
).
6 When the cooking is nished, the appliance
beeps and turns into warm keeping
automatically.
Frying (Frire)
1 Wipe the outside of the inner pot dry (g.
),
and then put it in the multicooker (g.
).
2 Put the plug in the power socket (g.
).
3 Pour some cooking oil into the inner pot.
Note
• Refer to the recipe book for more details on using the
frying function.
4 Press “menu” (Menu) to select “fry” (Frire)
(g.
).
5 Press “start” (On/O) to conrm and start
cooking (g.
).
6 Keep the lid open and stir the ingredients
constantly with a spatula.
7 When the cooking is nished, the appliance
beeps and turns into standby mode
automatically.
Baking (Four)
1 Put the ingredients to bake in the inner pot.
2 Wipe the outside of the inner pot dry (g.
),
and then put it in the multicooker (g.
).
3 Close the lid of the multicooker (g.
), and put
the plug in the power socket (g.
).
4 Press “menu” (Menu) to select “bake” (Four)
(g.
).
» To choose a dierent baking temperature,
refer to chapter “Setting up the cooking
temperature”.
» To choose a dierent cooking time, refer to
chapter “Setting up the cooking time”.
5 Press “start” (On/O) to conrm and start
cooking (g.
).
Note
• If the baking temperature is set below 80°C, when
the cooking is nished, the appliance turns into
standby mode automatically.
6 When the cooking is nished, the appliance
beeps and turns into warm keeping
automatically.
Note
• When baking cake, keep the lid closed during
cooking. Baking cake at 130°C and by 45 minutes
usually delivers best cooking result.
• If you bake other food with a temperature above
140°C, keep the lid open.
• When removing the inner pot from the multicooker
after cooking, use a kitchen glove or a cloth, as the
inner pot could be very hot.
Making stew (Mijoter)
1 Put the ingredients for the stew or ragout in the
inner pot.
2 Wipe the outside of the inner pot dry (g.
),
and then put it in the multicooker (g.
).
3 Close the lid of the multicooker (g.
), and put
the plug in the power socket (g.
).
4 Press “menu” (Menu) to select “stew” (Mijoter)
(g.
).
» To choose a dierent cooking time, refer to
chapter “Setting up the cooking time”.
5 Press “start” (On/O) to conrm and start
cooking (g.
).
6 When the cooking is nished, the appliance
beeps and turns into warm keeping
automatically.
Warm keeping
For cooking functions with warm keeping, you can
choose to activate or deactivate warm keeping after
the cooking process is nished.
• Before you start a cooking function with warm
keeping, the keep-warm indicator will be
ashing. If you start the cooking function directly,
the multicooker will turn into warm keeping
automatically when the cooking process is
nished.
• Before you start a cooking function with
warm keeping, the keep-warm indicator
will be ashing. If you press the keep-warm
button (Chaud), the keep-warm indicator will
go o. After the cooking process is nished,
the multicooker will turn into standby mode
automatically.
Note
• The maximum warm keeping time is 12 hours.
• The warm keeping mode does not apply to the
following cooking functions: Yogurt, Fry, Manual,
and Bake (only when baking at temperatures below
80°C).
Setting up the cooking time
You can adjust the cooking time for some functions.
Refer to chapter “Functions overview” for the
regulating range.
1 Select the cooking function you need.
2 Press “cooking time” (Temps de cuisson)
(g.
).
» The hour unit starts ashing on the display.
3 Press “increase” (+) or “decrease” (-) to set the
hour unit (g.
).
4 After the hour unit is set, press “cooking time”
(Temps de cuisson) again (g.
).
» The minute unit starts ashing on the
display.
5 Press “increase” (+) or “decrease” (-) to set the
minute unit (g.
).
6 Press “start” (On/O) to conrm and start
cooking (g.
).
Note
• If the multicooker is left idle for 10 seconds after
"cooking time" (Temps de cuisson) is pressed, it will
beep for another 15 seconds, you can still set the
cooking time at this point. If no button is pressed, the
multicooker will turn into standby mode.
• For functions with a maximum cooking time of no
more than 1 hour, the rst time you press “cooking
time” (Temps de cuisson), the minute unit starts
ashing on the display.
Preset time for delayed cooking
You can preset the delayed cooking time for some
cooking functions. Refer to chapter “Functions
overview” and see the preset time for dierent
functions.
1 Select the cooking function you need.
2 Press “preset time” (Départ deéré) (g.
).
» The hour unit starts ashing on the display.
3 Press “increase” (+) or “decrease” (-) to set the
hour unit (g.
).
4 After the hour unit is set, press “preset” (Départ
deéré) again (g.
).
» The minute unit starts ashing on the
display.
5 Press “increase” (+) or “decrease” (-) to set the
minute unit (g.
).
6 Press “start” (On/O) to conrm and start
cooking (g.
).
Note
• If the multicooker is left idle for 10 seconds after
"preset" (Départ deéré) is pressed, it will beep for
another 15 seconds, you can still set the preset time
at this point. If no button is pressed, the multicooker
will turn into standby mode.
• The cooking process will be nished when the preset
time has elapsed. For example, if you set a preset
time of 8 hours, the dishes will be ready 8 hours later.
Setting up the cooking temperature
You can adjust the cooking temperature for some
functions. Refer to chapter “Functions overview” to
see the regulating range.
1 Select the cooking function you need.
2 Press “temperature” (Temp) (g.
).
» The default cooking temperature displays
on the screen.
3 Press “increase” (+) or “decrease” (-) to set the
cooking temperature (g.
).
4 Press “start” (On/O) to conrm and start
cooking (g.
).
HD4726


Joignez-vous à la conversation sur ce produit
Ici, vous pouvez partager ce que vous pensez du Philips HD4725 Cuiseur à riz. Si vous avez une question, lisez d’abord attentivement le mode d’emploi. La demande d’un mode d’emploi peut être effectuée en utilisant notre formulaire de contact.