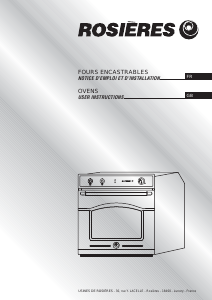
Mode d’emploi Rosières FR 2020/3 PN Four
Besoin d'un mode d’emploi pour votre Rosières FR 2020/3 PN Four ? Ci-dessous, vous pouvez consulter et télécharger gratuitement le mode d’emploi PDF en français. Ce produit a actuellement 5 questions fréquemment posées, 0 commentaires et 0 votes. Si ce n'est pas le mode d’emploi que vous souhaitez, veuillez nous contacter.
Votre produit est défectueux et le mode d’emploi n’offre aucune solution ? Rendez-vous à un Repair Café pour obtenir des services de réparation gratuits.
Mode d’emploi
Loading…

Loading…
Évaluation
Dites-nous ce que vous pensez du Rosières FR 2020/3 PN Four en laissant une note de produit. Vous voulez partager vos expériences avec ce produit ou poser une question ? Veuillez laisser un commentaire au bas de la page.En savoir plus sur ce mode d’emploi
Nous comprenons qu’il est agréable d’avoir un mode d’emploi papier pour vos Rosières FR 2020/3 PN Four. Vous pouvez toujours télécharger le mode d’emploi depuis notre site Web et l’imprimer vous-même. Si vous souhaitez disposer d’un mode d’emploi original, nous vous recommandons de contacter Rosieres. Ils pourront peut-être fournir un mode d’emploi original. Recherchez-vous le mode d’emploi de votre Rosières FR 2020/3 PN Four dans une autre langue ? Choisissez votre langue préférée sur notre page d’accueil et recherchez le numéro de modèle pour voir si nous l’avons disponible.
Caractéristiques
| Marque | Rosieres |
| Modèle | FR 2020/3 PN |
| Catégorie | Fours |
| Type de fichier | |
| Taille du fichier | 0.41 MB |
Tous les modes d’emploi pour Rosières Fours
Plus de modes d’emploi de Fours
Foire aux questions sur Rosières FR 2020/3 PN Four
Notre équipe d’assistance recherche des informations utiles sur les produits et des réponses aux questions fréquemment posées. Si vous trouvez une inexactitude dans notre foire aux questions, veuillez nous le faire savoir en utilisant notre formulaire de contact.
Mon four ne chauffe pas assez, que dois-je faire ? Vérifié
Le thermostat s’assure que les fours chauffent jusqu’à la température indiquée. Il est probable que l’élément chauffant est défectueux. Faites-le remplacer. En cas de doute, contactez le fabricant.
Cela a été utile (3191) En savoir plusQu’est-ce la pyrolyse ? Vérifié
Certains fours sont équipés d’une fonction pyrolyse. Il s’agit d’un système de nettoyage qui brûle la saleté et la graisse dans le four en utilisant des températures très élevées. Après la pyrolyse, toutes les saletés se transforment en cendres et peuvent être facilement enlevées. Si le four a une fonction pyrolyse, il est recommandé de l’utiliser 3 à 4 fois par an pour garder le four propre.
Cela a été utile (3183) En savoir plusLorsque j'utilise le four, il y a souvent des restes de nourriture qui tombent au fond et produisent de la fumée. Comment puis-je empêcher cela ? Vérifié
De nombreux fours sont équipés d'une grille et d'une plaque de cuisson. Lorsque vous préparez des aliments sur la grille, vous pouvez placer la plaque de cuisson au fond pour éviter que les restes de nourriture ne brûlent et causent de la fumée.
Cela a été utile (812) En savoir plusLa fumée s’accumule dans le four lors de l’échauffement, pourquoi ? Vérifié
Il y a probablement des restes de nourriture de l’utilisation précédente laissés dans le four. Les restes d’aliments particulièrement gras peuvent générer de la fumée lorsqu’ils sont chauffés. Nettoyez soigneusement le four.
Cela a été utile (803) En savoir plusEst-ce que je peux préparer plusieurs articles simultanément en utilisant plus de plaques à griller ? Vérifié
Techniquement, c’est possible. Cependant, il dépend du type d’aliment si vous avez besoin d’ajuster le temps de préparation ou de changer les plateaux à mi-chemin pendant la préparation.
Cela a été utile (800) En savoir plus

Joignez-vous à la conversation sur ce produit
Ici, vous pouvez partager ce que vous pensez du Rosières FR 2020/3 PN Four. Si vous avez une question, lisez d’abord attentivement le mode d’emploi. La demande d’un mode d’emploi peut être effectuée en utilisant notre formulaire de contact.