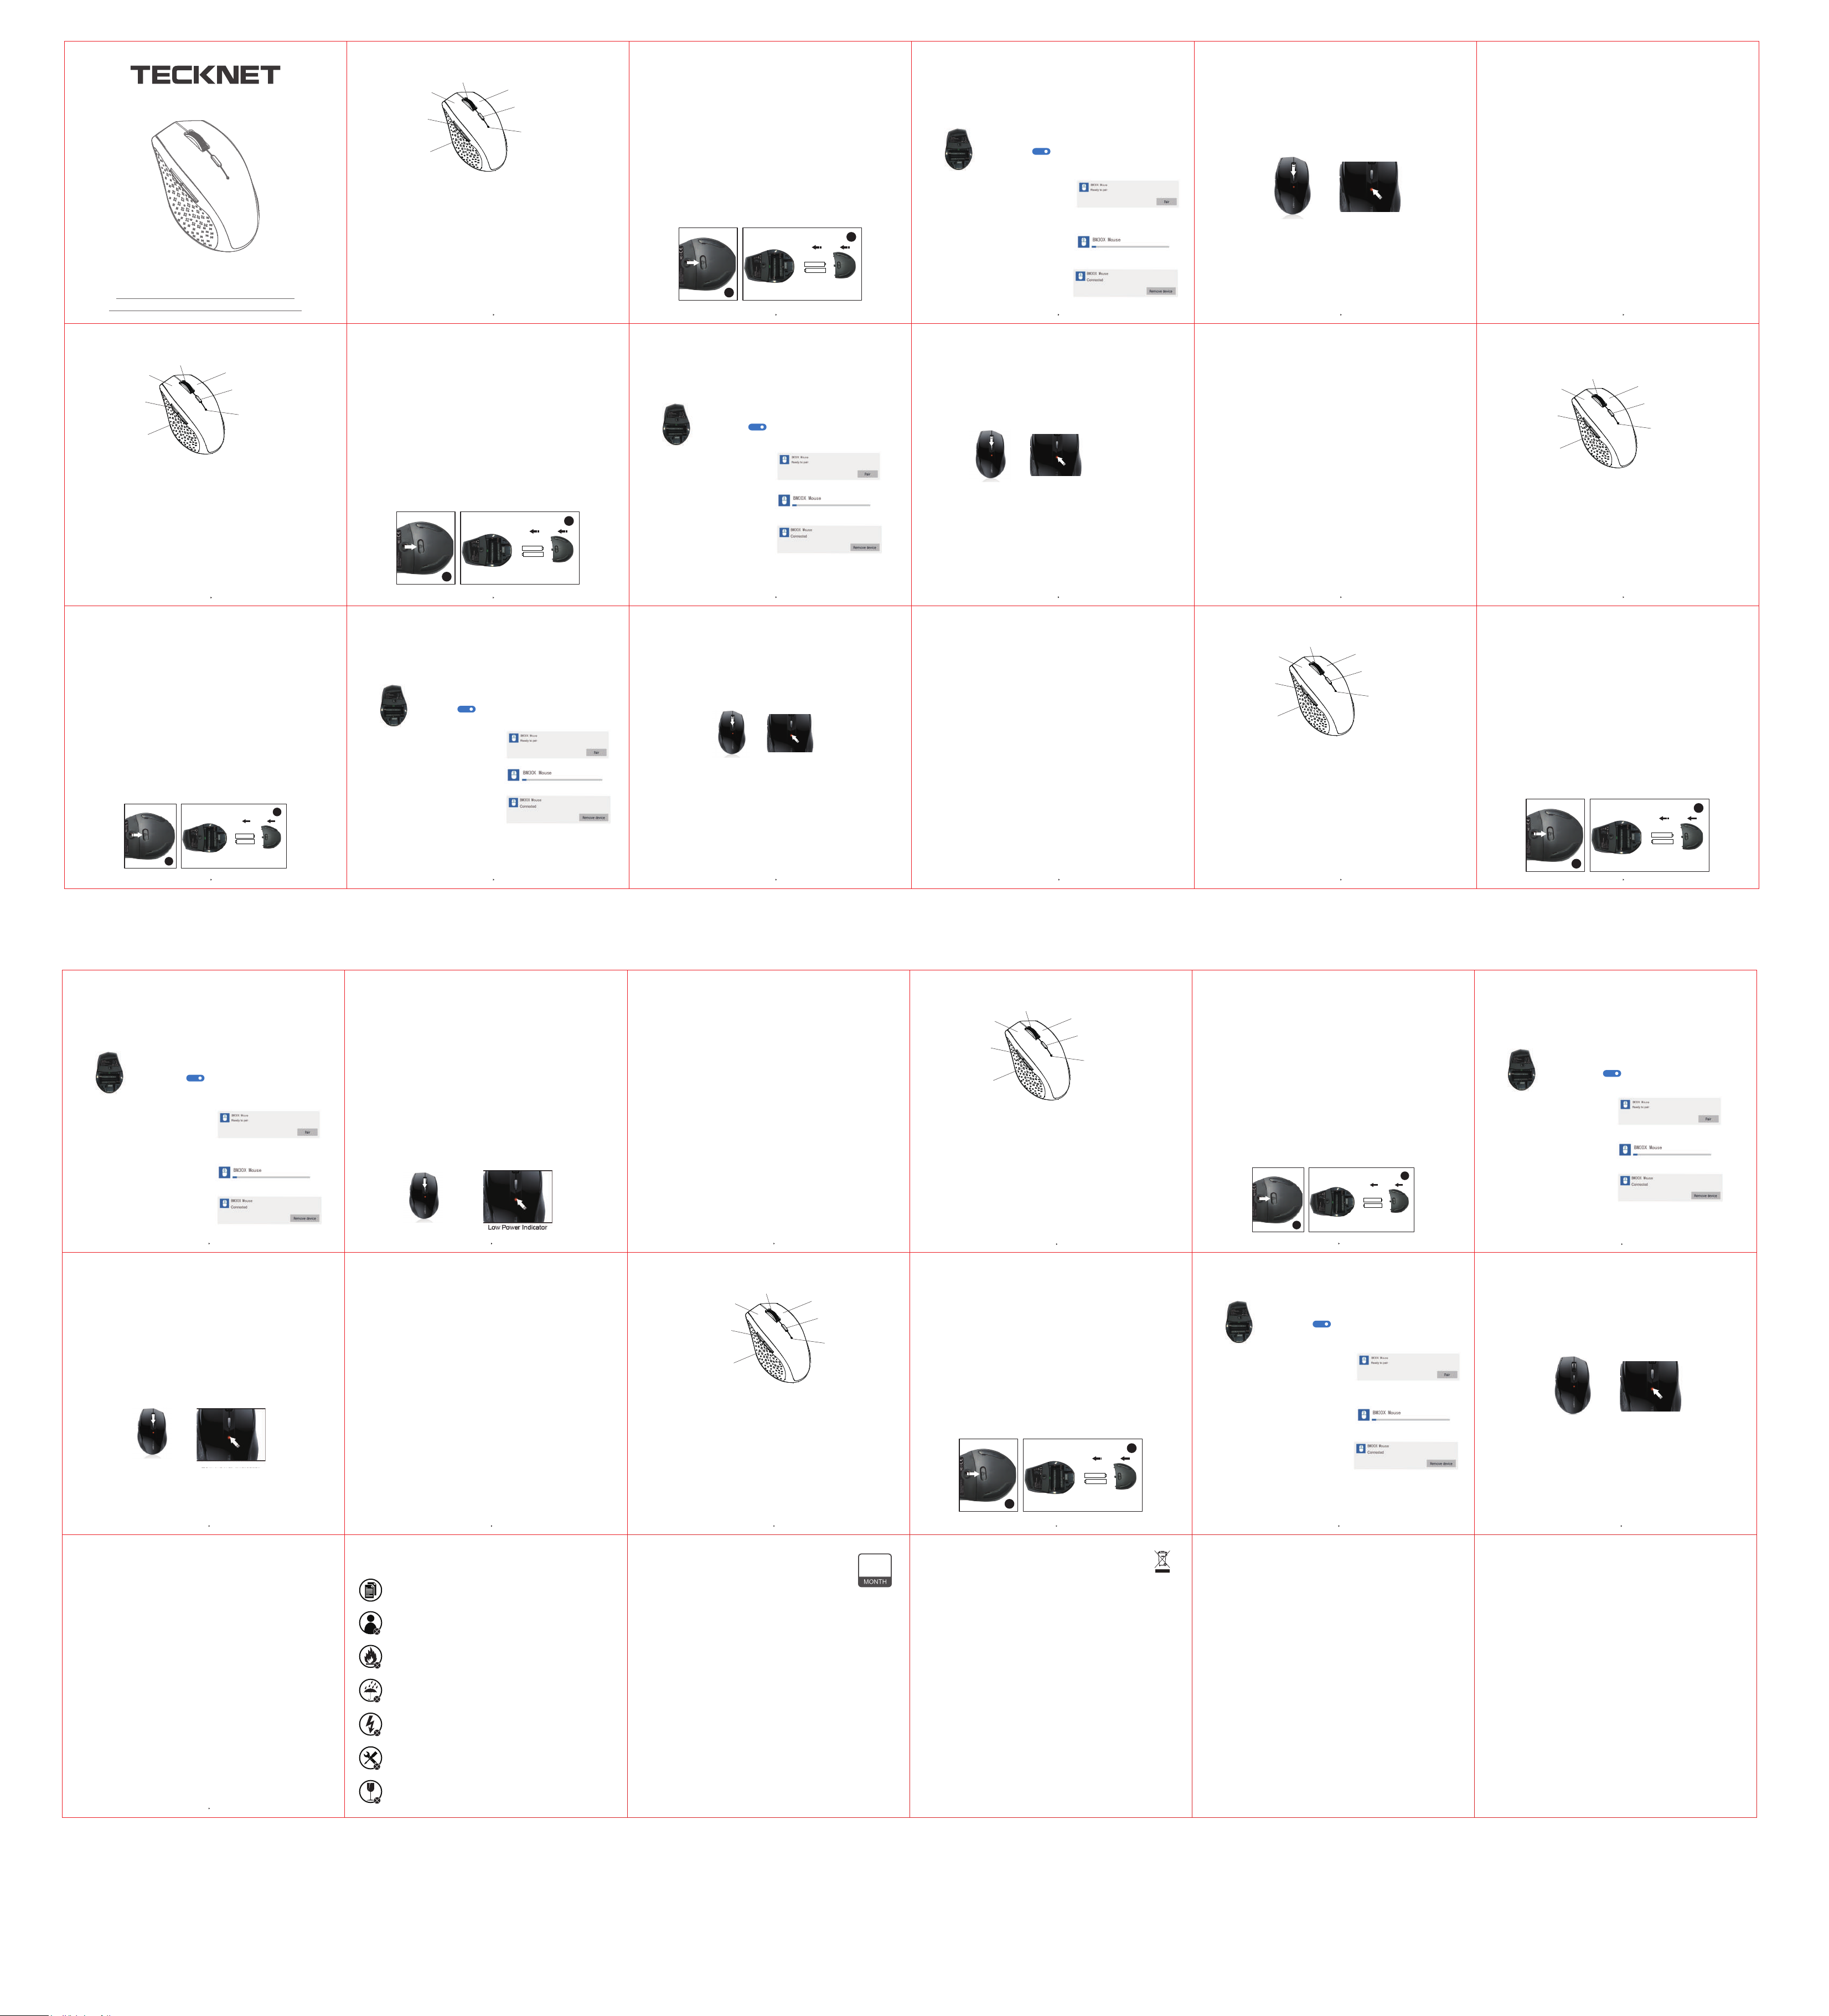
EN2 EN3 EN4 EN5
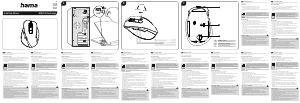
Produktaufbau
Technische Spezifikationen
Anzahl der Tasten: 6 Tasten
Wireless Version: 5.1
Anzahl der Kanäle: 16
Lösung: 800-1200-1600-2400-3200DPI
Operating Voltage: 3.0V
Operating Current: 5.5mA
DE1
Links Taste
Scrollrad
Rechts Taste
DIP Schalter-Druckknopf
Leistungsschwach Indikator
Vorwärtstaste
Rückwärtstaste
Product Layout
Technical Specifications
Button Count: 6 buttons
Wireless Version: 5.1
Number of Channels: 16
Resolution: 800-1200-1600-2400-3200DPI
Operating Voltage: 3.0V
Operating Current: 5.5 mA
EN1
Left Click Button
Scroll Wheel
Right Click Button
DPI Switch Button
Low Battery Indicator
Forward Button
Backward Button
Product Contents
• 1 x BM308 Wireless Mouse
• 1 x User Manual
Diseño del producto
Especificaciones técnicas
Número de botones: 6 botones
Versión Wireless: 5.1
Número de canales:16
Resolución: 800-1200-1600-2400-3200DPI
Voltaje operativo: 3.0V
Corriente operativa:5.5 mA
ES1
Botón de clic izquierdo
Rueda de desplazamiento
Botón de clic derecho
Botón de cambio DPI
Indicador de baja batería
Botón hacia adelante
Botón hacia atrás
Contenido del producto
• 1 x Ratón inalámbrico
• 1 x Manual de usuario
Layout del Prodotto
Specifiche Tecniche
Conteggio Tasti: 6 tasti
Versione Wireless: 5.1
Numero dei Canali: 16
Risoluzione: 800-1200-1600-2400-3200DPI
Tensione di funzionamento: 3.0V
Corrente di funzionamento: 5.5 mA
IT1
Tasto Sinistro
Rotella di Scorrimento
Tasto Destro
Pulsante Interruttore DPI
InIndicatore Batteria Scarica
Tasto Avanti
Tasto Indietro
Contenuto del Prodotto
• 1 x Mouse Senza Fili
• 1 x Manuale dell’utente
IT2
ES3 ES4
ES5
Contenu du produit
• 1 x Souris sans fil BM308
• 1 x Manuel d'utilisation
Disposition du produit
Spécifications techniques
Nombre de boutons: 6 buttons
Version Wireless: 5.1
Nombre de canaux: 16
Résolution: 800-1200-1600-2400-3200DPI
Tension de fonctionnement: 3.0V
Courant de fonctionnement: 5.5 mA
FR1
FR2 FR3 FR4 FR5
Bouton de clic gauche
Molette de défilement
Bouton de clic droit
Bouton de commutation DPI
Voyant de batterie faible
Bouton Avant
Bouton Arrière
24-Month Battery Life
The mouse consumes little power and offers a long battery life of up to 24 months without
changing batteries. However, the actual battery life may vary based on user and computing
conditions.
Vida útil de la batería: 24 meses
El ratón consume poca energía y tiene una batería de larga duración de hasta 24 meses sin
cambiar la batería. Sin embargo, la duración real de la batería puede variar en función de las
condiciones del usuario y de los dispositivos informáticos.
Durée de vie de la batterie jusqu'à 24 mois
La souris consomme peu d'énergie et offre une longue durée de vie de la batterie jusqu'à 24
mois sans changer la batterie. Cependant, la durée de vie réelle de la batterie peut varier en
fonction des conditions d'utilisation et informatiques.
System Requirements
• PC with a Pentium processor or equivalent AMD processors
Windows 98/ME/2000/XP/VISTA/Windows7/Windows8/WIN10
Note: The scroll wheel only works under the operating systems listed above. If you use the
mouse under a different operating system, the mouse may either not work or lose its
enhanced features.
Instructions
Battery Installation
The mouse uses two AA batteries (not included).
1. Open the battery cover.
2. Insert the batteries into the compartment.
3. Close the battery cover.
4. Switch on the mouse by adjusting the power switch underneath the mouse. The red
LED of the power indicator at the top of the mouse will flash.
Note: Make sure that the polarity of the batteries is correct. The positive (+) and negative
(-) ends of each battery must match the positive (+) and negative (-) markings in the
battery housing.
DE2
Lieferumfang
• 1 x BM308 Kabellose Maus
• 1 x Benutzerhandbuch
System Anforderungen
• PC mit Pentium-Prozessor oder gleichwertigen AMD-Prozessoren
• Windows 98/ME/2000/XP/VISTA/Windows7/Windows8/WIN10
Hinweis : Das Scrollrad funktioniert nur unter den oben aufgeführten Betriebssystemen,
Wenn Sie die Maus unter einem anderen Betriebssystem verwenden, kann die Maus
entweder nicht funktionieren oder seine erweiterten Funktionen verlieren.
Exigences du système
• Ordinateur avec processeur Pentium ou processeur AMD équivalent
• Windows 98/ME/2000/XP/VISTA/Windows7/Windows8/WIN10
Remarque: La molette de défilement ne fonctionne que dans les systèmes d'exploitation
énumérés ci-dessus. Si vous utilisez la souris dans un système d'exploitation différent, la
souris peut ne pas fonctionner ou perdre ses fonctionnalités améliorées.
Requisiti di Sistema
• PC con processore Pentium o processori AMD equivalenti
• Win7/Win8/Win10
Nota: la rotella di scorrimento funziona solo con i sistemi operativi sopra elencati. Se si
utilizza il mouse in un sistema operativo diverso, il mouse potrebbe non funzionare o perdere
le funzionalità avanzate.
Anleitung
Installierung der Batterien
Die Maus benutzt zwei AA-Batterien (nicht enthalten).
1.Öffnen Sie den Batteriefachdeckel.
2.Setzen Sie die Batterien in das Fach ein.
3.Bringen Sie die Batteriefachabdeckung wieder an.
4.Schalten Sie die Maus ein, indem Sie den Netzschalter unter die Maus stellen. Die rote
LED der Stromanzeige an der Oberseite der Maus blinkt.
Instructions
Installation des piles
La souris utilise deux piles AA (non fournies).
1.Ouvrez le couvercle du compartiment.
2.Insérez les piles dans le compartiment.
3.Fermez le couvercle du compartiment.
4.Activez la souris en réglant l'interrupteur d'alimentation situé sur le fond de la souris. Le
voyant d'alimentation LED rouge en haut de la souris clignotera.
Remarque: Assurez-vous que la polarité des piles est correcte. Les polarités positive
(+) et négative (-) de chaque pile doivent correspondre aux marques positive (+) et
négative (-) dans le compartiment de la batterie.
Hinweis: Stellen Sie sicher, dass die Polarität der Batterien korrekt ist. Die positiven (+)
und negative (-) Enden jeder Batterie müssen mit den positiven (+) und negativen (-)
Markierungen im Batteriegehäuse anpassen.
A A
A A
2
1
A A
A A
2
1
A A
A A
2
1
Pairing
1) Turn on the Bluetooth function of your device.
Sincronización
1) Encienda el Wireless de su dispositivo.
2) Encienda el ratón, presione el botón de
sincronización durante 2-3 segundos y el
indicador LED parpadeará. Ahora el ratón
está en modo de sincronización.
3) El ratón será detectado por su dispositivo,
luego haga clic en "Pair".
4) La sincronización demorará unos
segundos.
5) Su dispositivo dirá "Conectado" si logró
conectarse con éxito. El ratón ahora está
listo para usar.
Jumelage
1)Activez le Wireless de votre appareil.
2)Allumez la souris, appuyez sur le bouton
de jumelage pendant 2-3 secondes et le
voyant LED clignotera. Maintenant, la souris
est en mode de jumelage.
3)Une fois que la souris est détectée par
votre appareil, cliquez sur «Jumelage».
4)Il faudra attendre quelques secondes pour
le jumelage.
5)Votre appareil affichera «Connecté» en
cas de succès. Maintenant, la souris est
prête à l'emploi.
2) Switch on the mouse, press the pairing button for
2-3 seconds and the LED indicator will flash. Now the
mouse is in pairing mode.
3) The mouse will be detected by your device, then
click "Pair".
4) It will take a few seconds for pairing.
5) Your device will show "Connected" if successful.
Now the mouse is ready for use.
DE4
A A
A A
2
1
Intelligent Power Saving (IPS)
The mouse is equipped with Intelligent Power Saving (IPS) function.
• The PC is switched off, the mouse will be switched off automatically for the purpose of
power-saving.
• When the mouse is not operated for 3 seconds, it will automatically drop to the first level of
IPS. To wake the mouse, click any button or move the mouse.
• When the mouse is not operated for 10 seconds, it will automatically drop to the second
level of IPS. To wake the mouse, click any button or move the mouse.
• When the mouse is not operated for 8 minutes, it will automatically drop to the third level of
IPS - sleep model. To wake the mouse, click any button or move the mouse.
Ahorro de energía inteligente (Intelligent Power Saving IPS)
El ratón está equipado con la función Intelligent Power Saving (IPS).
• Cuando el ratón no es operado por 3 segundos, caerá automáticamente al primer nivel de
IPS.Para reactivar al ratón, haga clic en cualquier botón o mueva el ratón.
• Cuando el ratón no se utiliza durante 10 segundos, caerá automáticamente al segundo
nivel de IPS. Para reactivar al ratón, haga clic en cualquier botón o mueva el ratón.
• Cuando el ratón no se utiliza durante 8 minutos, caerá automáticamente al tercer nivel del
modelo IPS -sleep. Para reactivar el ratón, haga clic en cualquier botón o mueva el ratón.
• Lorsque la souris ne fonctionne pas pendant 3 secondes, elle tombera automatiquement
au premier niveau d'IPS. Pour réveiller la souris, cliquez sur un bouton ou déplacez la
souris.
• Lorsque la souris ne fonctionne pas pendant 10 secondes, elle tombera automatiquement
au deuxième niveau d'IPS. Pour réveiller la souris, cliquez sur un bouton ou déplacez la
souris.
• Lorsque la souris ne fonctionne pas pendant 8 minutes, elle tombera automatiquement au
troisième niveau d'IPS - mode veille. Pour réveiller la souris, cliquez sur un bouton ou
déplacez la souris.
Économie d'énergie intelligente (IPS)
La souris est équipée d'une fonction d'économie d'énergie intelligente (IPS).
•I'ordinateur est éteint, la souris sera automatiquement désactivée pour économiser
l'énergie.
• Wenn die Maus für 3 Sekunden nicht betätigt wird, wird es automatisch auf der ersten
Stufe der IPS fallen. Die Maus zu wecken, klicken Sie auf eine beliebige Schaltfläche oder
bewegen Sie die Maus.
• Wenn Ihre Maus für 10 Sekunden nicht betätigt wird, wird sie automatisch auf der zweiten
Stufe der IPS fallen. Die Maus zu wecken, klicken Sie auf eine beliebige Schaltfläche oder
bewegen Sie die Maus.
• Wenn die Maus 8 Minuten lang nicht betätigt wird, wird sie automatisch auf der dritte Stufe
von IPS fallen. Die Maus zu wecken, klicken Sie auf eine beliebige Schaltfläche oder
bewegen Sie die Maus.
DE3
24-Monaten-Batterielebensdauer
Die Maus verbraucht wenig Strom und bietet eine lange Akkulaufzeit von bis zu 24 Monaten
ohne die Batterien zu wechseln. Allerdings beachten Sie bitte, dass die tatsächliche
Akkulaufzeit wird mit den Benutzern und Betriebsbedingungen variieren.
Pairing
1)Aktivieren Sie die Wireless Ihres Geräts.
2)Schalten Sie die Maus, drücken Sie die
Pairing-Taste für 2-3 Sekunden, dann die
LED-Anzeige blinkt. Nun ist die Maus in den
Pairing-Modus.
3)Die Maus wird von Ihrem Gerät erkannt
wird, dann klicken Sie auf “Pairing”.
4)Es dauert ein paar Sekunden für die
Paarung nehmen.
5)Das Gerät zeigt “Verbindet”, wenn
erfolgreich. Nun ist die Maus einsatzbereit ist.
Intelligent Power Saving (IPS)
Die Maus ist mit Intelligent Power Saving (IPS) ausgestattet.
• Der PC ausgeschaltet ist, wird die Maus zum Zwecke der Stromsparfunktion automatisch
abgeschaltet.
DPI Switch
The mouse supports 3200DPI, 2400DPI,1600DPI, 1200DPI and 800DPI
The default setting is 1200DPI. Click the DPI button once to switch from 1200DPI to
1600DPI, the second click to upgrade to 2400DPI, the third click to upgrade to 3200DPI, click
once again to switch back to 800DPI.
Low Power Indicator
When the battery power gets low during the period of use, the indicator under the scroll
wheel will flash. Please replace the battery.
Note: We recommend you to use AA alkaline dry cell batteries.
Cambio de DPI
El ratón soporta
3200DPI, 2400DPI,1600DPI, 1200DPI, 800DPI.
La configuración por defecto es 1200DPI.Haga clic una vez en el botón DPI para cambiar de
1200DPI a 1600DPI, con el segundo clic cambiará a 2400DPI, con el tercer clic cambiará a
3200DPI, haga clic nuevamente para volver a 800DPI.
Commutation DPI
La souris prend en charge 3200DPI, 2400DPI, 1600DPI, 1200DPI et 800DPI.
Le paramètre par défaut est 1200DPI. Cliquez sur le bouton DPI une fois pour passer de
1200DPI à 1600DPI, deux fois pour passer à 2400DPI, trois fois pour passer à 3200DPI, et
quatre fois pour passer à 800DPI.
Reconnection
Il existe un code de connexion pour cette souris. Des températures élevées, des champs
Voyant de faible puissance
Lorsque la puissance de la batterie est faible au cours d'utilisation, le voyant sous la molette
de défilement clignotera. Remplacez la batterie.
Remarque: Nous vous recommandons d'utiliser une pile alcaline AA.
Note on handling batteries
• Keep batteries out of the reach of children.
• Replace old or weak batteries promptly.
• Remove the batteries if the mouse is not going to be used.
Remarque sur le traitement des piles
• Gardez les piles hors de portée des enfants.
• Remplacez immédiatement les piles usées ou faibles.
• Retirez les piles si la souris ne sera pas utilisée.
Mesures de sécurité
• Éloignez la souris des jeunes enfants.
• Toute tentative de démonter, de modifier ou de réparer la souris peut entraîner une
exposition et d'autres risques pour la sécurité.
Hinweise zum Umgang mit Batterien
• Batterien außerhalb der Reichweite von Kindern aufbewahren.
• Ersetzen Sie alte oder schwache Batterien umgehend.
• Entfernen Sie die Batterien, wenn die Maus längere Zeit nicht benutzt wird.
Safety Measures
• Keep the mouse away from young children.
• Any attempt to disassemble, adjust or repair the mouse may result in exposure and other
safety hazards.
Sicherheitsmaßnahmen
• Halten Sie die Maus von kleinen Kindern fern.
• Jeder Versuch, die Maus auseinanderzubauen, einzustellen oder zu reparieren, kann zu
Exposition und anderen Sicherheitsrisiken führen.
To reconnect
There is a connection code for this mouse. High temperatures, electro-magnetic fields or
vibration may influence the code signal and the mouse may need to be reconnected.
Press the pairing button for 2-3 seconds to reconnect.
Indicador de baja batería
Cuando el nivel de batería baja durante el uso, el indicador bajo la rueda de desplazamiento
parpadeará.Reemplace la batería.
Nota: le recomendamos que use pilas secas alcalinas AA
Nota sobre el manejo de las baterías
• Mantenga las baterías fuera del alcance de los niños.
• Reemplace las baterías viejas o débiles rápidamente.
• Retire las baterías si el ratón no va a ser utilizado.
Medidas de seguridad
• Mantenga el ratón alejado de los niños pequeños.
• Cualquier intento de desmontar, ajustar o reparar el ratón puede ocasionar peligros de
exposición y otros riesgos de seguridad.
Istruzioni
Installazione della batteria
Il mouse utilizza due batterie AA (non incluse).
1. Aprire il coperchio del vano batteria.
2. Inserire le batterie nel vano
3. Chiudere il coperchio del vano batteria.
4. Accendere il mouse regolando l'interruttore di alimentazione sotto il mouse. Il LED rosso
dell'indicatore di alimentazione nella parte superiore del mouse lampeggerà.
Nota: assicurarsi che la polarità delle batterie sia corretta. Le estremità positive (+) e
negative (-) di ogni batteria devono corrispondere alle marcature positive (+) e negative (-)
nell'alloggiamento della batteria.
Reconnecter
électromagnétiques ou des vibrations peuvent affecter le signal de code et la souris peut
devoir d'être reconnectée.
Appuyez sur le bouton de jumelage pendant 2-3 secondes pour reconnecter.
Hinweis: Wir empfehlen Ihnen, AA alkalische Trockenbatterie zu verwenden.
Es gibt eine Verbindung Code für diese Maus. Hohe Temperaturen, elektromagnetische
Felder oder Vibration können das Codesignal beeinflussen und die Maus müssen wieder
angeschlossen werden.
Drücken Sie die Pairing-Taste für 2-3 Sekunden wieder zu verbinden.
Attention
1. To maximize battery life, it’s recommended to use the mouse on a white or light color
surface. As the mouse might not work smoothly on some special surfaces, such as smooth,
dark or black, reflecting and 3D mouse pads surfaces.
2. Do not use the mouse on a glass or mirrored surface, as these surfaces will cause the
mouse to fail temporarily.
3. Avoid using the mouse on a metal surface. Metals, such as iron, aluminum or copper,
shield the radio frequency transmission and may slow down the mouse presenter’s response
time or cause the mouse to fail temporarily.
4. If your PC has a metal case that contains aluminum or magnesium, use the mouse by the
side of the PC. The display panel may interfere with the radio frequency if you use the mouse
directly in front of the PC.
Atención
1. Para maximizar la vida de la batería, se recomienda usar el ratón en una superficie blanca
o de color claro.
El ratón podría no funcionar bien en ciertas superficies especiales, como en superficies
suaves, oscuras o negras, que reflejen y en superficies de almohadilla para ratón 3D.
2. No use el ratón sobre una superficie de vidrio o espejo, ya que estas superficies harán
que el ratón falle temporalmente
3. Evite usar el ratón en una superficie de metal. Los metales, como hierro, aluminio o cobre,
encubren la transmisión de radiofrecuencia y pueden ralentizar el tiempo de respuesta del
proyector del ratón o hacer que el ratón falle temporalmente.
4. Si su PC tiene una carcasa de metal que contiene aluminio o magnesio, use el ratón al
costado de la PC. El panel de visualización puede interferir con la frecuencia de radio si usa
el ratón directamente en frente de la PC.
Reconexión
Existe un código de conexión para este ratón. Las altas temperaturas, los campos
electromagnéticos o la vibración pueden influir en la señal del código y es posible que sea
necesario volver a conectar el ratón.
Presione el botón de sincronización durante 2-3 segundos para reconectar.
Attention
1. Pour maximiser la durée de vie de la batterie, il est recommandé d'utiliser la souris sur une
surface de couleur blanche ou claire. Comme la souris pourrait ne pas fonctionner aisément
sur certaines surfaces spéciales telles que des surfaces lisses, foncées ou noires,
réfléchissantes et un tapis de souris 3D.
2. N'utilisez pas la souris sur une surface de verre ou un miroir, car la souris risque de ne pas
fonctionner sur ces surfaces.
3. Évitez d'utiliser la souris sur une surface métallique. Les métaux, tels que le fer,
l'aluminium ou le cuivre, empêchent la transmission par radiofréquence et ralentissent le
temps de réponse du pointeur de la souris ou provoquent l'échec temporaire de la souris.
4. Si votre ordinateur possède un boîtier en métal contenant de l'aluminium ou du
magnésium, utilisez la souris du côté de l'ordinateur. Le panneau d'affichage peut interférer
avec la radiofréquence si vous utilisez la souris directement devant l'ordinateur.
DE5
Vorsichtig:
1. Um die Akkulaufzeit zu maximieren, empfiehlt es sich, die Maus auf einer Oberfläche mit
weißer oder heller Farbe zu verwenden. Auf einigen speziellen Oberflächen, wie glatte,
dunkele oder schwarze, reflektierte und 3D-Maus-Pads Oberflächen, könnte die Maus nicht
fließend funktionieren.
2. Verwenden Sie die Maus nicht auf einer Glas- oder verspiegelte Oberfläche, da diese
Flächen die Maus vorübergehend ausfallen lassen.
3. Vermeiden Sie, die Maus auf einer Metalloberfläche zu verwenden. Metalle wie Eisen,
Aluminium oder Kupfer schirmt die Hochfrequenzübertragung ab und kann die Reaktionszeit
des Maus-Moderators verlangsamen oder die Maus vorübergehend ausfallen lassen.
4. Wenn Ihr PC ein Metallgehäuse hat, das Aluminium oder Magnesium enthält, verwenden
Sie die Maus von der Seite des PCS. Die Anzeigetafel mit der Radiofrequenz stören kann,
wenn Sie die Maus direkt vor dem PC verwenden.
IMPORTANT SAFETY INSTRUCTIONS-CAREFULLY
FOLLOW THESE INSTRUCTIONS.
Low Power Indicator
DPI Switch
Low Power Indicator
DPI Switch
DPI Switch
Low Power Indicator
DPI Switch
DPI Schalter
Die Maus unterstützt 3200DPI, 2400DPI,1600DPI, 1200DPI und 800DPI.
Die Voreinstellung ist 1200DPI. Klicken Sie auf die DPI-Taste einmal, von 1200 DPI zu
1600DPI zu wechseln, dem zweiten Klick auf 2400DPI zu aktualisieren, der dritten Klick auf
3200DPI zu aktualisieren, klicken Sie erneut auf 800 DPI zu wechseln.
ES2
Requisitos del sistema
• PC con un procesador Pentium o procesadores equivalentes AMD
• Win7/Win8/Win10
Nota: La rueda de desplazamiento solo funciona en los sistemas operativos enumerados
anteriormente. Si usa el ratón en un sistema operativo diferente, es posible que el ratón no
funcione o pierda sus características mejoradas.
Instrucciones
Instalación de la batería
El ratón usa dos pilas AA (no incluidas).
1. Abra la tapa de la batería.
2. Inserte las baterías en el compartimento.
3. Cierre la tapa de la batería.
4. Encienda el ratón ajustando el interruptor de encendido debajo del ratón. El LED rojo del
indicador de encendido en la parte superior del ratón parpadeará.
Nota: asegúrese de que la polaridad de las baterías sea correcta. Los extremos positivos
(+) y negativos (-) de cada batería deben coincidir con las marcas positivas (+) y negativas (-)
dentro del compartimento de la batería.
A A
A A
2
1
Batteria Durata 24 Mesi
Il mouse consuma poca energia e offre una lunga durata della batteria fino a 24 mesi senza
cambiare la batteria. Tuttavia, la durata effettiva della batteria potrebbe variare in base
all'utente e alle condizioni di calcolo.
Accoppiamento
1) Attivare il Wireless sul proprio dispositivo.
IT3
IT4 IT5
2) Accendere il mouse, premere il pulsante di
accoppiamento per 2-3 secondi e l'indicatore
LED lampeggerà. Ora il mouse è in modalità
di accoppiamento.
3) Il mouse verrà rilevato dal dispositivo,
quindi fare clic su "Paring " (“Accoppia”).
4) Ci vorranno pochi secondi per
l'accoppiamento.
5) Il proprio dispositivo visualizzerà
"Connesso" in caso di esito positivo. Ora il
mouse è pronto per l'uso.
• Quando il mouse non viene azionato per 3 secondi, si posiziona automaticamente al primo
livello di IPS,Per riattivare il mouse, fare clic su qualsiasi tasto o spostare il mouse.
• Quando il mouse non viene azionato per 10 secondi, si posiziona automaticamente al
secondo livello dell'IPS. Per riattivare il mouse, fare clic su qualsiasi tasto o spostare il
mouse.
• Quando il mouse non viene azionato per 8 minuti, si posizionerà automaticamente al terzo
livello del modello IPS in sleep. Per riattivare il mouse, fare clic su qualsiasi tasto o spostare
il mouse.
Risparmio Energetico Intelligente (IPS, Intelligent Power Saving)
Il mouse è dotato di una funzione Intelligente di Risparmio Energetico (IPS, Intelligent Power
Saving).
Interruttore DPI
Il mouse supporta
3200DPI, 2400DPI,1600DPI, 1200DPI e 800DPI.L'impostazione predefinita è 1200DPI. Fare
clic sul pulsante DPI una volta per passare da1200DPI a 1600DPI, un secondo clic per
aggiornare a 2400DPI, un terzo clic per passare a 3200DPI, fare clic ancora una volta per
tornare a 800DPI.
Indicatore di Scarsa Energia
Quando l’energia della batteria viene meno durante il periodo di utilizzo,indicatore sotto la
rotella di scorrimento lampeggerà. Si prega di sostituire la batteria.
Nota: Si consiglia di utilizzare batterie AA alcaline.
Nota Sulla Gestione delle Batterie
• Tenere le batterie al di fuori dalla portata dei bambini.
• Sostituire prontamente le batterie vecchie o deboli.
• Rimuovere le batterie se il mouse non viene utilizzato.
Misure di Sicurezza
• Tenere il mouse lontano dai bambini piccoli.
• Qualsiasi tentativo di smontaggio, regolazione o riparazione del mouse potrebbe causare
l'esposizione e altri rischi per la sicurezza.
Attenzione
1. Per ottimizzare la durata della batteria, si consiglia di usare il mouse su una superficie di
colore bianco o chiara.
Pertanto, il mouse potrebbe non funzionare fluidamente su alcune superfici particolari, come
quelle lisce, scure o nere, riflettenti e tappetini 3D per mouse.
2. Non utilizzare il mouse su una superficie di vetro o specchiata, in quanto queste superfici
provocano un malfunzionamento temporaneo del mouse.
3. Evitare di usare il mouse su una superficie metallica. I metalli, come ferro, alluminio o
rame, schermano la trasmissione a radiofrequenza e potrebbero rallentare il tempo di
risposta del relatore del mouse o causare un errore temporaneo del mouse.
4. Se il proprio PC ha un involucro metallico che contiene alluminio o magnesio, usare il
mouse sul lato del PC. Il pannello del display potrebbe interferire con la frequenza radio se si
utilizza il mouse direttamente davanti al PC.
Riconnessione
C'è un codice di connessione per questo mouse. Temperature elevate, campi elettromagneti-
ci o vibrazioni potrebbero influenzare il segnale del codice e potrebbe essere necessario
riconnettere il mouse.
Premere il tasto di accoppiamento per 2-3 secondi per riconnetterlo.
Indicatore di Bassa Potenza
Manage BT devices
Your PC is searching for and can be
discovered by BT devices
BT
On
Manage BT devices
Your PC is searching for and can be
discovered by BT devices
BT
On
Manage BT devices
Your PC is searching for and can be
discovered by BT devices
BT
On
Manage BT devices
Your PC is searching for and can be
discovered by BT devices
BT
On
Manage BT devices
Your PC is searching for and can be
discovered by BT devices
BT
On
JP2 JP3 JP4
JP5
製 品レイアウト
JP1
左クリックボタン
スクロールホイール
右クリックボタン
DPI切替ボタン
電池残量表示
フォワード( 前 進)ボタン
バックワード( 戻る)ボタン
A A
A A
2
1
1)端末のBluetoothをオンにします
2)マウスの電源を入れ、ペアリングボタンを2-3秒押すとLED
インジケータが点 滅します。これでマウスがペアリングモ
ードになりました 。
3)端末がマウスを検出したら、「ペアリング」をクリックして
ください。
4)ペアリングには数秒かかります。
5)端末に「接続済み」と表示されたら成功です。これでマ
ウスをご 使 用いた だ けま す。
電池残量表示DPIの切替
BTデバイスの管 理
B T 端 末 がご 使 用 中の P C を探して見つ けま す。
BT
On
1. SAVE THESE INSTRUCTIONS - This sheet contains important safety and
operating instructions.
2. Before using the product, read all instructions and caution markings on the
product, accessories and device using our product.
3. This appliance is not intended for use by persons (including children) with
reduced physical, sensory or mental capabilities, or lack of experience and
knowledge, unless they have been given supervision or instruction concerning
use of the appliance by a person responsible for their safety.
4. Children should be supervised to ensure that they do not play with the
appliance.
5. Keep the product away from fire or explosion may occur.
6. For proper insertion, please observe polarity indicators ( +/-).
7. Remove the batteries if the product is not going to be used for a long period of
time.
8. Do not place the product in or near any inflammable, explosive or hazardous
object.
9. Do not place in or near water, rain, excess moisture or extreme heat.
10. Do not operate the product with damaged cord or plug.
11. Do not operate the product if it has been damaged in any way.
12. Do not disassemble the product. Disassembly may result in a risk of safety
hazards.
13. Do not throw or shake the product.
14. To reduce the risk of electric shock, unplug the product from the power supply
when not in use or switch off the power supply.
ボタン数:6個
無線バージョン:5.1
チャンネル数:16
解像度:800-1200-1600-2400-3200DPI
動作電圧:3.0V
動作電流:5.5mA
技術仕様
•1xBM308無線マウス
•1xユーザーマニュアル
製品内容
Windows98/ME/2000/XP/VISTA/Windows7/Windows8/WIN10
メモ:スクロールホイールは上記のオペレーティングシステムでのみ動作します。
上記 以外のオペレーティングシステムでマウスを使用されると、マウスが 動作しない、
あるいは 拡張 機能をご 利用いただけない場 合があります。
システム要件
このマウスにはインテリジェントパワーセービング(IPS)機能が搭載されています。
•PCの電源がオフになると、節電のためにマウスの電源も自動的にオフになります。
•マウスが3秒間使われていない状態になると自動的にIPSのレベル1になります。
どれかボタンをクリックするかマウスを移動させるとマウスが起動します。
•マウスが10秒間使われていない状態になると自動的にIPSのレベル2になります。
どれかボタンをクリックするかマウスを移動させるとマウスが起動します。
•マウスが8分間使われていない状態になると自動的にレベル3のIPS-スリープモードになります。
どれかボタンをクリックするかマウスを移動させるとマウスが起動します。
インテリジェントパワーセービング(IPS)
このマウスは3200DPI、2400DPI、1600DPI、1200DPIおよび800DPIに対応します。
規定では1200DPIに設定されています。マウス上部のDPIボタンを1回クリック
すると1200DPIから1600 DPIに切り替わり、2回クリックすると24 00DPI、
3回クリックすると3200DPIにそれぞれアップグレードし、もう1回クリックすると800DPIになります。
DPIの切替
ご 使 用中 に 電 池 の 残 量 が 少なくなると、
スクロールホイールの下のインジケータが点滅します。電池を交換してください。
メモ:単3のアルカリ乾電池のご使用をお勧めします。
電池残量表示
このマウスには接続コードがあります。高温や電磁場、また振動によりコード信号に
影響があると、マウスを再接続する必要が生じる場合があります。
ペアリングボタン を2 -3 秒 押して 再度接 続してくださ い。
再接続
1.電池の寿命を長くするには、マウスを白色または色の薄い表面上で使用されることをお勧めします。
これはツルツルした面や濃い色または黒色、反射式や3Dマウスパッドなど、特殊な表面上でマウスを
使用した場 合に、マウスがスムーズに 動作しないことがあるためです。
2.ガラスや鏡状の表面でマウスを使用されるとマウスが一時的に動作不良になる場合があるため、
使 用しないでください。
3.金属の表面でマウスを使用しないでください。鉄やアルミ、また銅などの金属は高周波の伝送を遮り
、マウス使 用者の応答時間を 低下させ、またマウスが 一時的に動作 不良になる場 合があります。
4.ご使用のPCの筐体にアルミまたはマグネシウムが含まれている場合は、マウスをP Cの横で使用してく
ださい。
PCのすぐ手前でマウスを使 用すると、ディスプレイパネルが高周波に干渉する場合があります。
注意事項
•電池はお子様の手の届かない所に保管してください。
•古くなった電池や電力が弱くなった電池は速やかに交換してください。
•しばらくマウスを使用する予定がない場合は電池を取り外してください。
電池の取扱いに関する注意
•マウスはお子様の手の届かない所に保管してください。
•マウスの分解、調節または修理を試みる行為は、高周波や他の危険性への暴露に繋がる恐れがありま
す。
安全対策
電池の装填
このマウスでは単3電池を2本使用します(別売)。
1.電池ケースのカバーを開けます。
2.ケース内に電池を入れてください。
3.電池ケースのカバーを閉じます。
4.マウスの下側にある電源スイッチを動かしてマウスの電源を入れます。マウスの上部にある電源イン
ジケータのLEDが赤く点滅します。
メモ:電池の電極の向きが正しいことを確認してください。電池の陽極(+)と陰極(-)の向きが電池ケー
スの陽極(+)と陰極(-)の印と同じになるようにしてください。
操 作 ガ イド
このマウスは消費電力が少なく、電池を交換せずに最長で24ヶ月と長くご使用いただけます。
ただし、実際の電池寿命 はご使用社 やコンピュータのご利用状況により異なります。
電池寿命24ヶ月
ペアリング
Limited 12-Month Warranty
What this warranty covers.
Shenzhen Unichain Technology Co., LTD. (Manufacturer: “Unichain”) warrants to the
original purchaser of this TECKNET product that the product shall be free of defects in
design, assembly, material, or workmanship.
What the period of coverage is.
Unichain warrants the TECKNET product for 12 Months.
What will we do to correct problems?
Unichain will repair or replace, at its option, any defective product free of charge (except
for shipping charges for the product).
What is not covered by this warranty?
All above warranties are null and void if the TECKNET product is not provided to Unichain
for inspection upon Unichain’s request at the sole expense of the purchaser, or if Unichain
determines that the TECKNET product has been improperly installed, altered in any way,
or tampered with. The TECKNET Product Warranty does not protect against acts of God
such as flood, earthquake, lightning, war, vandalism, theft, normal-use wear and tear,
erosion, depletion, obsolescence, abuse, damage due to low voltage disturbances (e.g.
brownouts or sags), non-authorized program, or system equipment modification or
alteration.
How to claim the warranty
for more information. To extend the warranty period, please visit TECKNET website and
register your TECKNET products within 90 days of purchase.
Disclaimer
Every effort has been made to ensure that the information and procedures in this guide
are accurate and complete, no liability can be accepted for any errors or omissions and
we reserve the right to make any changes without further notice to any products
mentioned herein.
FCC Statement
This device complies with Part 15 of the FCC Rules. Operation is subject to the following two
conditions:
(1) This device may not cause harmful interference, and
(2) This device must accept any interference received, including interference that may cause
undesired operation.
Warning: Changes or modifications not expressly approved by the party responsible for
compliance could void the user's authority to operate the equipment.
NOTE: This equipment has been tested and found to comply with the limits for a Class B digital
device, pursuant to Part 15 of the FCC Rules. These limits are designed to provide reasonable
protection against harmful interference in a residential installation. This equipment generates uses
and can radiate radio frequency energy and, if not installed and used in accordance with the
instructions, may cause harmful interference to radio communications. However, there is no
guarantee that interference will not occur in a particular installation. If this equipment does cause
harmful interference to radio or television reception, which can be determined by turning the
equipment off and on, the user is encouraged to try to correct the interference by one or more of
the following measures:
~ Increase the separation between the equipment and receiver.
~ Connect the equipment into an outlet on a circuit different from that to which the receiver is
connected.
~ Consult the dealer or an experienced radio/TV technician for help.
FCC Radiation Exposure Statement:
This equipment complies with FCC radiation exposure limits set forth for an uncontrolled
environment. This equipment should be installed and operated with minimum distance 20cm
between the radiator & your body.
Correct Disposal of This Product
( Waste Electrical& Electronic Equipment )
This Marking shown on the product or its literature, indicate that it should not be disposed with
other household wastes at the end of its working life.
To prevent possible harm to the environment or human health from uncontrolled waste disposal,
please separate this from other types of wastes and recycle it responsibly to promote the
sustainable reuse of material resources.Household user should contact either the retailer where
they purchased this product, or their local government office, for details of where and how they
can take this item for environmentally safe recycling.
Business users should contact their supplier and check the terms and conditions of the purchase
contact. This product should not be mixed with other commercial wastes for disposal.
SIMPLIFIED EU DECLARATION OF CONFORMITY
Hereby, Shenzhen Unichain Technology Co., Ltd. declares that the product type BM308 is in
compliance with Directive 2014/53/EU.
The full text of the EU declaration of conformity is available at the following internet address:
https://eu.tecknetonline.com/
12
Wireless Mouse
User Manual
DE ESFREN IT JP
Model: BM308




Joignez-vous à la conversation sur ce produit
Ici, vous pouvez partager ce que vous pensez du Tecknet BM308 Souris. Si vous avez une question, lisez d’abord attentivement le mode d’emploi. La demande d’un mode d’emploi peut être effectuée en utilisant notre formulaire de contact.