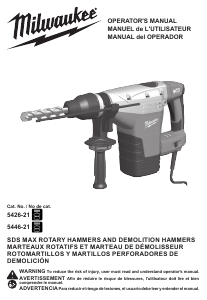
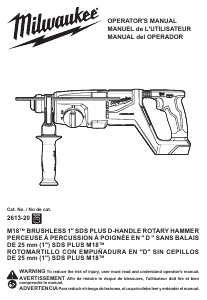
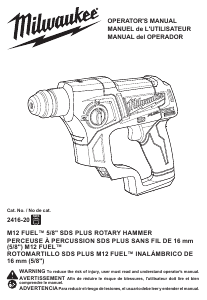
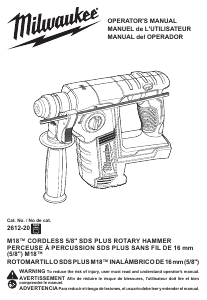
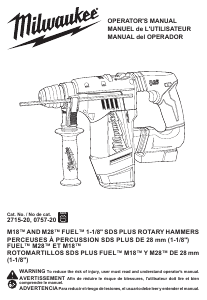
Mode d’emploi Milwaukee 2715-20 Perforateur

Besoin d'un mode d’emploi pour votre Milwaukee 2715-20 Perforateur ? Ci-dessous, vous pouvez consulter et télécharger gratuitement le mode d’emploi PDF en français. Ce produit a actuellement 4 questions fréquemment posées, 0 commentaires et 0 votes. Si ce n'est pas le mode d’emploi que vous souhaitez, veuillez nous contacter.

Votre produit est défectueux et le mode d’emploi n’offre aucune solution ? Rendez-vous à un Repair Café pour obtenir des services de réparation gratuits.

Mode d’emploi

Loading…

4
Selecting Action
MILWAUKEE Rotary Hammers have three settings:
rotation only, rotary hammer, and hammer only.
Always allow the motor to come to a complete stop
before changing the mode selection to avoid dam-
age to the tool.
1. For rotation only, rotate the
mode selector so the arrow
on the lever points to the
twist drill
symbol.
2. For rotary hammering, rotate
the mode selector so the
arrow points to the hammer
and twist drill
symbol.
3. For hammering only, rotate the mode selector so
the arrow points to the hammer
symbol.
4. To freely rotate the bit to the desired angle for
hammering only, rotate the mode selector to the
symbol. Then, follow step 3.
NOTE: To engage the hammering mechanism,
maintain pressure on the bit. When pressure on the
bit is released, the hammering action will stop.
Using the Control Switch
The control switch may be set to three positions:
forward, reverse and lock. Always allow the motor
to come to a complete stop before using the control
switch to avoid damage to the tool.
For forward (clockwise) rotation, push in the control
switch from the right side of the tool. Check the direc-
tion of rotation before use.
For reverse (counterclockwise) rotation, push in the
control switch from the left side of the tool. Check
direction of rotation before use.
To lock the trigger, push the control switch to the
center position. The trigger will not work while the
control switch is in the center locked position. Always
lock the trigger or remove the battery pack before
performing maintenance, changing accessories,
storing the tool and any time the tool is not in use.
Starting, Stopping and Controlling Speed
For operation when using the Dust Extractor, refer
to your Dust Extractor manual.
1. To start the tool, grasp the handle rmly and pull
the trigger.
2. To vary the speed, increase or decrease the pres-
sure on the trigger. The further the trigger is pulled,
the greater the speed.
3. To stop the tool, release the trigger. Make sure
the tool comes to a complete stop before laying
the tool down.
Operating
Position the tool, grasp the handles rmly and pull
the trigger. Always hold the tool securely using both
handles to maintain control. This tool has been de-
signed to achieve top performance with only moder-
ate pressure. Let the tool do the work.
If the speed begins to drop o󰀨 when drilling large or
deep holes, pull the bit partially out of the hole while
the tool is running to help clear dust. Do not use water
to settle the dust since it will clog the bit utes and
tend to make the bit bind in the hole. If the bit should
bind, a built-in, non-adjustable slip clutch prevents
the bit from turning. If this occurs, stop the tool, free
the bit and begin again.
WARNING
Only use accessories specically
recommended for this tool. Others
may be hazardous.
To reduce the risk of injury, always use a side
handle when using this tool. Always brace or
hold securely.
Adjusting the Side Handle Position
1. Loosen the side handle by unscrewing the side
handle grip until the side handle rotates freely.
2. Rotate the side handle to the desired position.
3. Tighten the side handle grip securely.
For use with the Dust Extractor
The Milwaukee Cat. No. 2715-DE Dust Extractor
plugs directly into these
1-1/8" SDS PLUS Rotary
Hammers. For Dust Extractor assembly and opera-
tion, refer to your Dust Extractor manual.
Setting the Depth Gauge
1. Press in the clamping lever.
2. Slide the depth gauge rod backward or forward
until it is set for the desired depth.
NOTE: The drilling depth is the distance between
the tip of the bit and the tip of the depth gauge rod.
3. Release the clamping lever.
Drilling Depth
Installing Drill Bits and Chisels
NOTE: Only use accessories with SDS or SDS Plus
shanks.
Be sure that the shank of the bit is clean. Dirt particles
may cause the bit to line up improperly. Do not use
bits larger than the maximum recommended capacity
of the drill because gear damage or motor overload-
ing may result. For best performance, be sure that
the bit is properly sharpened and the shank is lightly
greased before use.
1. Insert the bit or chisel into the nose of the tool.
2. Rotate bit slowly until it aligns with the locking
mechanism.
3. Push bit into tool until it locks.
4. Check that the bit is locked properly; it should be pos-
sible to pull the bit back and forth slightly (about 1/4").
5. To remove bits and chisels, pull bit holder release
collar toward the rear of tool and remove bit.
NOTE: Use caution when handling hot bits and chisels.
OPERATION
WARNING
Always remove battery pack before
changing or removing accesso-
ries. Only use accessories specically recom-
mended for this tool. Others may be hazardous.
To reduce the risk of injury, keep hands away
from the bit and all moving parts. Always wear
safety goggles or glasses with side shields.
To reduce the risk of injury, wear a dust mask or
use an OSHA compliant dust extraction solution
when working in dusty situations.
To reduce the risk of injury, always use a side
handle when using this tool. Always brace or
hold securely.
Télécharger mode d’emploi en Français (PDF, 2.8 MB)
(Tenez compte de l’environnement et imprimez ce manuel uniquement si c’est vraiment nécessaire)

Loading…

Évaluation

Dites-nous ce que vous pensez du Milwaukee 2715-20 Perforateur en laissant une note de produit. Vous voulez partager vos expériences avec ce produit ou poser une question ? Veuillez laisser un commentaire au bas de la page.
Etes-vous satisfait du Milwaukee 2715-20 Perforateur ?
Oui Non
Soyez le premier à évaluer ce produit
0 évaluations

Joignez-vous à la conversation sur ce produit

Ici, vous pouvez partager ce que vous pensez du Milwaukee 2715-20 Perforateur. Si vous avez une question, lisez d’abord attentivement le mode d’emploi. La demande d’un mode d’emploi peut être effectuée en utilisant notre formulaire de contact.

En savoir plus sur ce mode d’emploi

Nous comprenons qu’il est agréable d’avoir un mode d’emploi papier pour vos Milwaukee 2715-20 Perforateur. Vous pouvez toujours télécharger le mode d’emploi depuis notre site Web et l’imprimer vous-même. Si vous souhaitez disposer d’un mode d’emploi original, nous vous recommandons de contacter Milwaukee. Ils pourront peut-être fournir un mode d’emploi original. Recherchez-vous le mode d’emploi de votre Milwaukee 2715-20 Perforateur dans une autre langue ? Choisissez votre langue préférée sur notre page d’accueil et recherchez le numéro de modèle pour voir si nous l’avons disponible.

Caractéristiques

Marque Milwaukee
Modèle 2715-20
Catégorie Perforateurs
Type de fichier PDF
Taille du fichier 2.8 MB

Tous les modes d’emploi pour Milwaukee Perforateurs
Plus de modes d’emploi de Perforateurs

Foire aux questions sur Milwaukee 2715-20 Perforateur

Notre équipe d’assistance recherche des informations utiles sur les produits et des réponses aux questions fréquemment posées. Si vous trouvez une inexactitude dans notre foire aux questions, veuillez nous le faire savoir en utilisant notre formulaire de contact.

Quelle est la différence entre une perceuse à percussion et un perforateur ? Vérifié

Les perceuses à percussion peuvent être utilisées pour percer des trous dans les murs en briques ou en mortier. Pour percer des trous dans les murs en béton, vous avez besoin d'un perforateur.

Cela a été utile (196) En savoir plus

Que signifie Joule (J) par rapport aux marteaux rotatifs ? Vérifié

Le nombre de Joule indique l’énergie d’impact du marteau rotatif. Pour percer des trous réguliers dans le béton, un marteau rotatif de 2,2 J est suffisant.

Cela a été utile (131) En savoir plus

Dois-je porter une protection auditive lorsque j'utilise une perceuse ? Vérifié

Oui, vous devriez. Bien que la quantité de bruit produite par une perceuse varie selon les marques et les modèles, une exposition prolongée aux bruits forts peut entraîner des lésions auditives permanentes. C'est pourquoi il est judicieux de porter une protection auditive.

Cela a été utile (88) En savoir plus

Puis-je ranger des outils électriques dans un hangar ou un garage ? Vérifié

En général, vous pouvez ranger les outils électriques dans un cabanon ou un garage, même s'il y gèle parfois. Cependant, pour préserver la durée de vie de l'outil électrique, il est préférable de le stocker dans un endroit sec et sans variations de température importantes. Dans une remise ou un garage, les différences de température peuvent provoquer la formation de condensation, ce qui peut provoquer de la rouille. De plus, les outils fonctionnant sur piles durent moins longtemps et se chargent moins bien à des températures très basses. Pour être sûr de la manière dont votre outil électrique doit être stocké, lisez toujours attentivement le manuel d'utilisation.

Cela a été utile (16) En savoir plus
Mode d’emploi Milwaukee 2715-20 Perforateur

Produits connexes

Catégories associées